Organization Management
The Organization Management allows you to create, manage, and collaborate within multiple organizations. From setting up new organizations to inviting team members and managing access, everything is handled from this section.
- Click Settings from the left navigation panel.
- Select Organizations to view and manage your organizations.
Managing Organizations
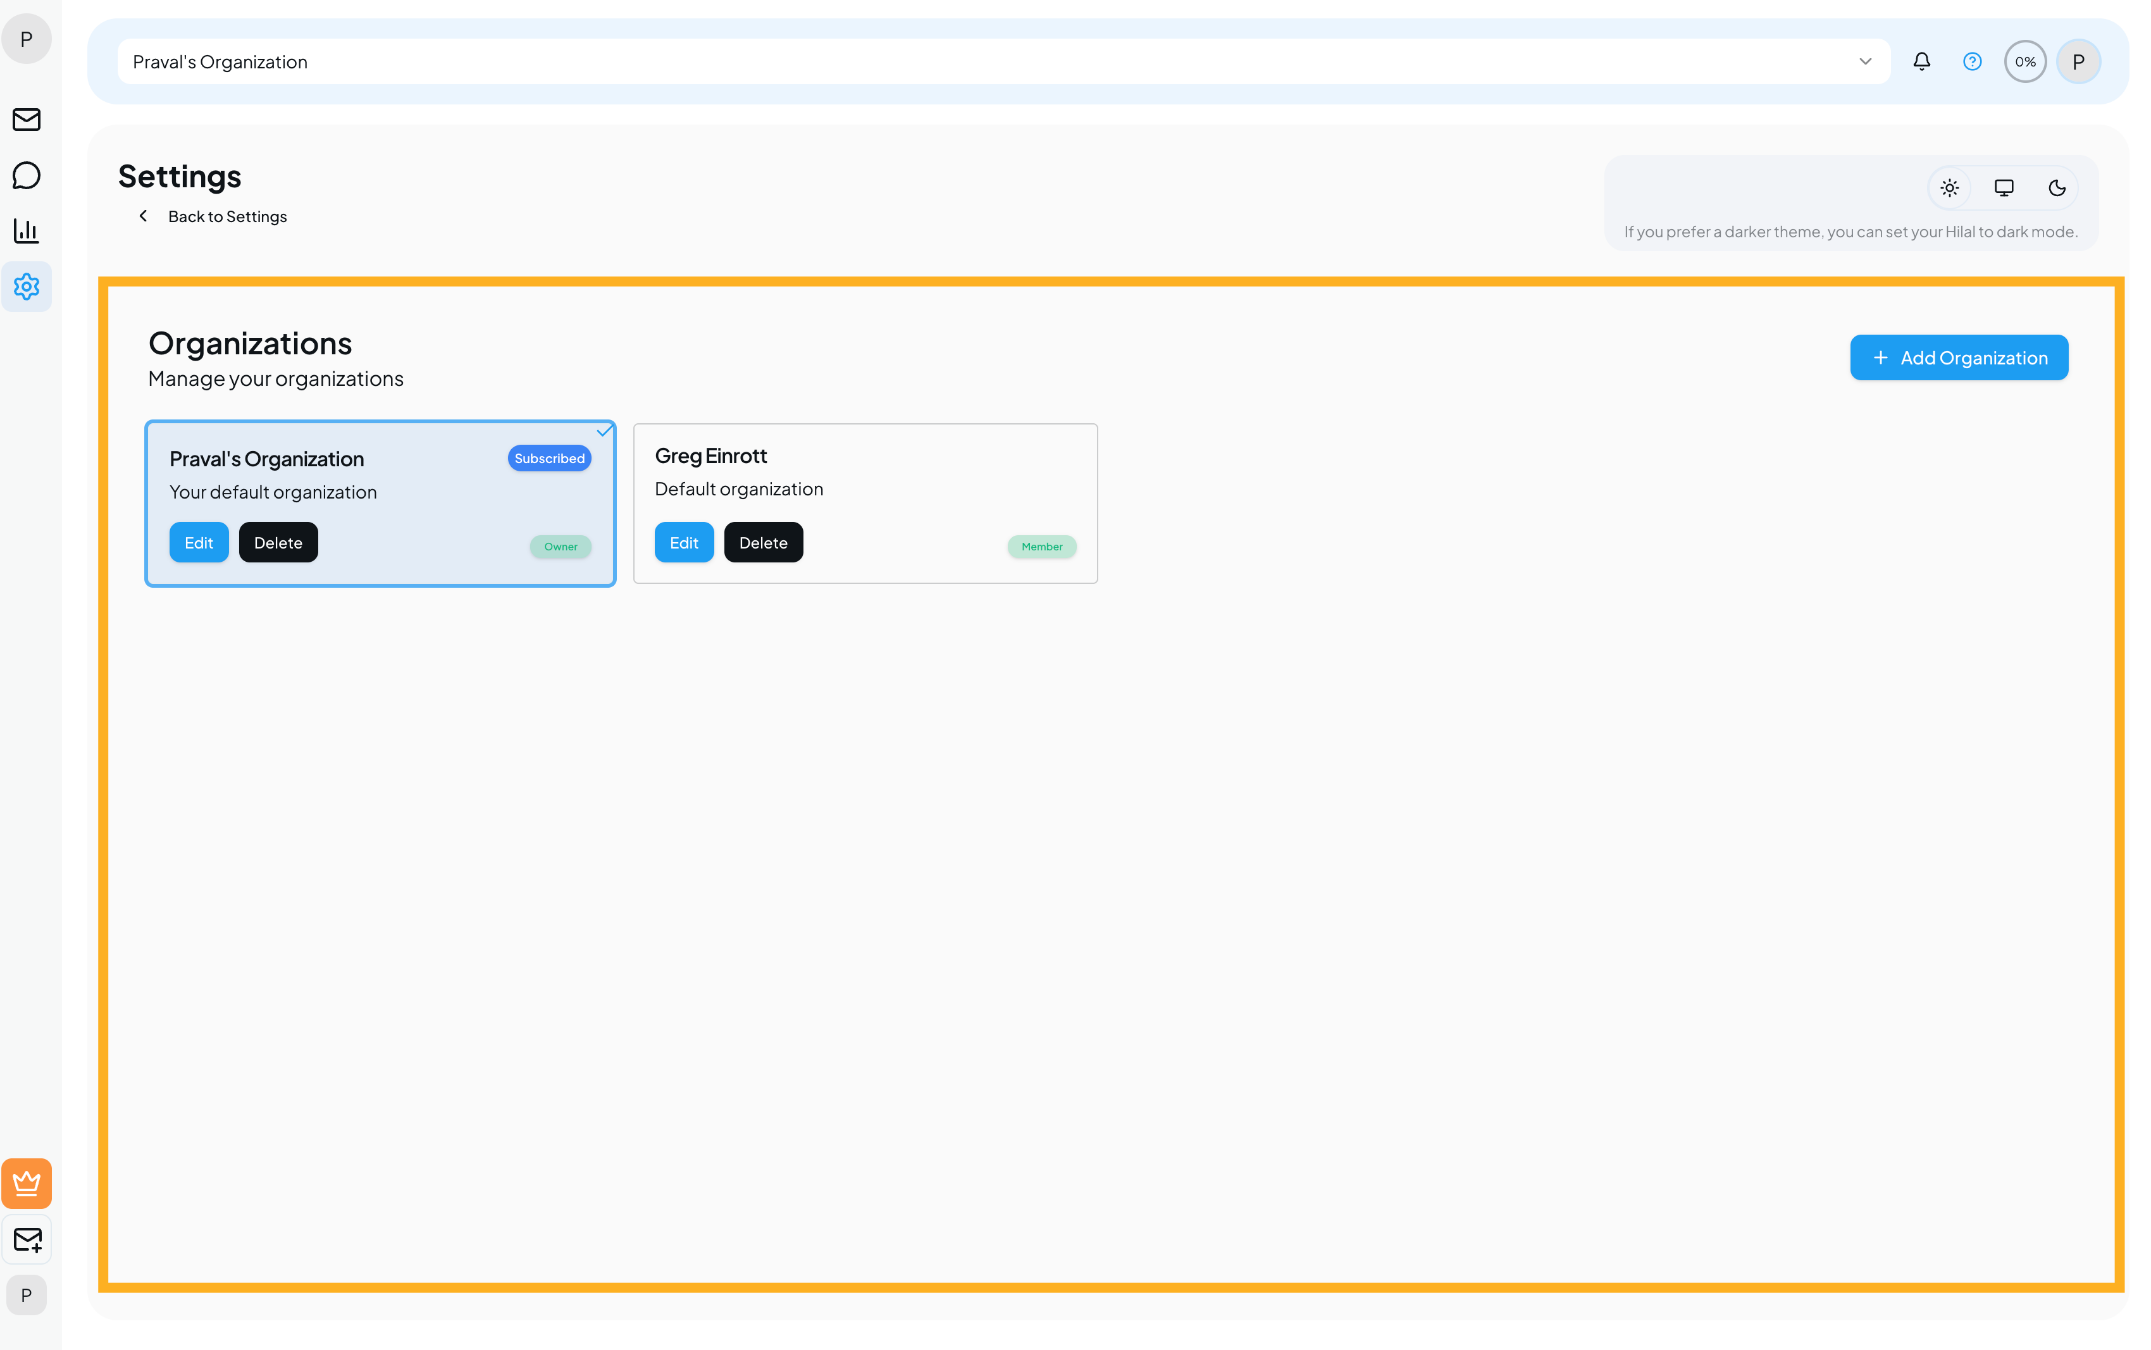
View Organizations
- All organizations associated with your account are listed on this page.
- Your default organization is clearly marked.
- Each organization displays its subscription status and your role (for example, Owner).
Create a New Organization
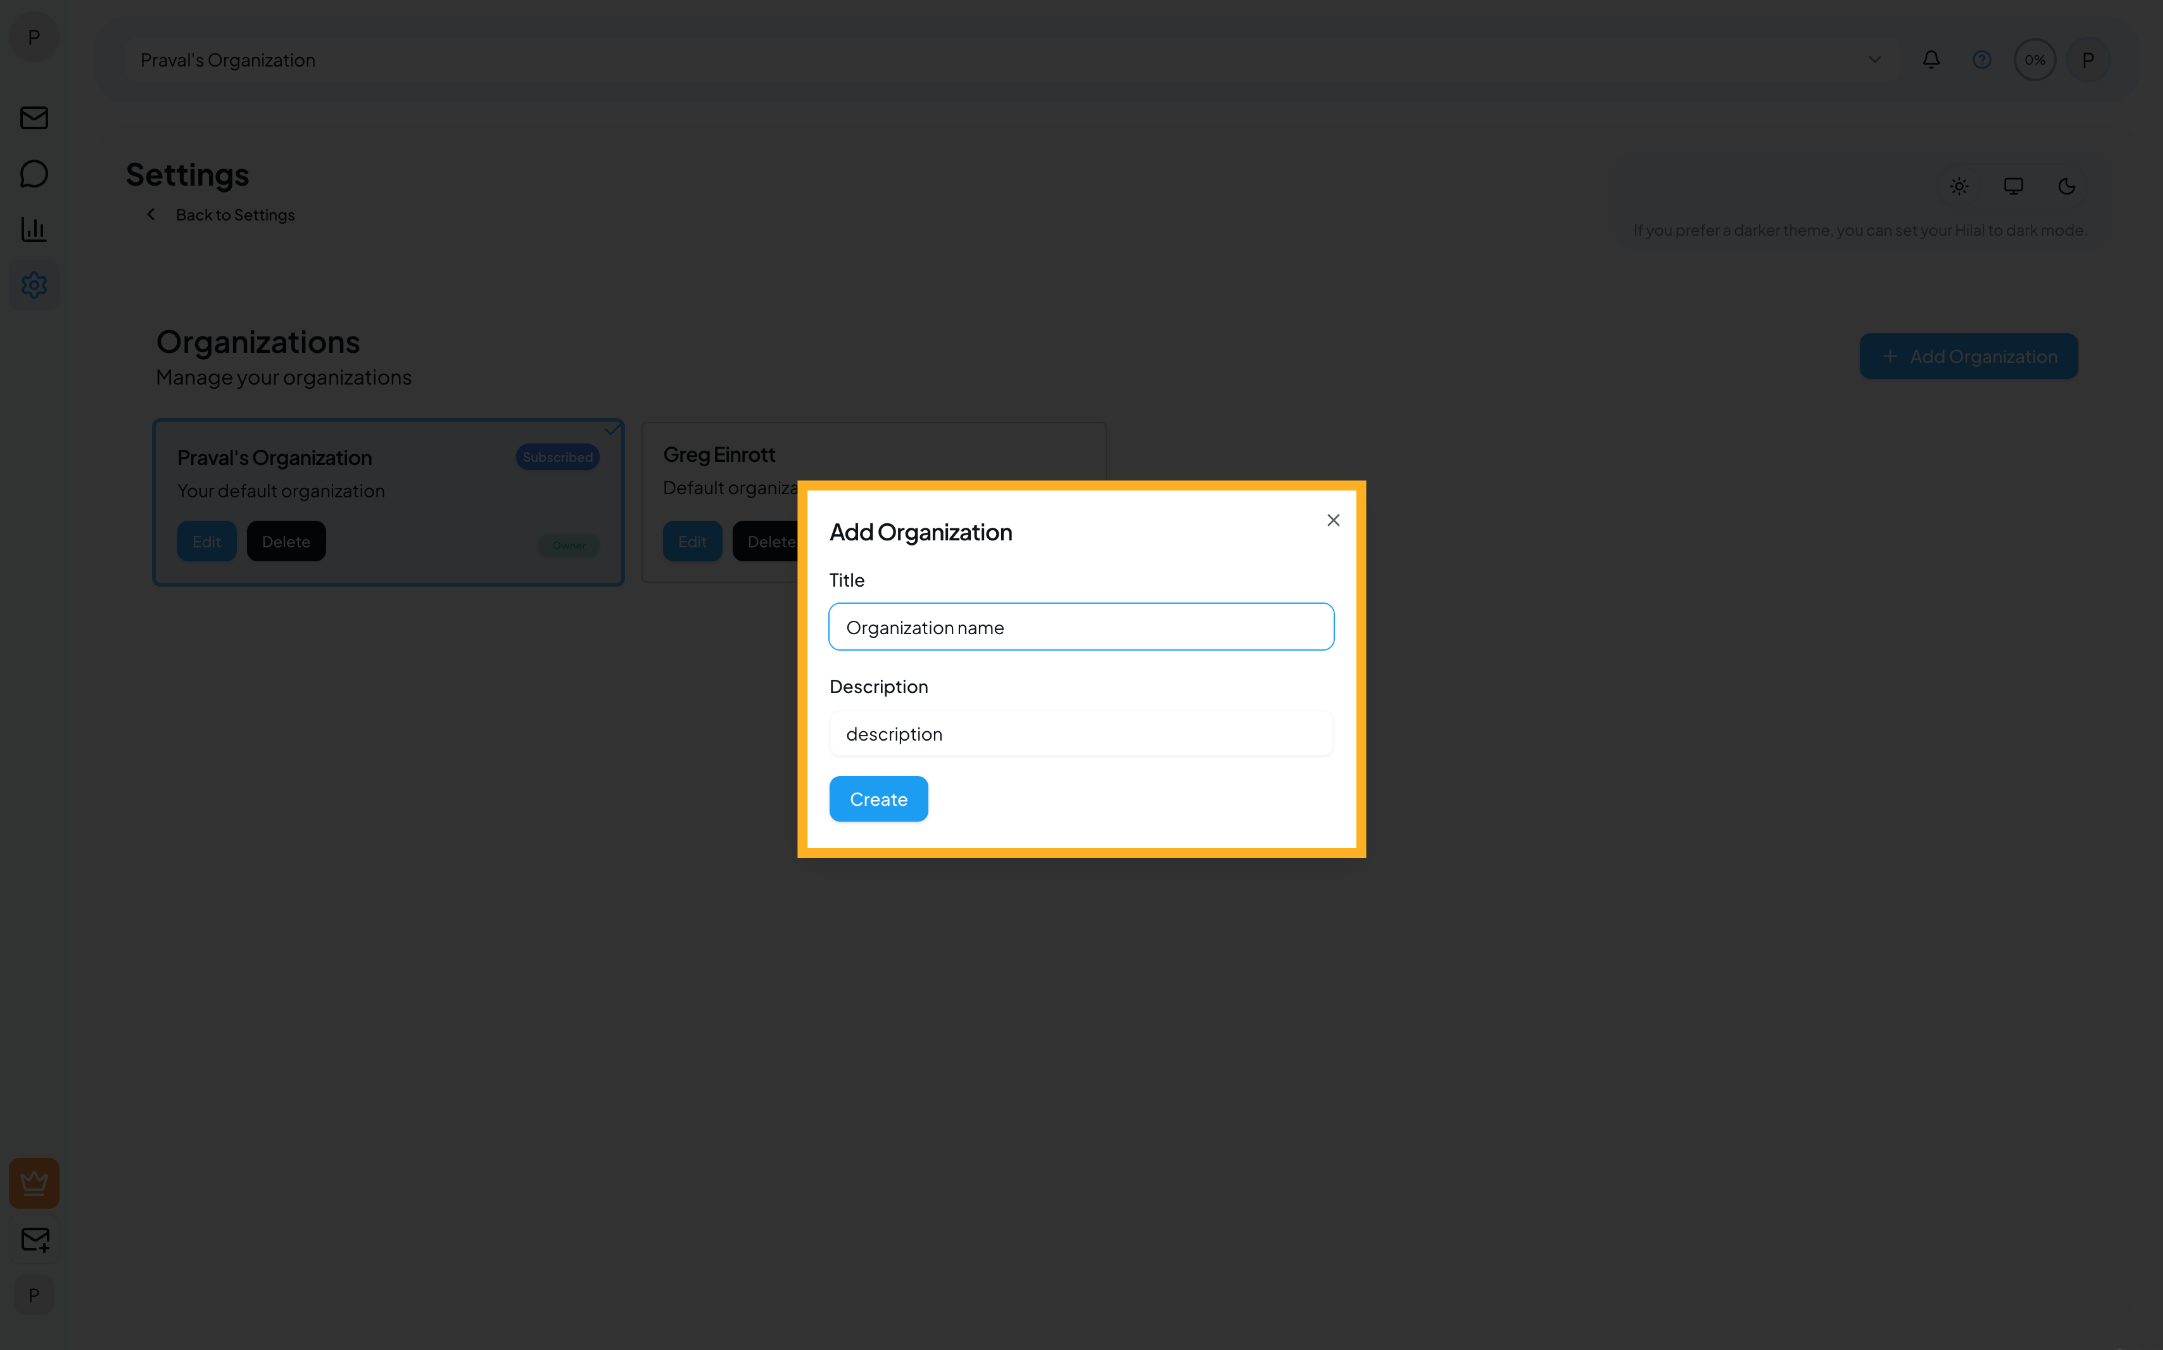
- Click Add Organization.
- Enter the following details:
- Title – Name of the organization.
- Description – A short description (optional).
- Click Create to finish.
⚠️ The number of organizations you can create depends on the plan associated with your account.
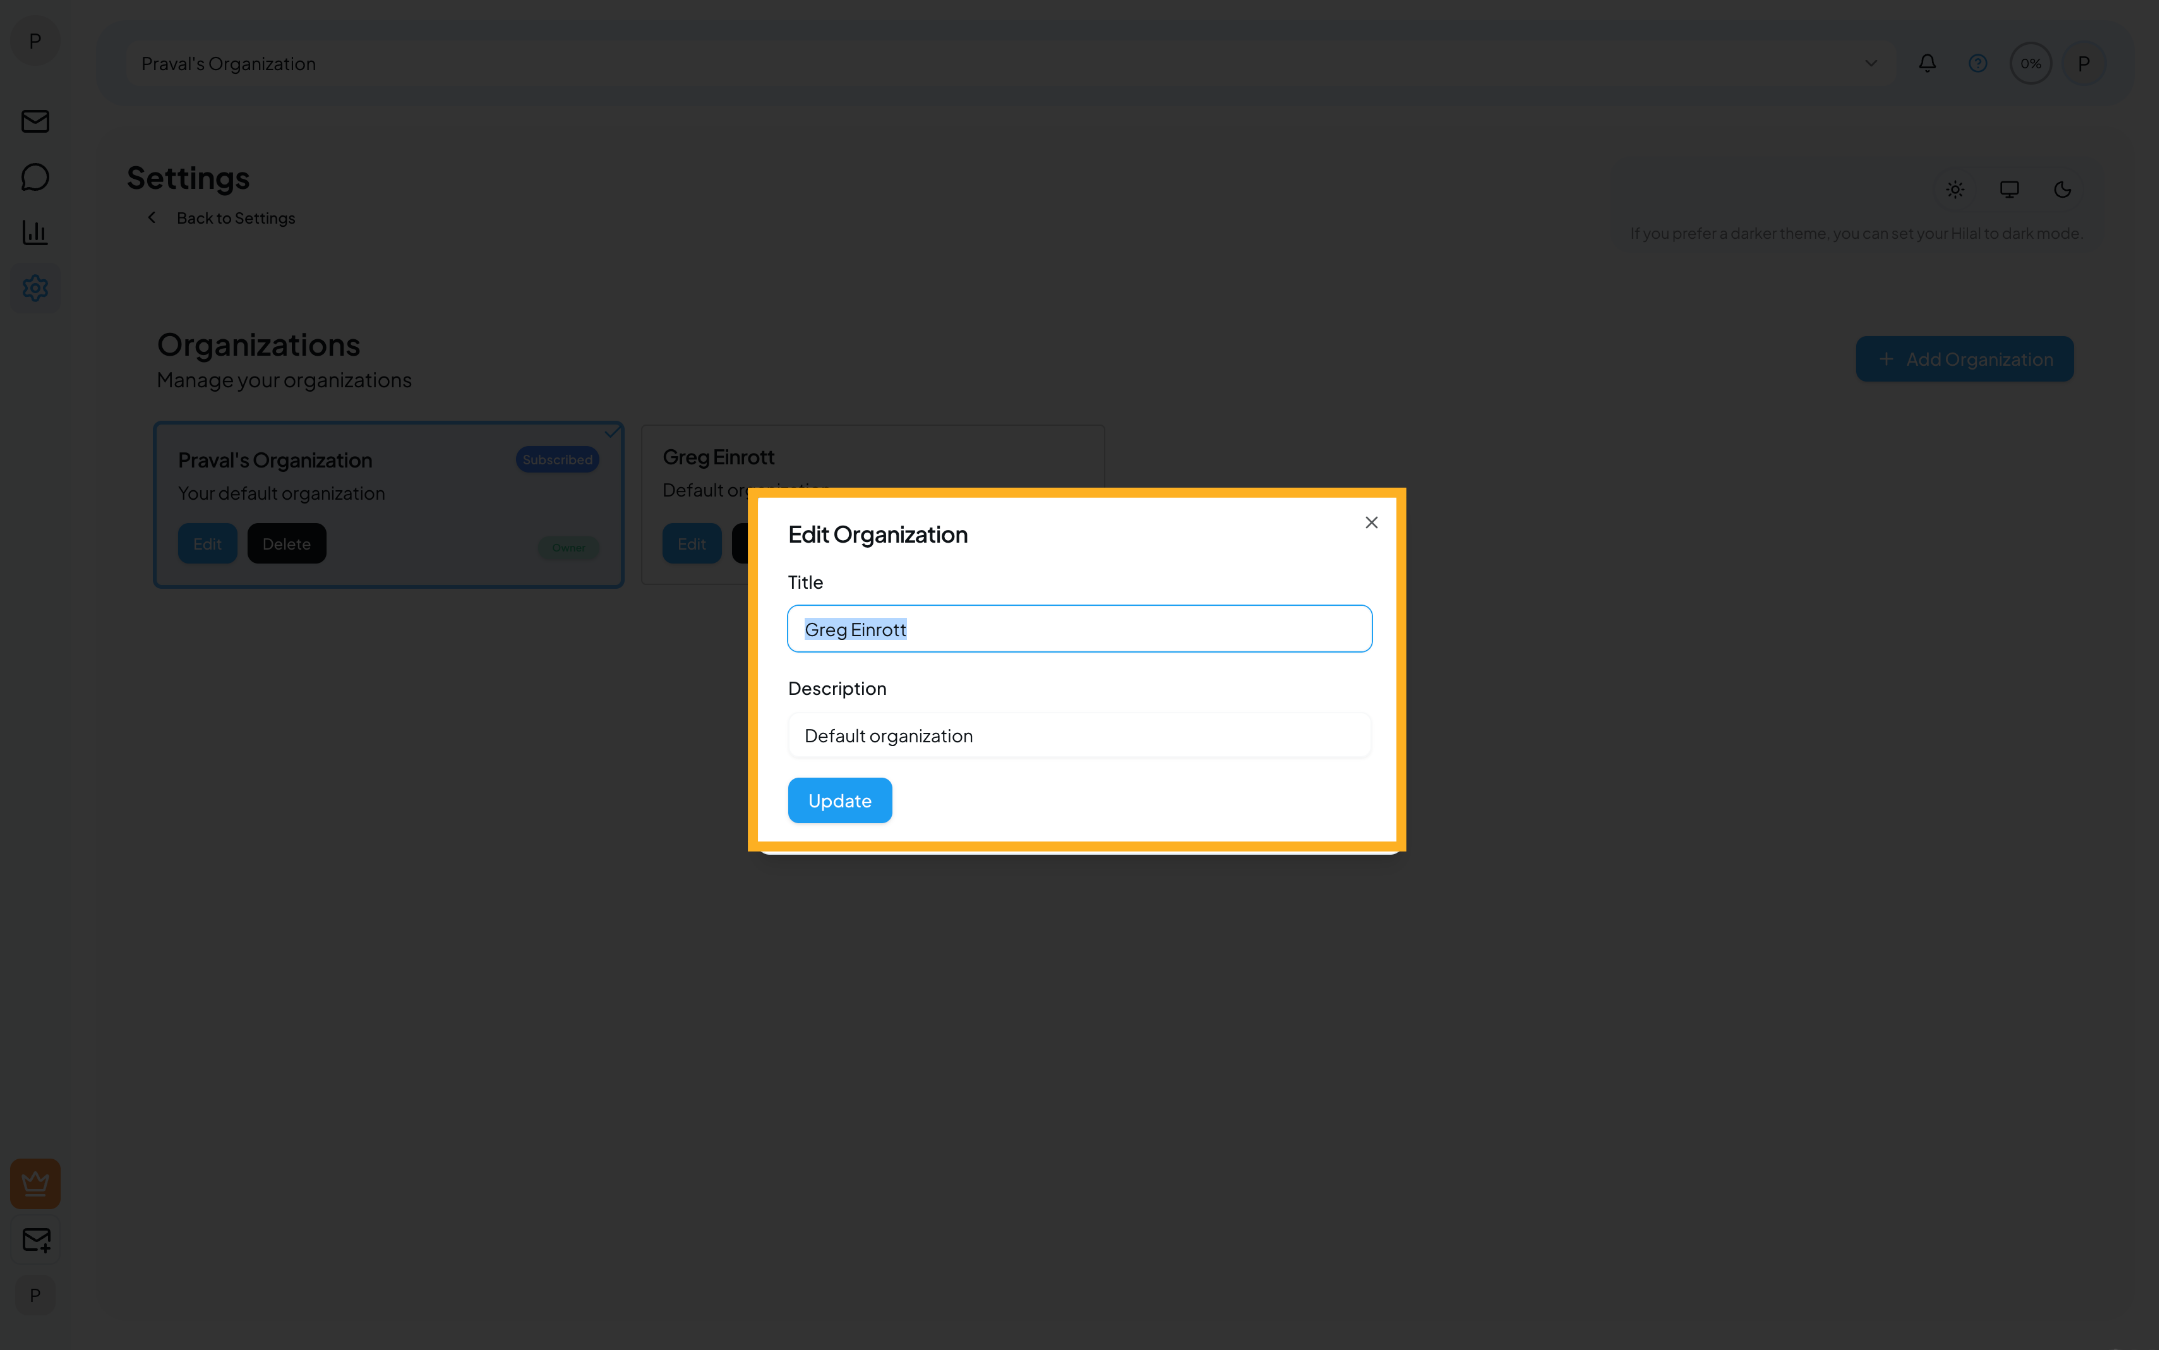
Edit an Organization
- Click Edit on the organization card.
- Update the organization name or description.
- Save your changes.
Only organization owners can edit organization details.
Delete an Organization
Deleting an organization permanently removes the organization and all associated data. This action cannot be undone.
⚠️ Only organization owners can delete an organization.
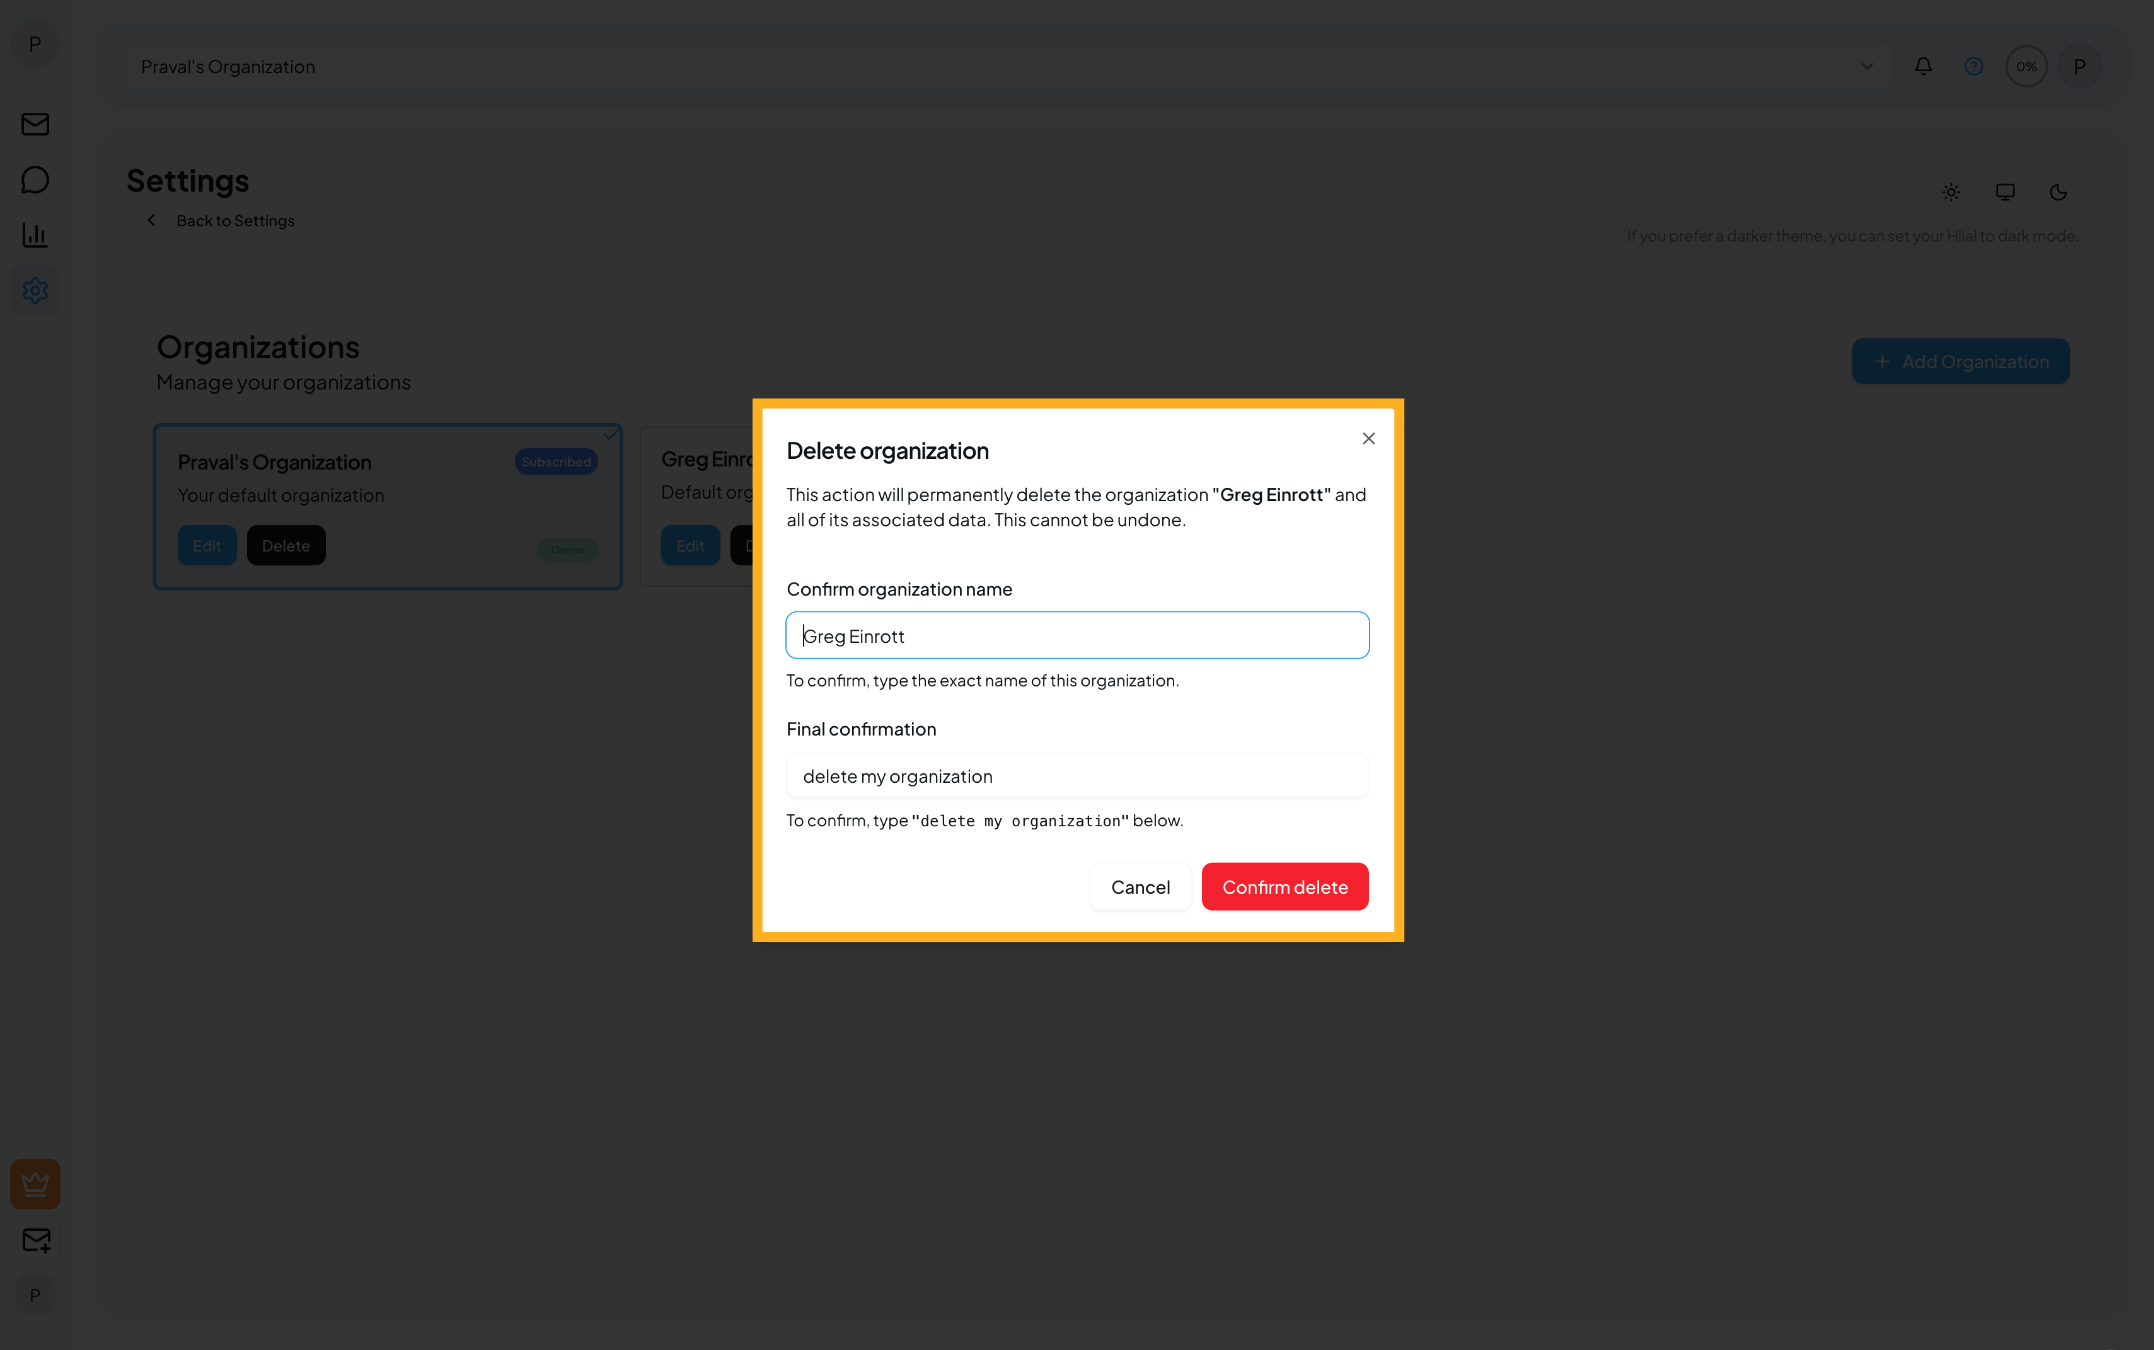
Deletion Confirmation Process
To prevent accidental deletion, the system requires a two-step confirmation:
Confirm Organization Name
- Enter the exact name of the organization as displayed.
Final Confirmation
- Type the following phrase exactly:
delete my organization
- Type the following phrase exactly:
Click Confirm delete to permanently delete the organization.
What Happens After Deletion
- The organization is immediately removed.
- All associated data, members, and configurations are permanently deleted.
- All team members lose access to the organization.
- This action cannot be reversed.
Team Management
Each organization includes a Team Management section where you can manage members and access levels. This section is accessable for only Professional & Business account users.
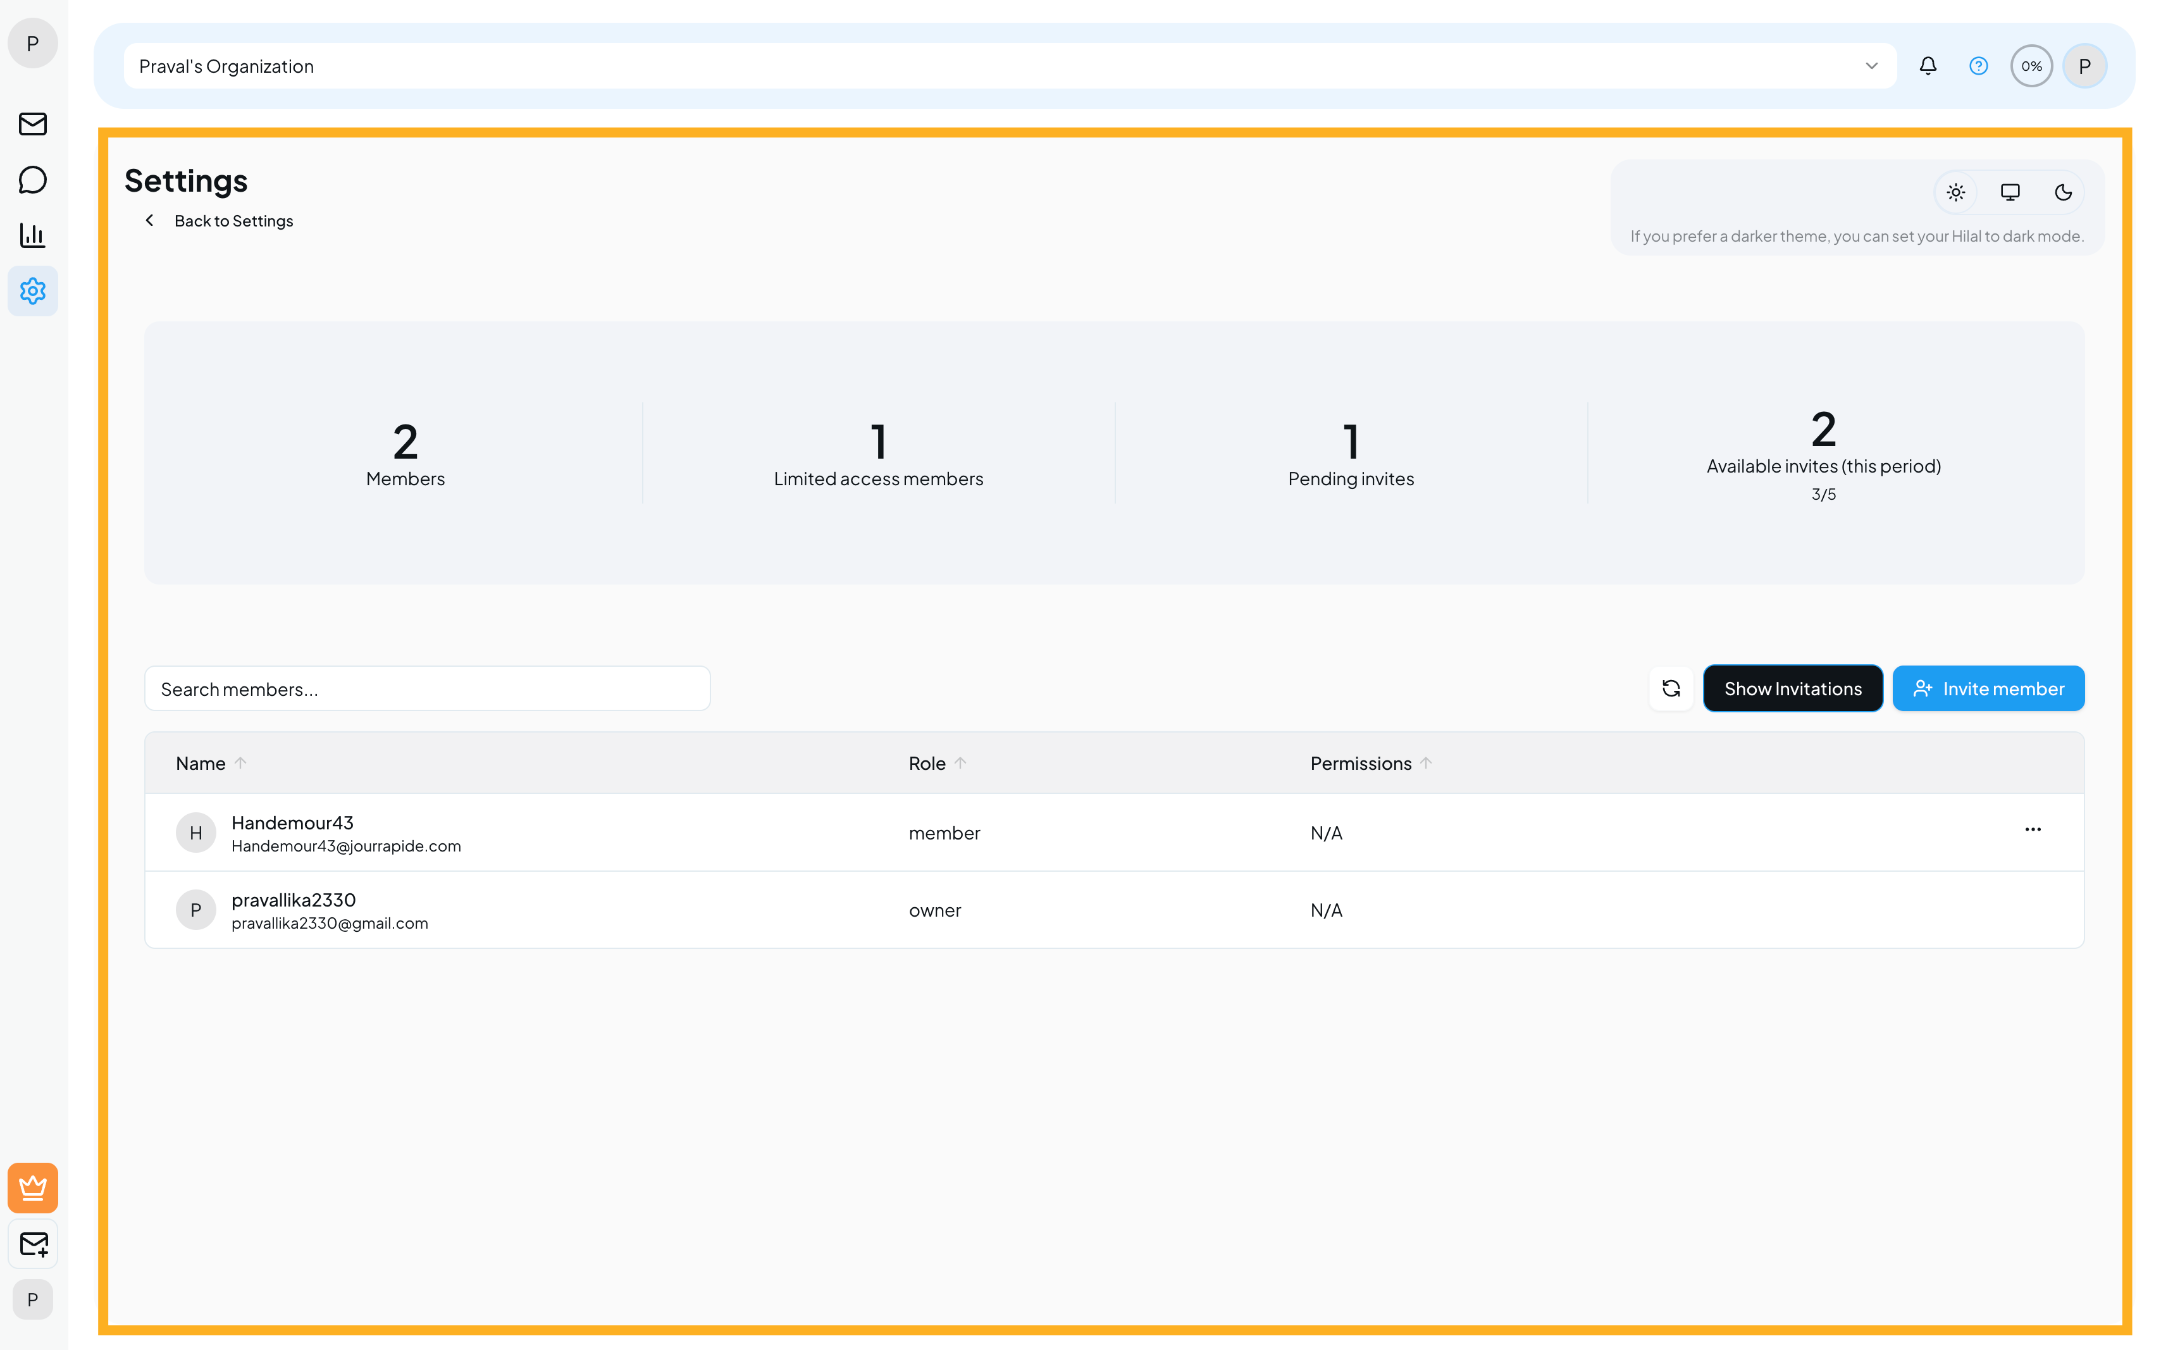
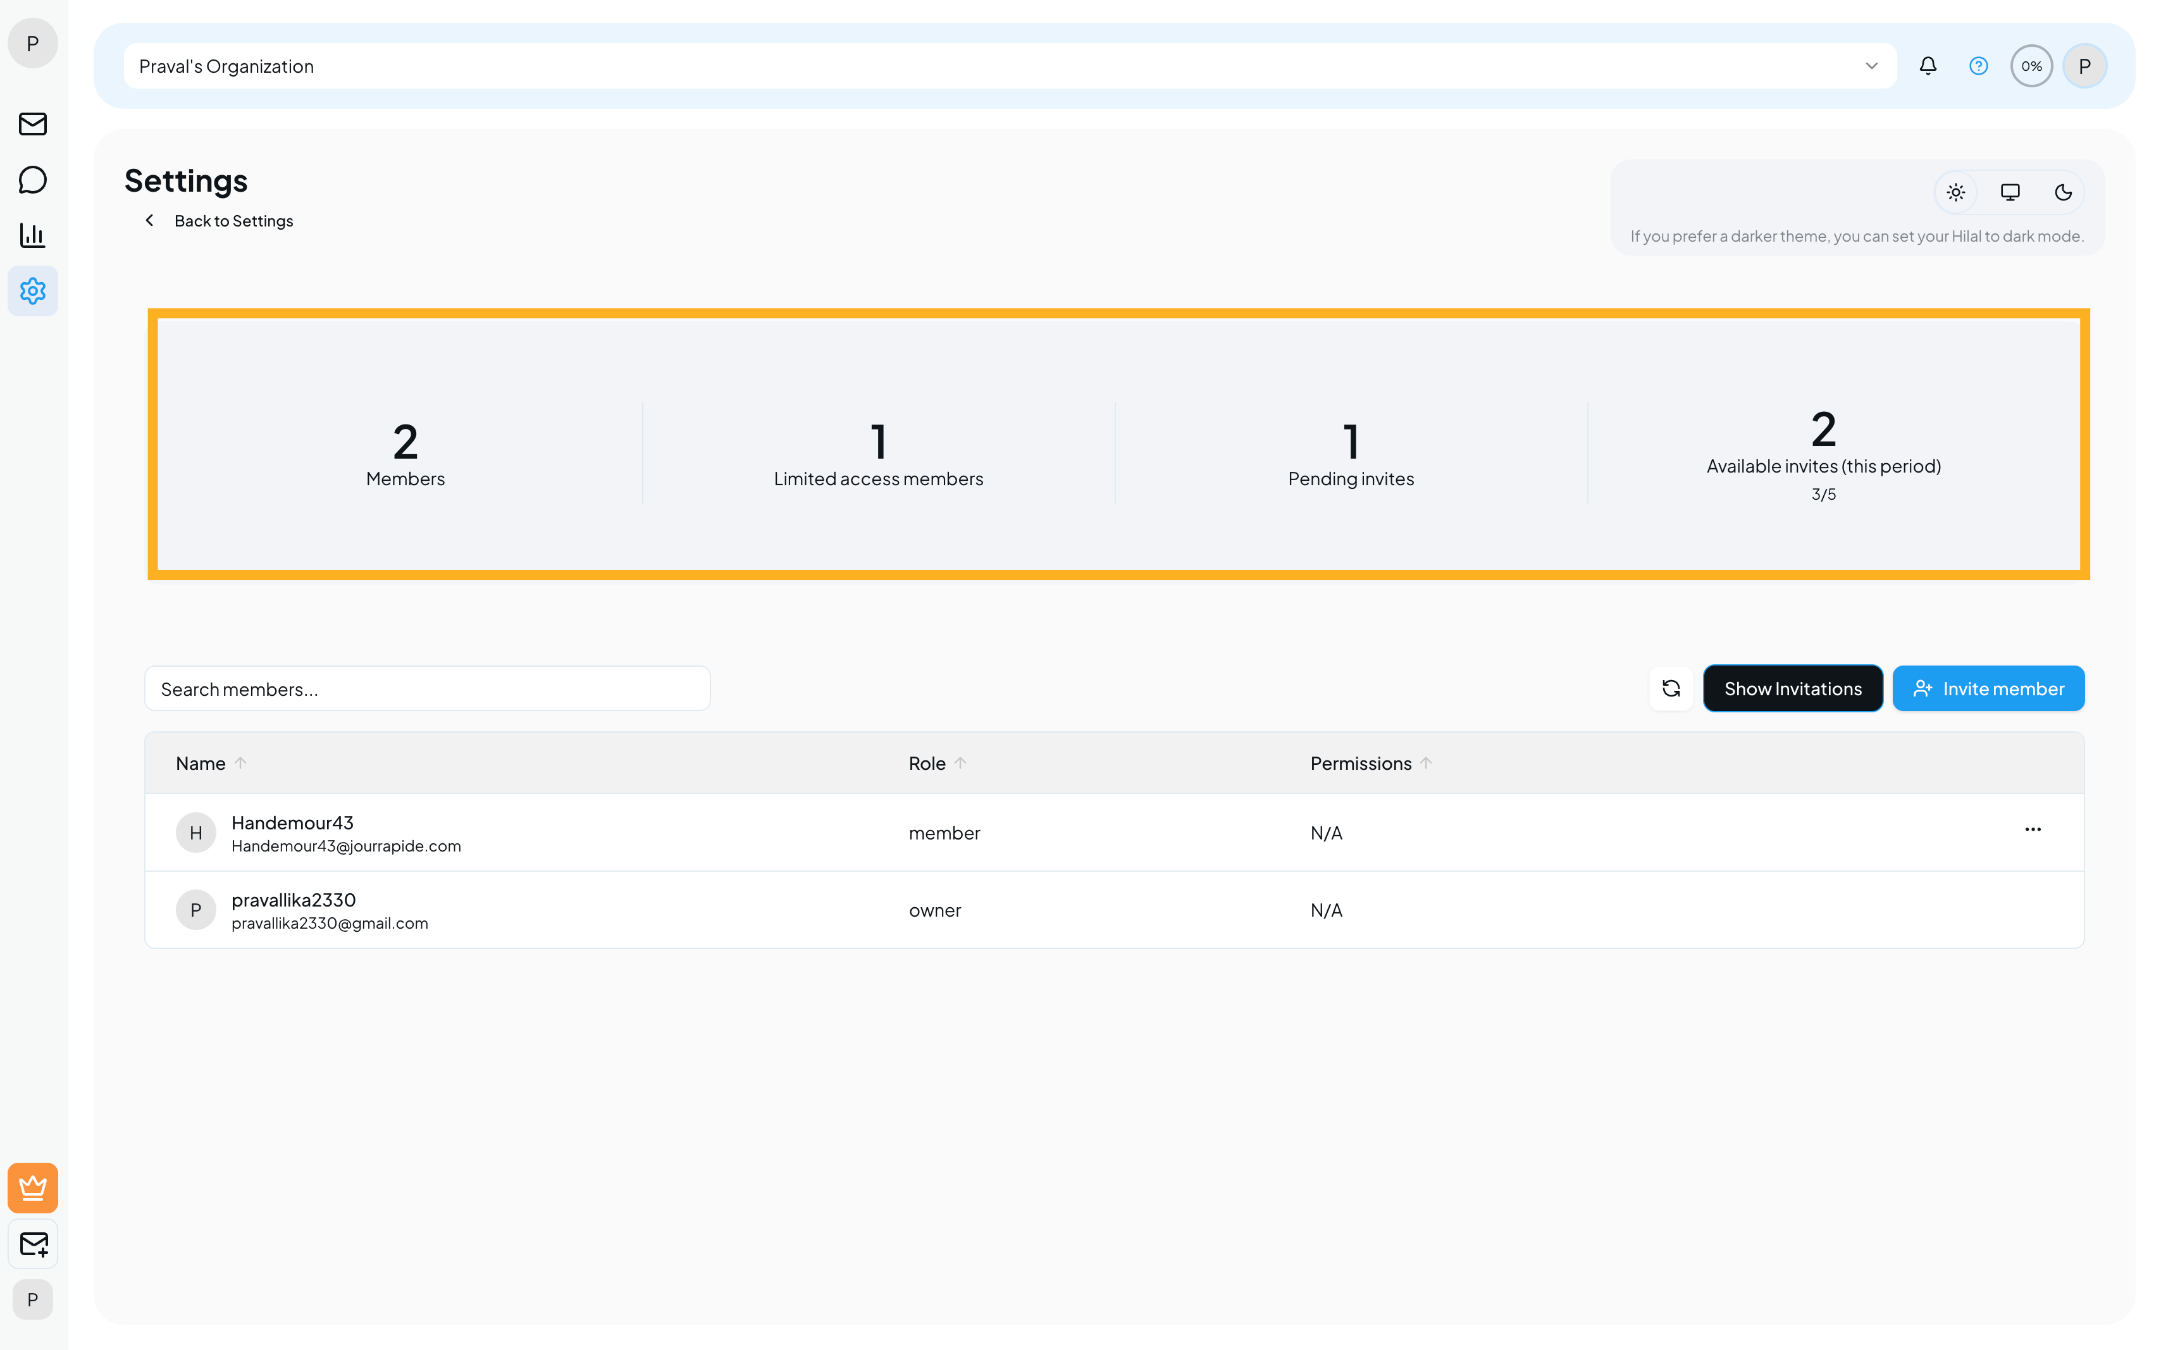
Member Overview
At the top of the page, you can see:
- Members – Total active members in the organization.
- Limited Access Members – Members with restricted permissions.
- Pending Invites – Invitations that haven’t been accepted yet.
- Available Invites – Remaining invites for the current billing period.
The number of members and available invites is determined by your subscription plan.
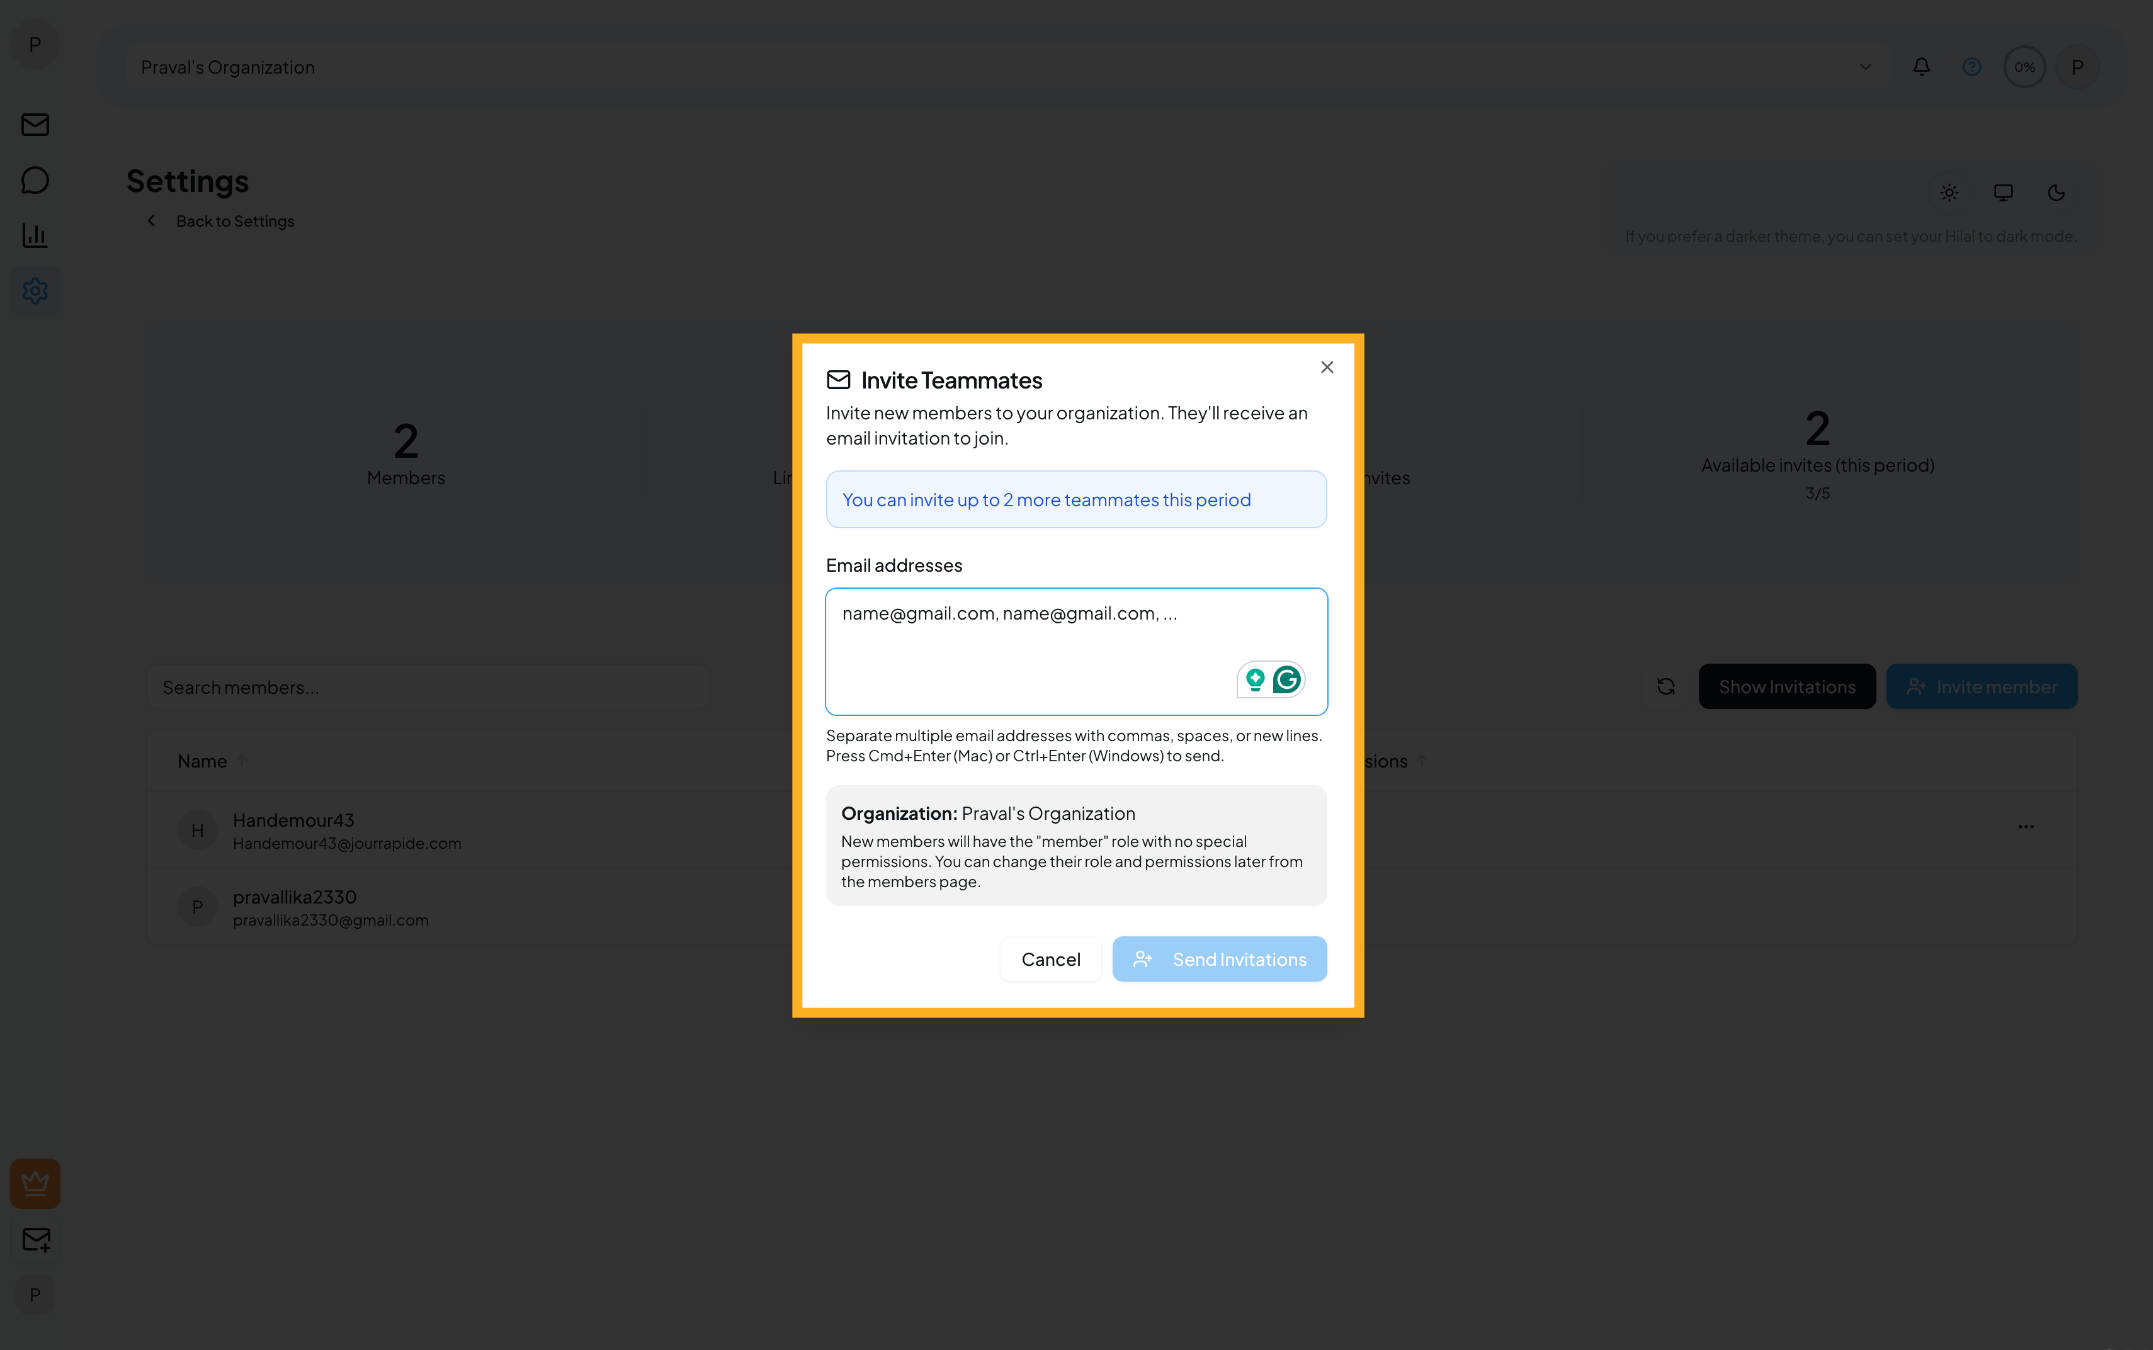
Invite Members
- Click Invite Member.
- Enter one or more email addresses:
- Separate emails using commas, spaces, or new lines.
- Click Send Invitations.
Invited users will receive an email invitation to join the organization.
View Invitations
- Click Show Invitations to view all invitations sent for the organization.
- Each invitation displays:
- Email address
- Assigned role
- Invitation status (Pending, Expired)
- Expiration date
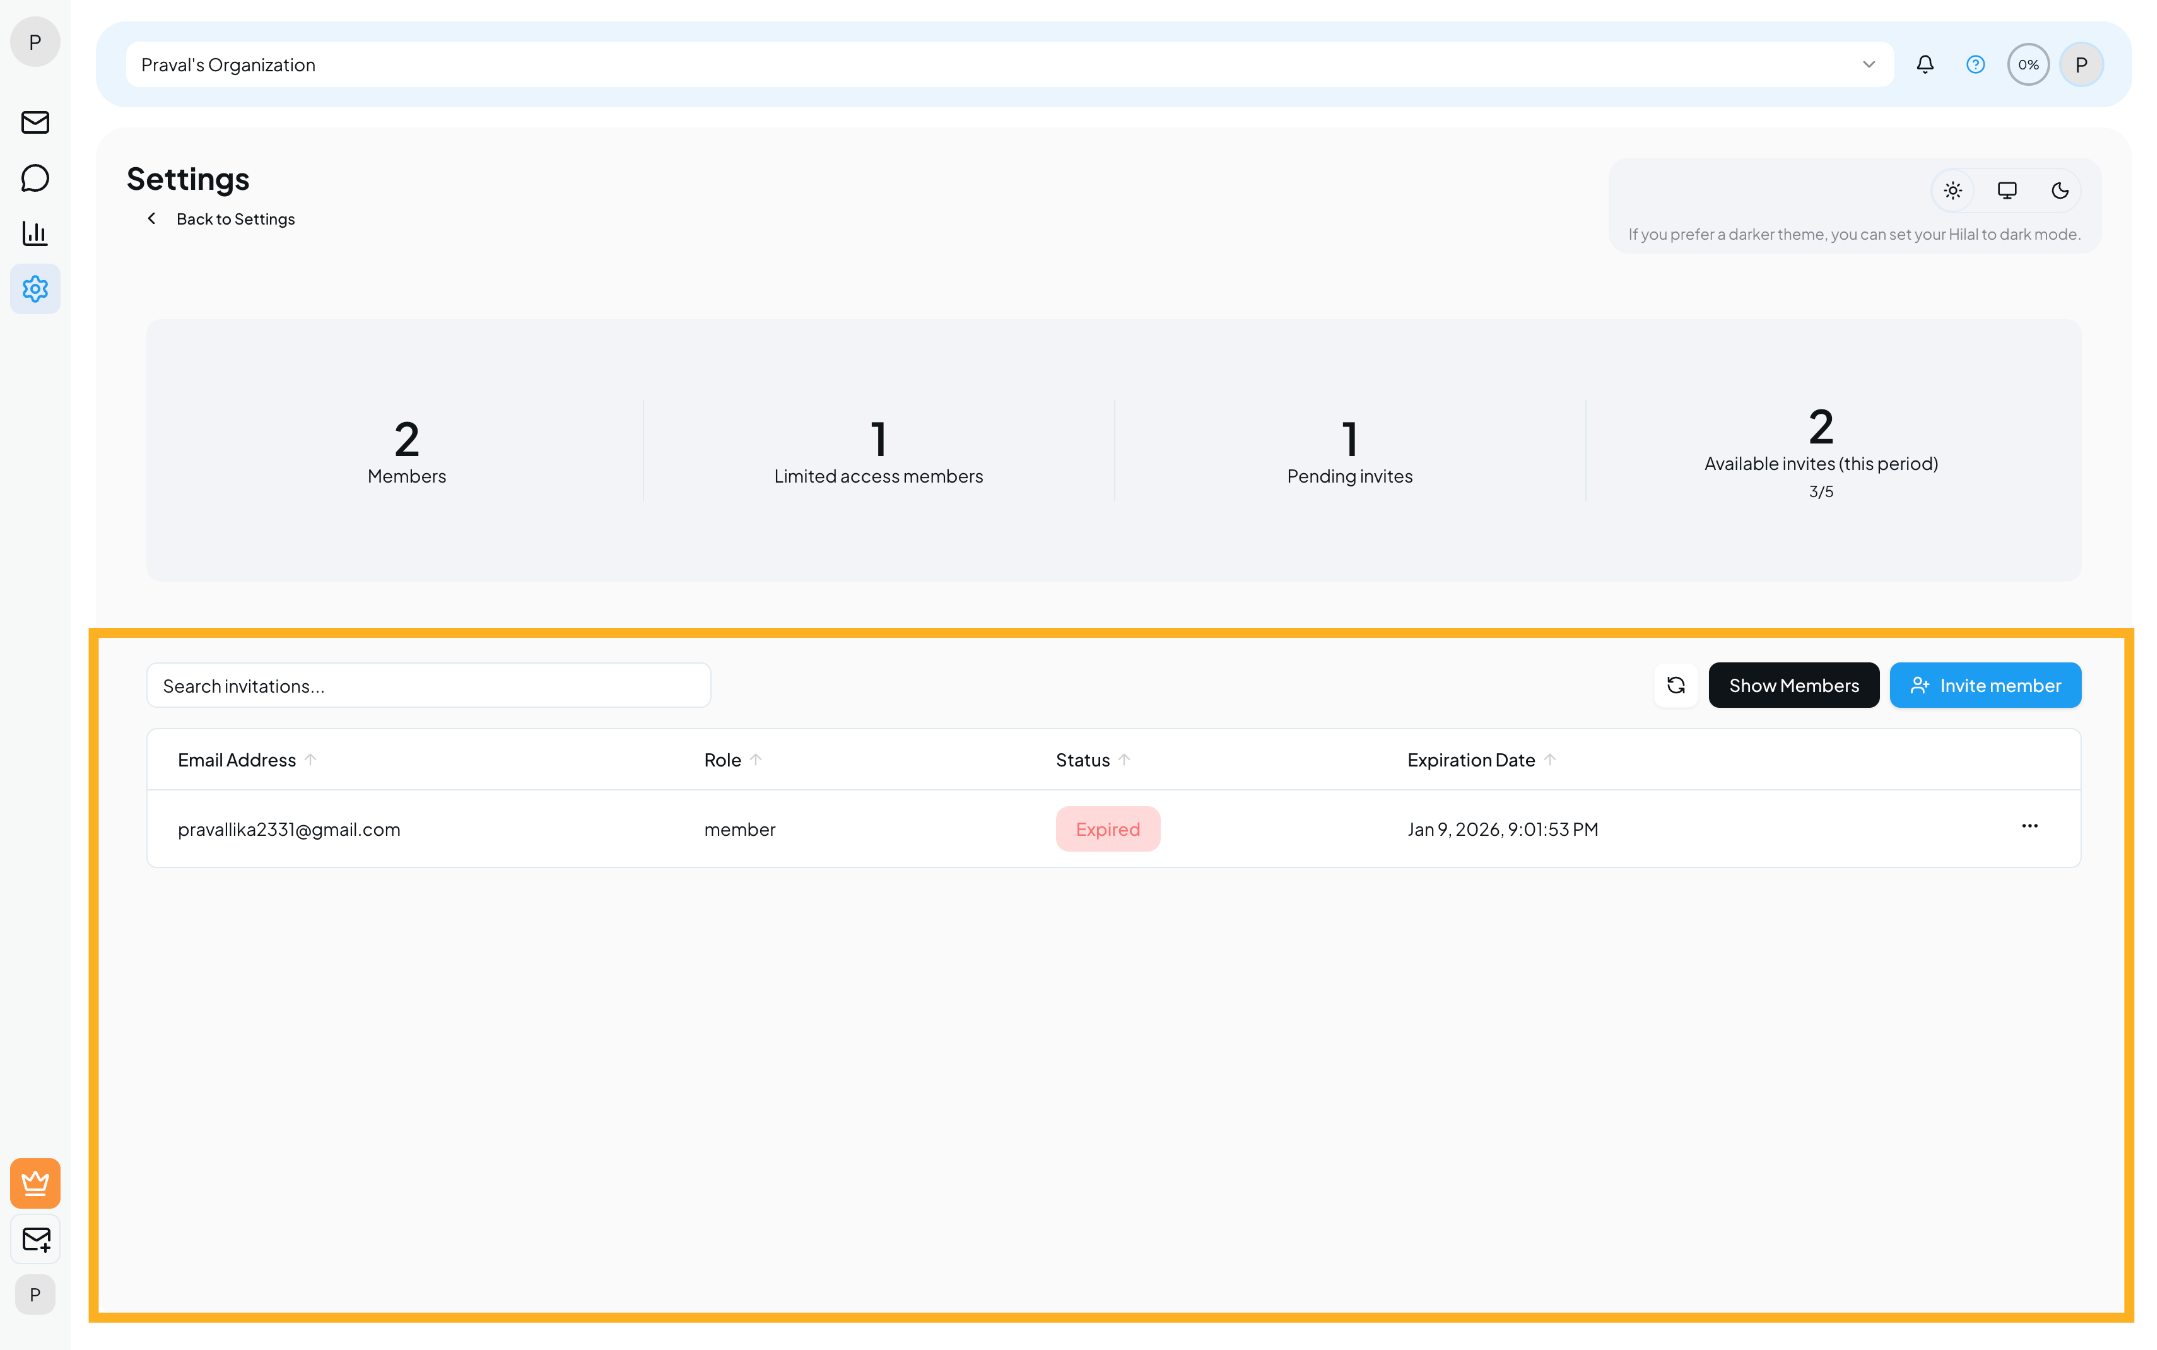
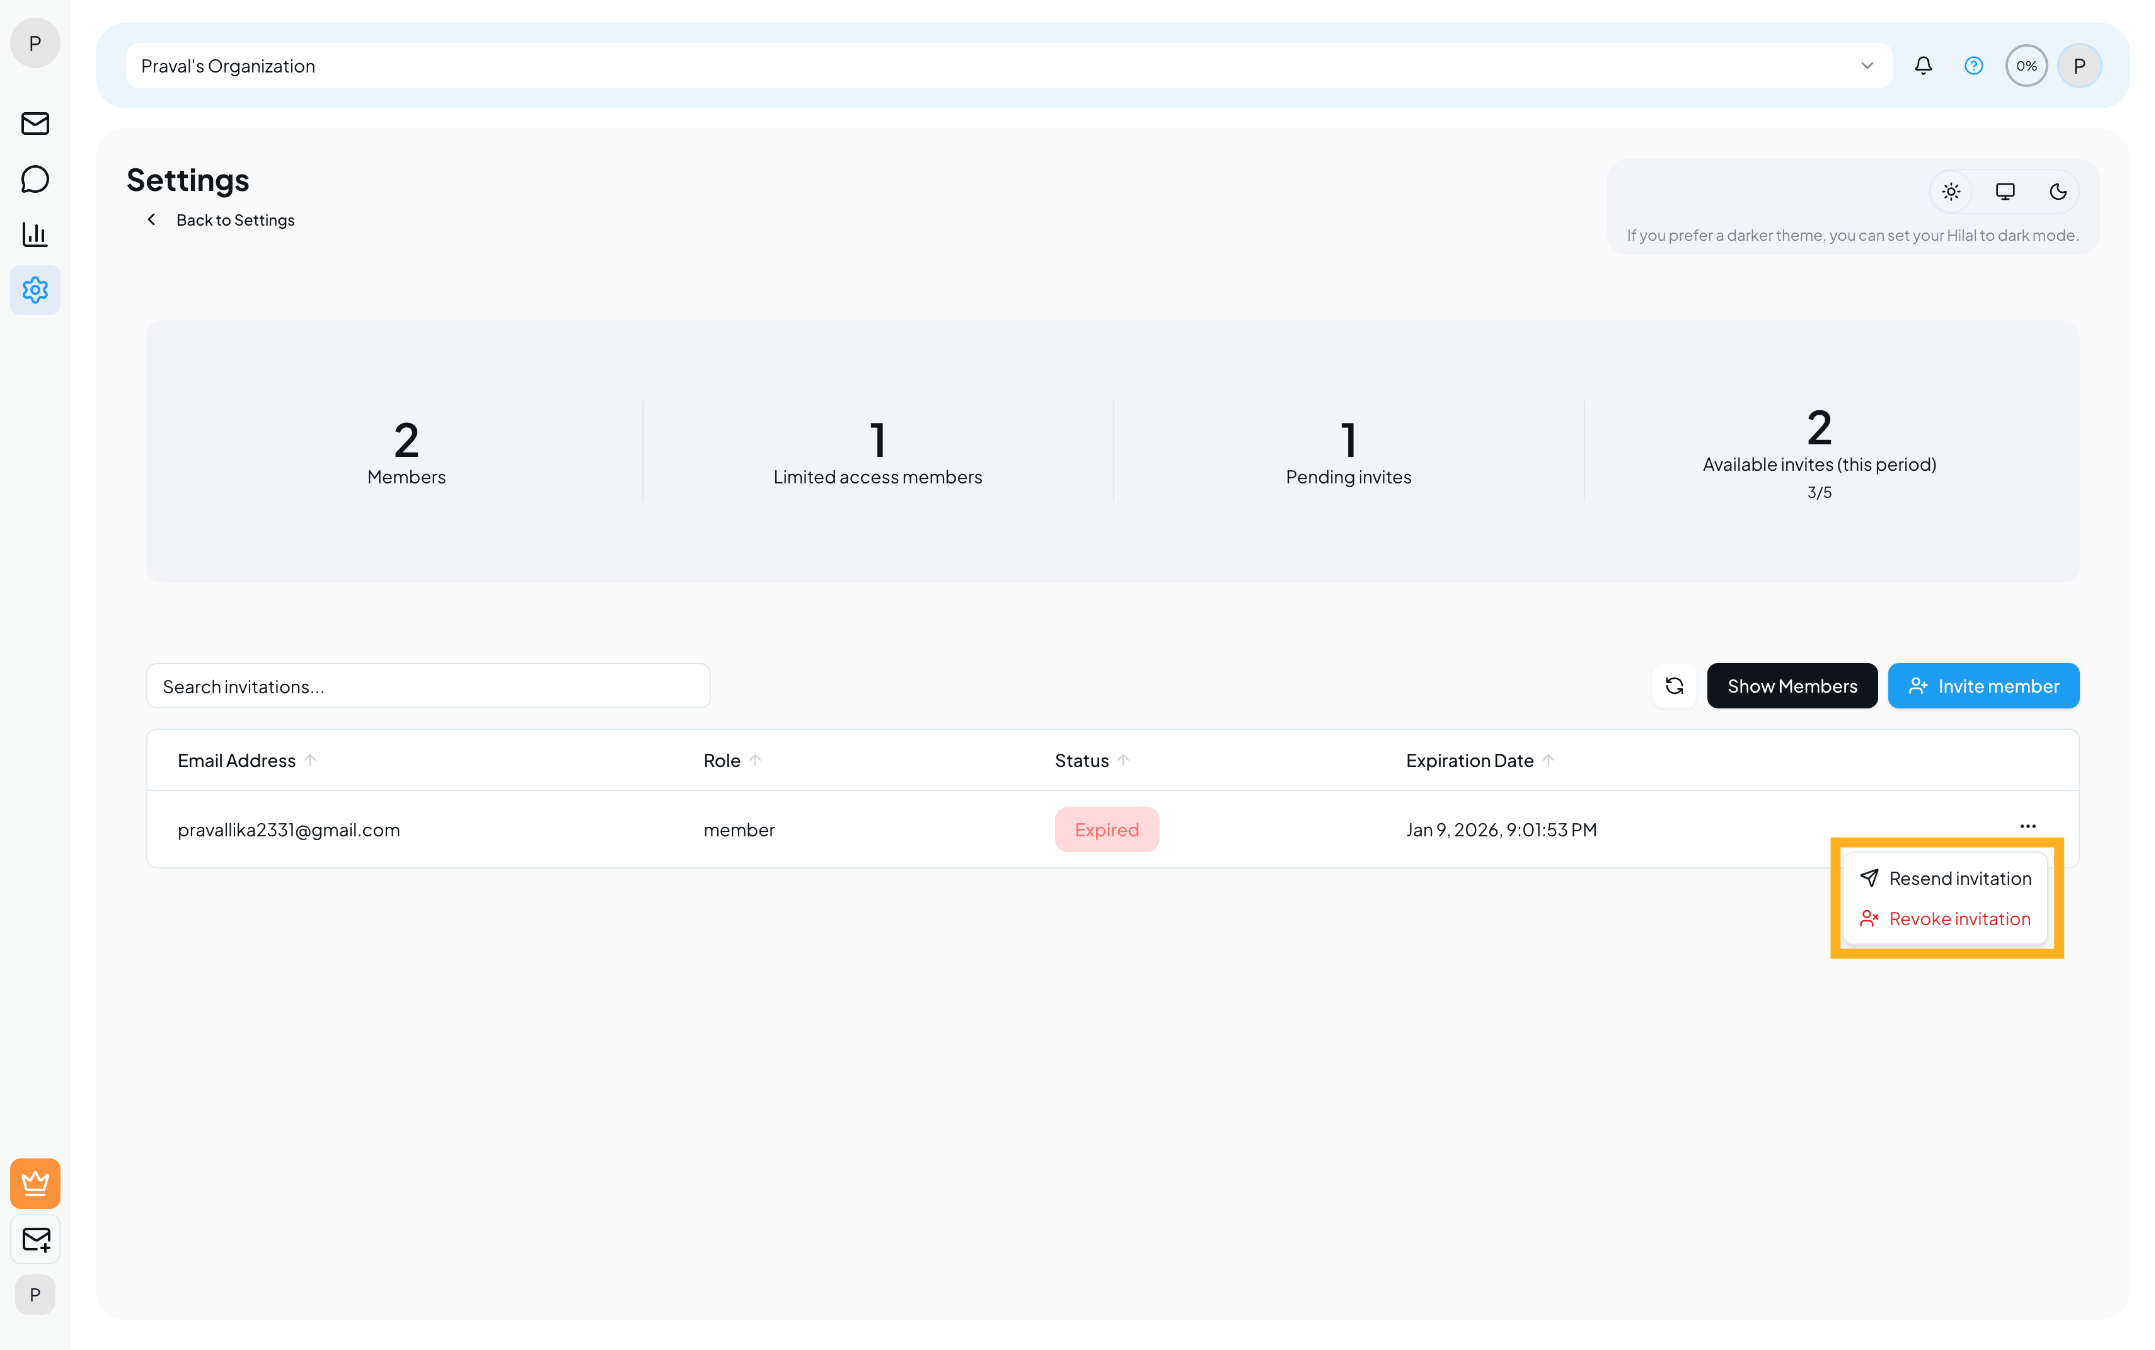
Resend or Revoke Invitations
- Click the three-dot (⋯) menu next to an invited user.
- Choose one of the following actions:
- Resend invitation – Sends the invitation email again.
- Revoke invitation – Cancels the invitation immediately.
Revoked invitations cannot be accepted unless a new invitation is sent.
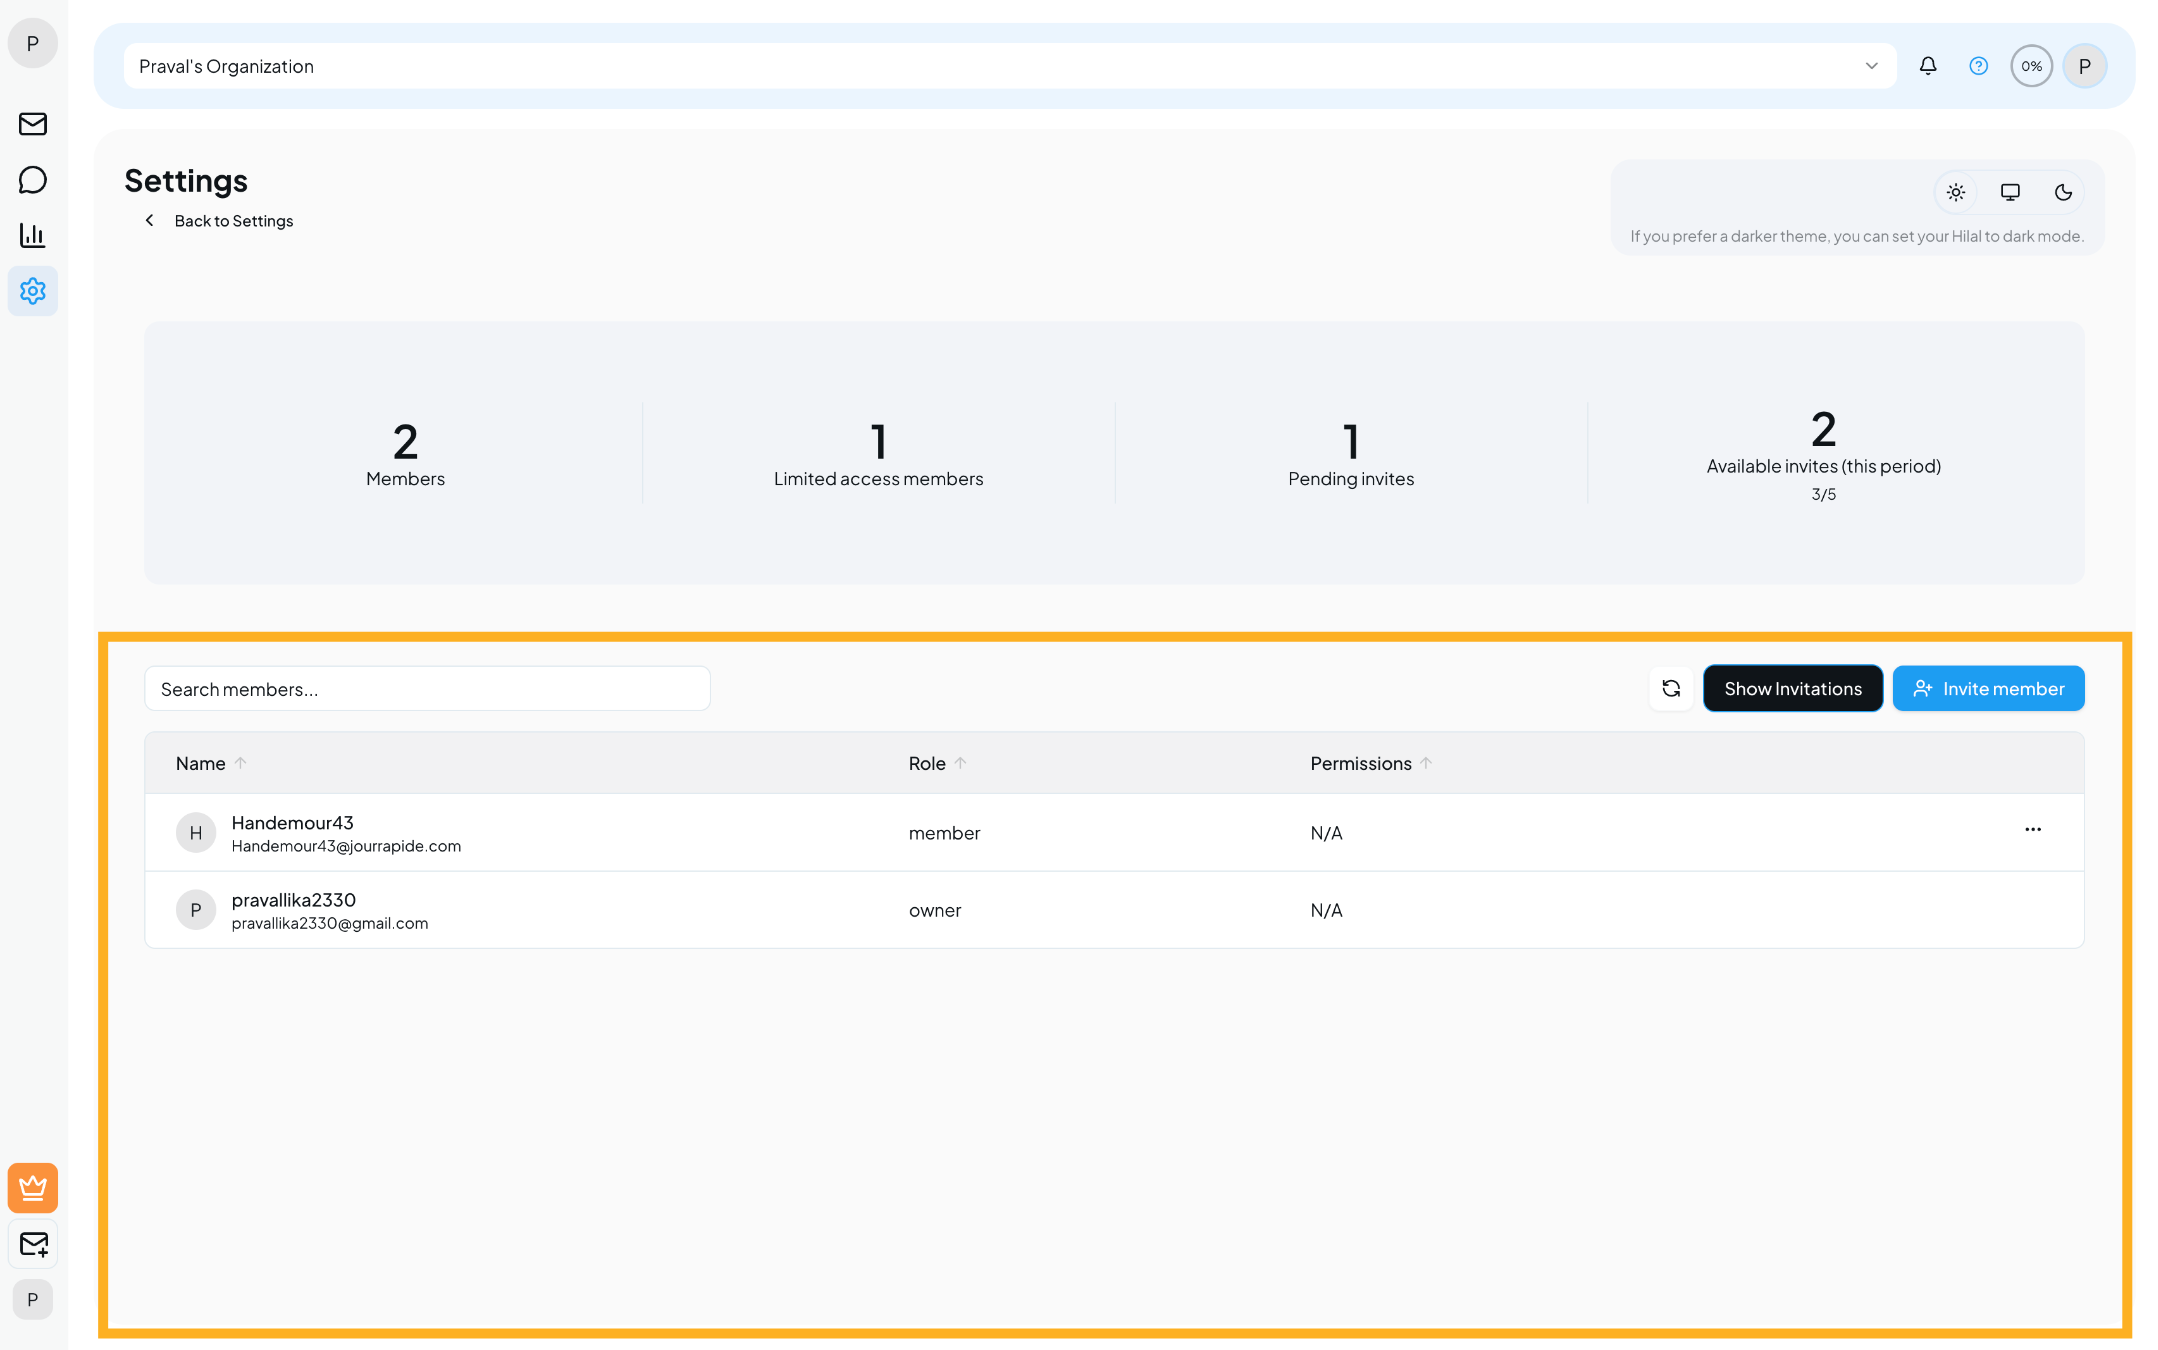
Manage Members
Once a member accepts the invitation:
- They will appear in the Members list.
- You can view their:
- Name
- Email address
- Role
- Assigned permissions
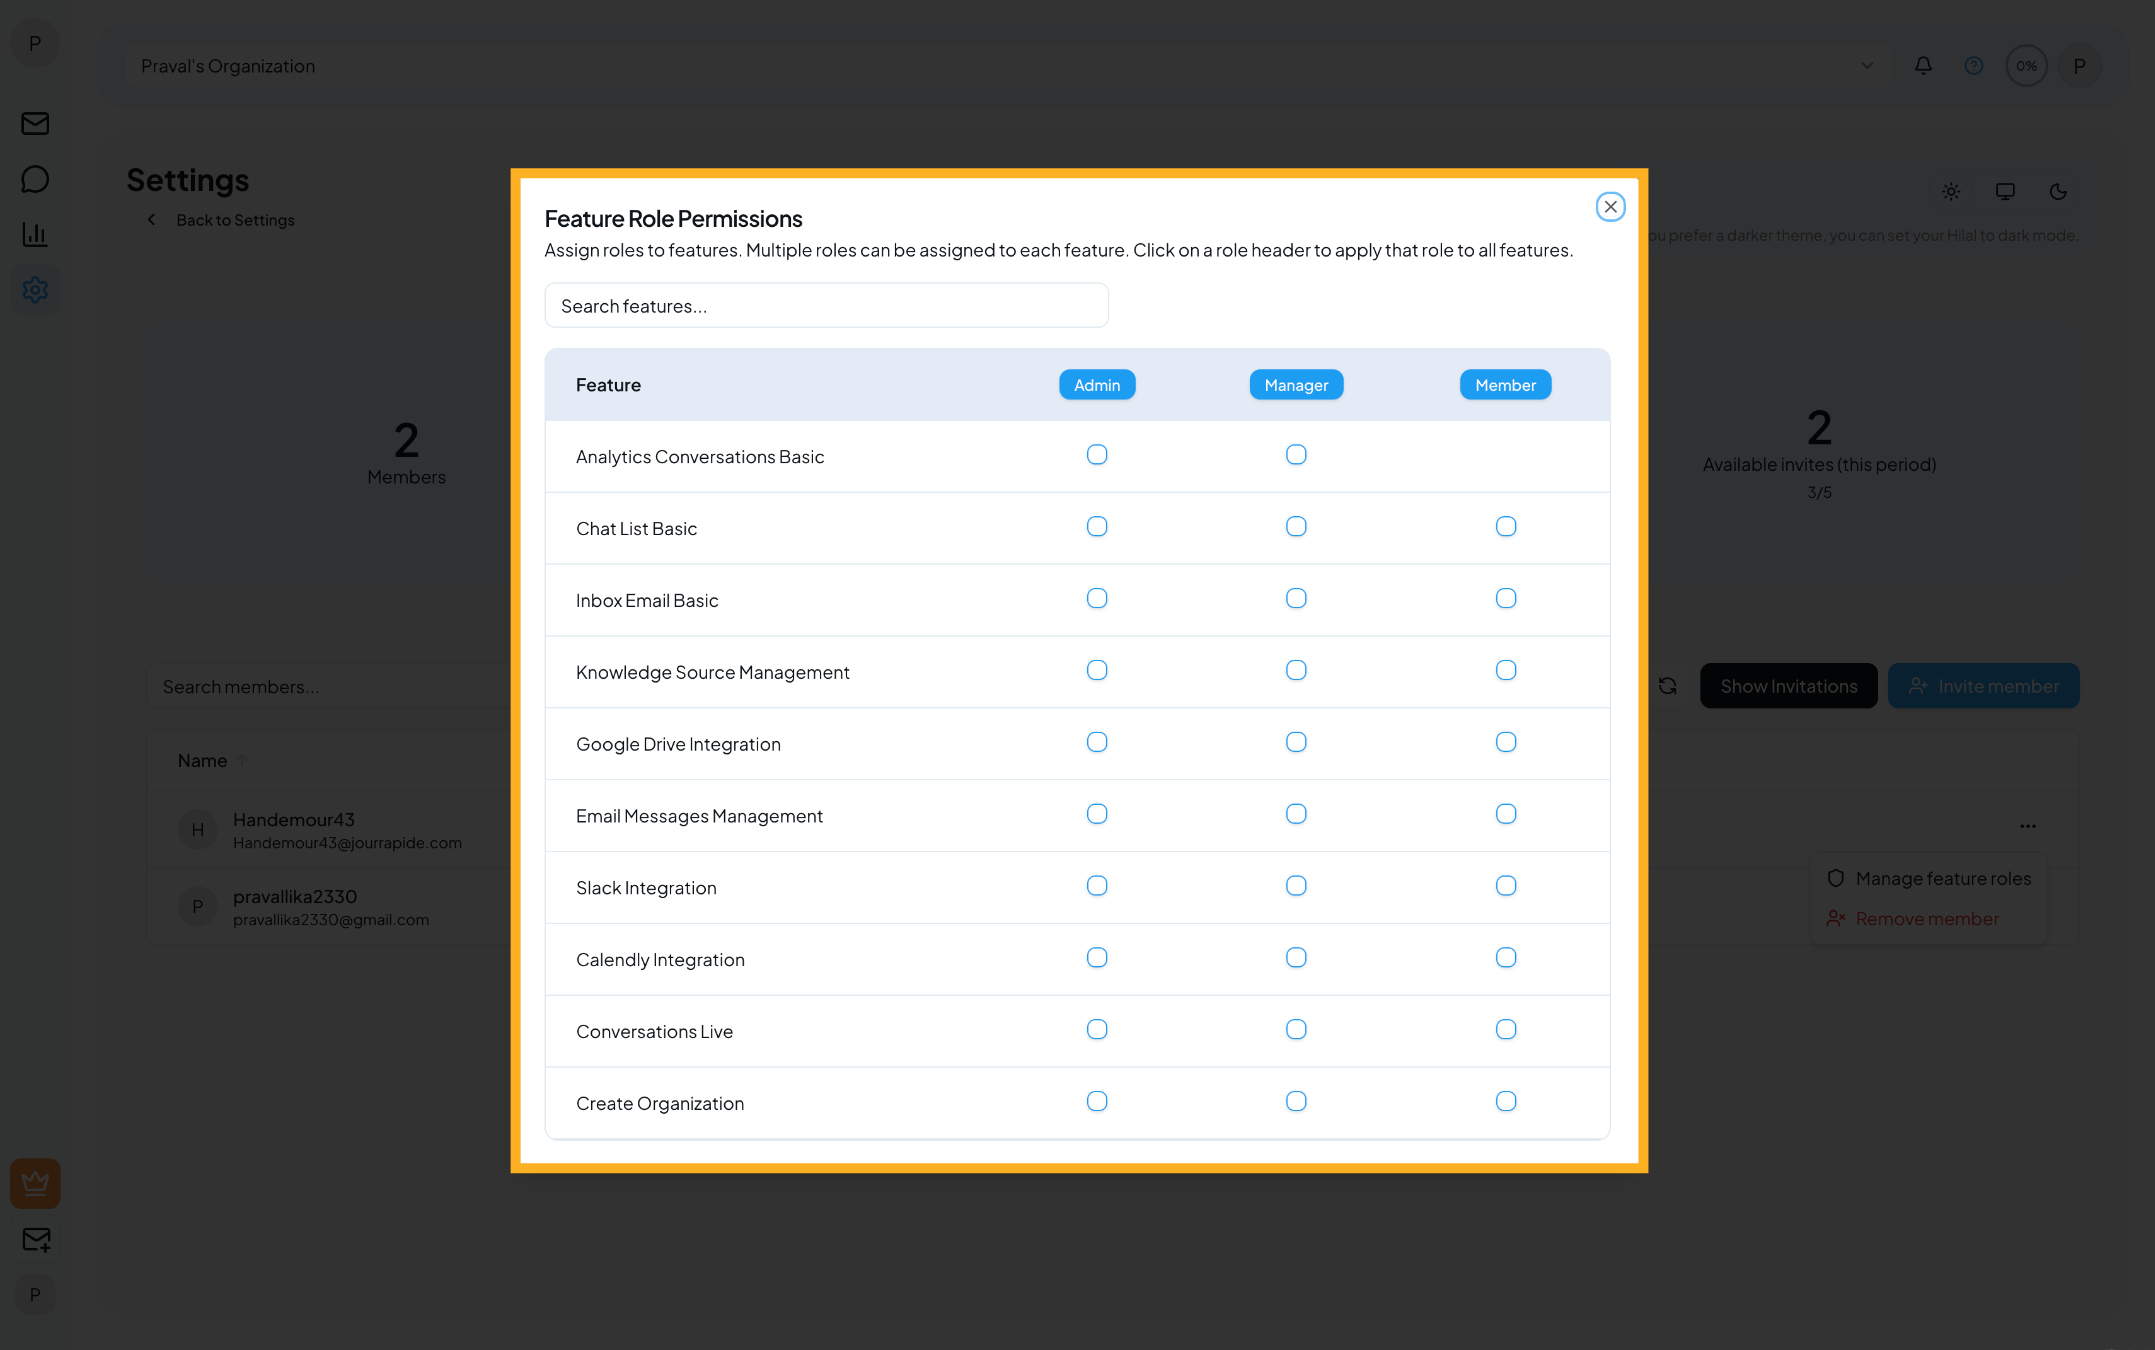
Feature Role Permissions
- Click on a member to manage their feature-level roles.
- Assign permissions across different features such as:
- Analytics
- Conversations
- Integrations
- Knowledge sources
- Multiple roles can be assigned per feature.
- Clicking a role header applies that role to all features at once.
Notes
- Organization and team limits reset based on your billing period.
- Owners have full control over organization settings and members.
- Permissions can be updated at any time from the members list.