Email inbox
The email inbox channel turns your support email into a chat surface. Incoming emails become conversations; the bot replies (or hands off to an agent), and every thread is visible in the agent dashboard.
In this guide:
- Connect an inbox
- Configure forwarding (Gmail, Outlook, custom)
- How the bot replies
- Multiple inboxes
- Disconnect
Step 1: Connect an inbox
In the left sidebar, go to Settings → Email inbox (or Inboxes, depending on your plan).
Click Add inbox. You’ll get two options:
- Generate a Hilal forwarding address — easiest. Hilal Chatbot gives you
inbox-xyz@hilal.email. Set up forwarding from your real address to this one.
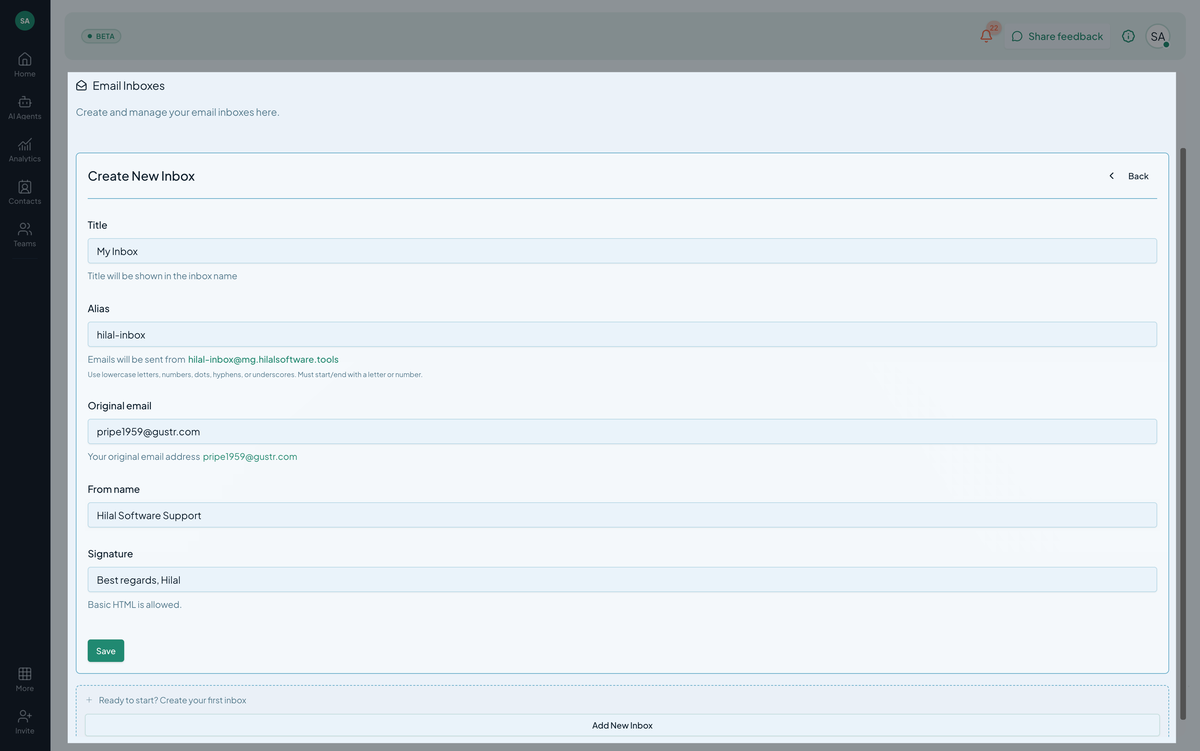
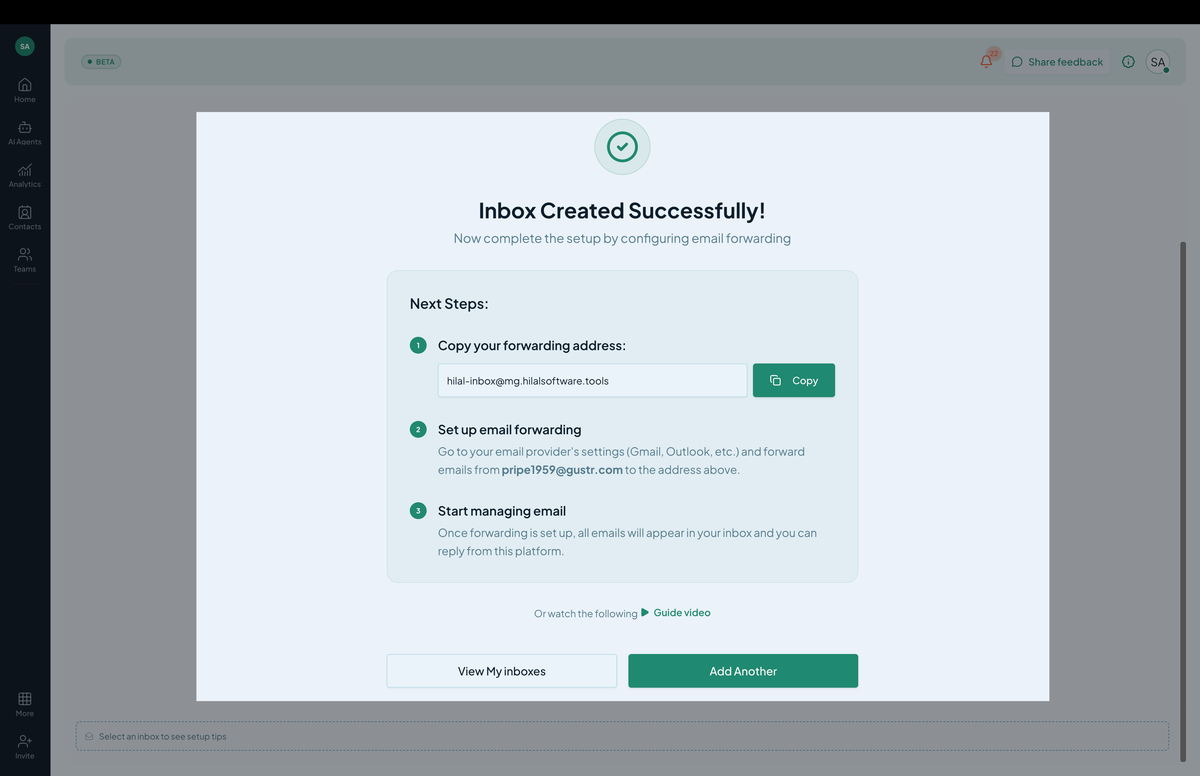 Screenshot: The “Add inbox” form with forwarding options.
Step 2: Configure forwarding (Gmail)
If you went the forwarding route, configure your real inbox to forward incoming mail to Hilal’s address:
- In Gmail, go to Settings → Forwarding and POP/IMAP → Add a forwarding address.
- Paste the Hilal forwarding address.
- Gmail emails a confirmation code to that address; copy it from the Hilal Chatbot inbox view and paste in Gmail.
- Activate forwarding for new mail.
Optional: filter so only certain emails forward (e.g., emails to support@yourcompany.com only).
Step 3: Configure forwarding (Outlook)
In Outlook on the web:
- Settings → Mail → Forwarding → enable forwarding to the Hilal address.
- Optionally, Keep a copy of forwarded messages.
For Outlook desktop, use Rules → Forward to with the same target.
Step 4: How the bot replies
When a new email arrives at the connected inbox:
- Hilal Chatbot creates a conversation with the email’s
Fromas the contact. - The bot generates a reply using the chatbot’s knowledge and behavior, formatted as an email (subject, body, signature).
- If using IMAP/SMTP: reply is sent through your real mail server — recipients see your real address.
- If using forwarding: reply comes from the Hilal forwarding address. To make replies appear from your real address, set up “send as” in Gmail / Outlook.
- Threading: Hilal Chatbot uses standard email headers to keep follow-up replies on the same thread.
Multiple inboxes
You can connect multiple inboxes per organization — support@, sales@, billing@ — and route each to a different chatbot (or all to the same one).
In Settings → Email inbox, add each inbox separately. In each inbox row, pick which chatbot handles it.
Step 5: Disconnect
In Settings → Email inbox, click the trash icon on the inbox row. Forwarding still continues to send mail to Hilal until you disable it on your real provider — turn that off too.
Tips
- Use a separate inbox for the bot. Don’t connect your personal email; create a dedicated address (
bot@yourcompany.com) and forward selected mail to it. - Set a clear signature. The bot’s reply includes a signature you configure — make sure it identifies the bot (“Replied by Acme Bot. Hit reply to talk to a human.”) so customers know what’s happening.
- Use auto-escalation rules. When customers reply with “wait, I want a human” the bot escalates — see Escalation Policy.
Troubleshooting
- Forwarding confirmation code never arrives. Check spam in the Hilal inbox view. If still missing, make sure forwarding was actually configured — Gmail won’t send the code until forwarding is set up.
- Bot replies but recipients don’t see them. SMTP may be misconfigured (wrong port, wrong auth). Test with a small reply first.
- Threads broken. Reply headers may have been stripped by the receiving server. This is mostly cosmetic — content still arrives.