Manage contacts
Every time a user provides identifying info — email, phone, name — Hilal Chatbot creates or updates a Contact. The Contacts page is the directory of those people, with full conversation history attached to each.
In this guide:
- Open the Contacts page
- View a contact’s details
- Edit a contact
- Add tags
- Delete
Step 1: Open Contacts
In the left sidebar, click Contacts to see the bots contacts.
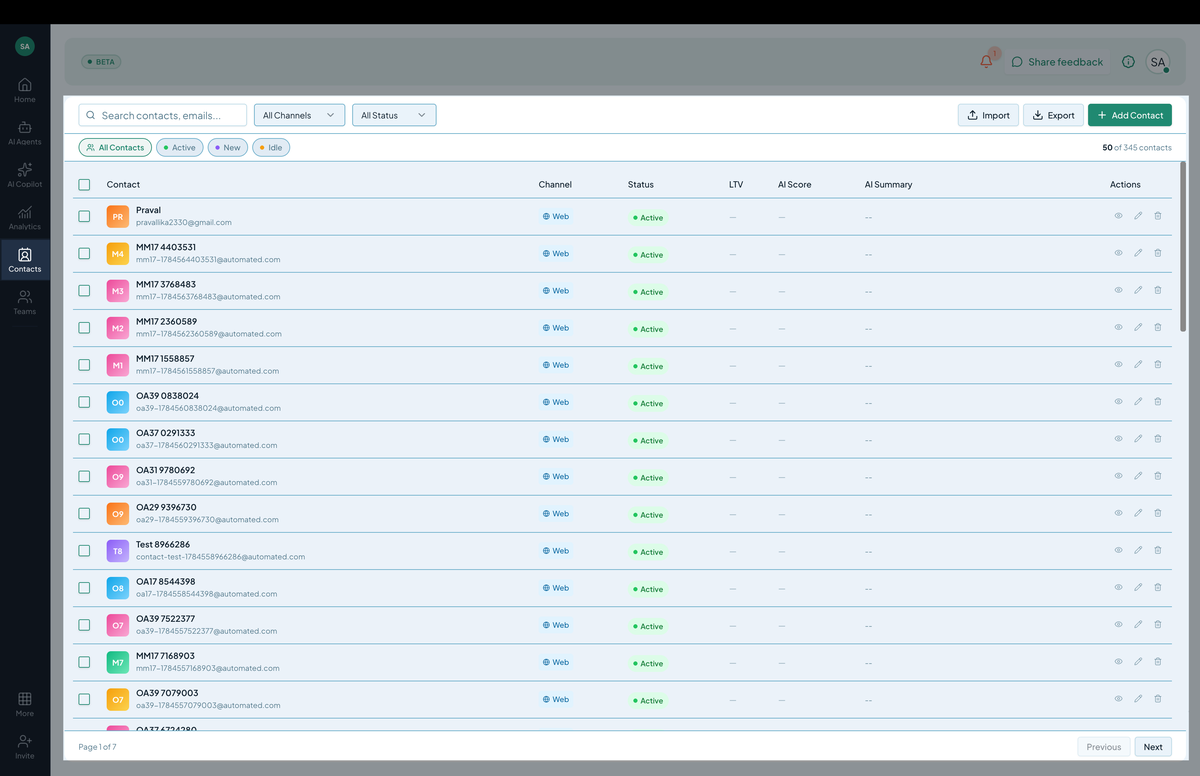 Screenshot: The contacts table with name, email, last seen, and conversation count.
Step 2: View a contact’s details
Click a row to open the contact detail panel:
- Identity — name, email, phone, identity badge (verified via JWT, self-reported, anonymous).
- Conversation history — every conversation, sortable by date, with quick links.
- Captured fields — anything else collected (company, role, plan tier).
- Tags — labels you’ve added.
- First seen / last seen timestamps.
- External IDs — Salesforce ID, Zendesk user ID, Stripe customer ID (if integrated).
Step 3: Edit a contact
In the detail panel, click Edit. You can update:
- Name, email, phone.
- Custom captured fields.
- Add or remove tags.
Email is treated as a unique key — changing it merges with an existing contact if one matches.
Step 4: Add tags
Tags are flexible labels:
vip,enterprise,trial,churn-risk,champion.- Use to filter conversations and contacts.
- Tags are flat (no hierarchy).
In the detail panel, type a tag name and hit Enter. Existing tags are suggested as you type.
Step 5: Delete
Click Delete contact. Two options:
- Soft delete — hides the contact from default views; conversations remain.
- Hard delete (GDPR) — permanently removes the contact and anonymizes their conversation transcripts. Cannot be undone.
For GDPR/CCPA right-to-be-forgotten requests, hard delete is the safe path.
Searching contacts
Above the table:
- Search — name, email, phone, tag.
- Filter — by tag, by last-seen window, by chatbot.
- Sort — last seen / first seen / conversation count.
Identity sources
The badge next to a contact’s name shows where their identity came from:
- 🔒 Verified — JWT-signed by your backend (JWT user identification). Trust this.
- 📝 Self-reported — provided in chat or via
data-user-*attributes. Treat as user input. - 👤 Anonymous — unidentified visitor.
Verified contacts are merged across sessions automatically (same sub claim). Self-reported contacts merge by email when a match is found.