Embed on a custom website
The custom-website embed is the simplest deployment — one <script> tag and the widget loads on every page that includes it.
In this guide:
- Get the embed snippet
- Install on your site
- Configure inline options
- Restrict to allowed domains
- Verify it works
Step 1: Get the snippet
On your chatbot detail page, click Connect. The snippet looks like:
<script src="https://cdn.hilalsoftware.tools/chat_v3.js"></script>
<script>
  window.HilalChat.init({
    organizationId: 'org_abc123',
    botId: 'bot_xyz789',
    theme: 'light'
  });
</script>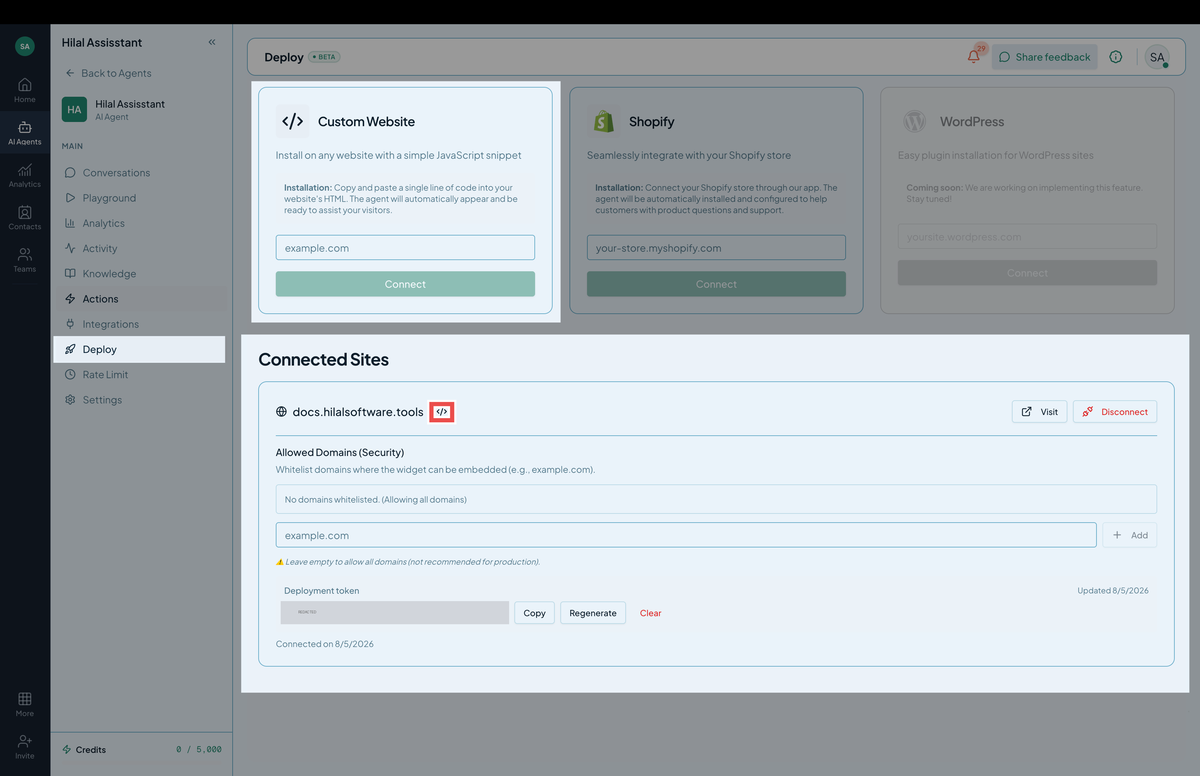
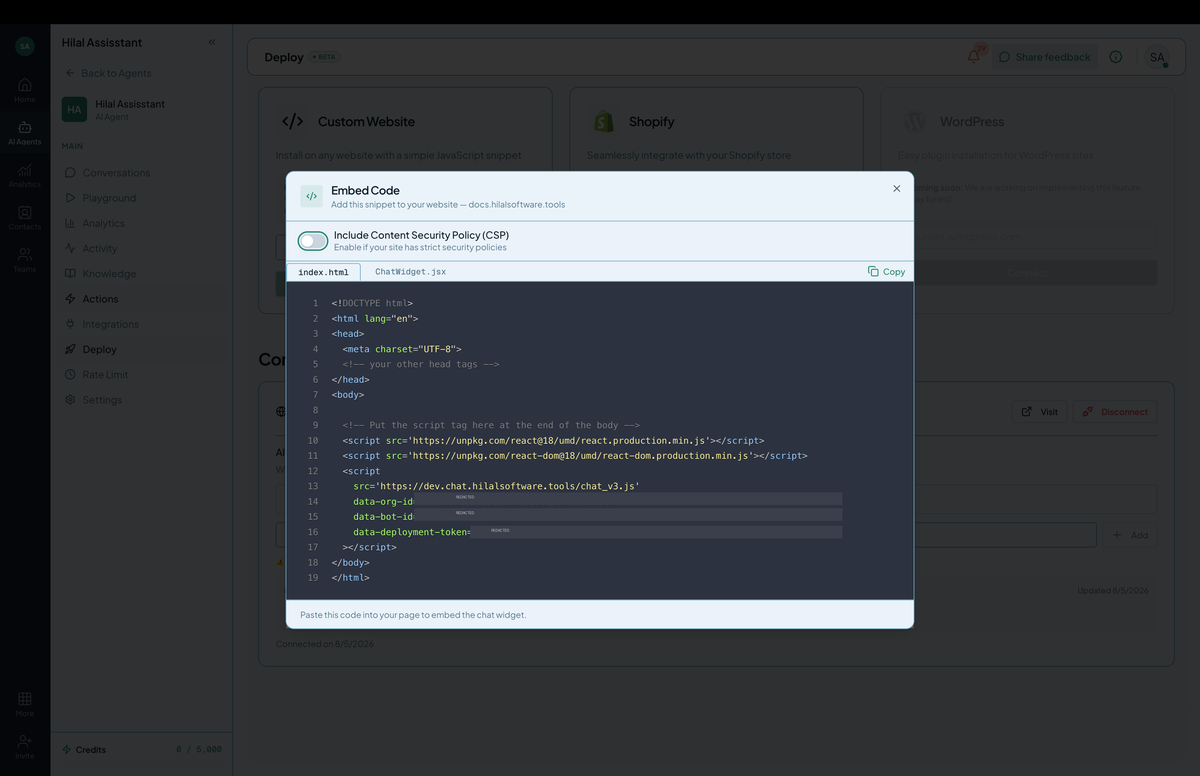 Screenshot: The Install tab with copy buttons for the embed snippet.
Click Copy to copy yours.
Step 2: Deploy on your site
Paste the snippet just before </body> on every page where you want the widget.
If you’re using a tag manager (Google Tag Manager, Segment), create a Custom HTML tag with the snippet and trigger it on All Pages.
Step 3: Configure inline options
The init() config object accepts:
| Option | Type | Default | What it does |
|---|---|---|---|
organizationId | string | — | Required. From the snippet. |
botId | string | — | Required. From the snippet. |
theme | 'light' | 'dark' | 'light' | Widget theme. |
position | 'bottom-right' | 'bottom-left' | 'bottom-right' | Anchor corner. |
primaryColor | string | (from Appearance) | Hex color override. |
offset | { bottom?: number; right?: number } | — | Pixel offset from anchor. |
userToken | string | — | Verified user JWT — see JWT user identification (New). |
initialMessages | object | — | Page context and floating prompts — see Developer embed JS API (New). |
Step 4: Restrict to allowed domains
By default, the widget will load anywhere — you should lock it down to your real domains so no one can embed your bot on a phishing page.
In Deploy → Allowed domains, add each domain (example.com, www.example.com, app.example.com). Subdomain wildcards work (*.example.com).
The widget refuses to send messages from any other origin and the API rejects calls from non-allowed referrers.
Step 5: Verify
Visit a page where you installed the snippet:
- Open browser DevTools → Console.
- Look for any errors. A 404 on
chat_v3.jsmeans the script URL is wrong. - The chat bubble should appear in the configured corner within ~1 second of page load (the widget lazy-loads).
- Click the bubble → send a test message → expect a normal reply.
Performance notes
- Lazy loading. The full chat UI only loads when the user clicks the bubble — first page load only fetches a small bootstrap (~25 KiB gzipped).
- Shadow DOM. The widget renders in a shadow root, so its CSS never leaks into your site’s styles.
- Async script. The snippet is non-blocking — it doesn’t slow down your page’s first paint.
Troubleshooting
- Widget never appears. Console says
Refused to load? The host page’s CSP blocks scripts. Addcdn.hilalsoftware.toolsto yourscript-src. - Widget appears on dev but not prod. You added
localhostto allowed domains but not your prod domain. Add the prod domain. - Send fails with “Origin not allowed.” Check Install → Allowed domains and confirm the exact origin (with the right protocol and subdomain).