Add your first knowledge source
Without a knowledge source, your chatbot replies to everything with “I don’t know.” This guide gets one source in — the rest of the Knowledge base section covers every type in detail.
In this guide:
- Pick a source type
- Add a website or upload a document
- Wait for training to complete
- Sanity-check the source
Prerequisites
- A chatbot to train (see Create your first chatbot).
- The URL of a website you control, or a PDF/DOCX/TXT document on your computer.
Step 1: Open the Knowledge base tab
On your chatbot’s detail page, click Knowledge base in the left rail. The list is empty for a new chatbot — that’s expected.
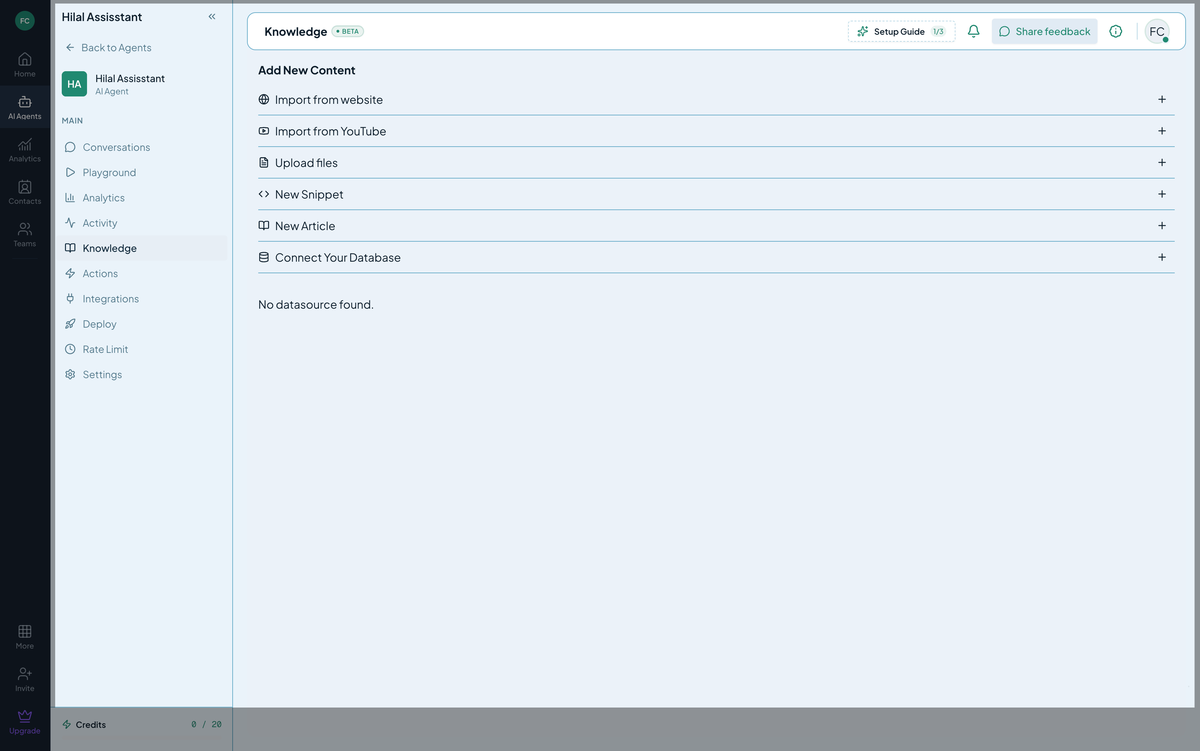 Screenshot: The Knowledge base tab before adding any sources.
Click Add knowledge source.
Step 2: Pick a source type
Hilal Chatbot supports seven source types out of the box:
- Website — auto-crawl and index pages.
- Document — upload PDF, DOCX, or TXT.
- YouTube — extract transcripts from videos.
- Snippet — small editable text blob (e.g., refund policy in 3 lines).
- Article — long-form HTML content you write inline.
- Google Drive — sync a folder of Drive files.
- Notion (New) — sync pages and databases. → Sync Notion
For your first source, start with Website if you have a public knowledge base, or Document if you have a PDF you’d like the bot to know.
Step 3a: Add a website
- Pick Website.
- Paste the root URL — for example,
https://hilalsoftware.com. - Click Add Websites.
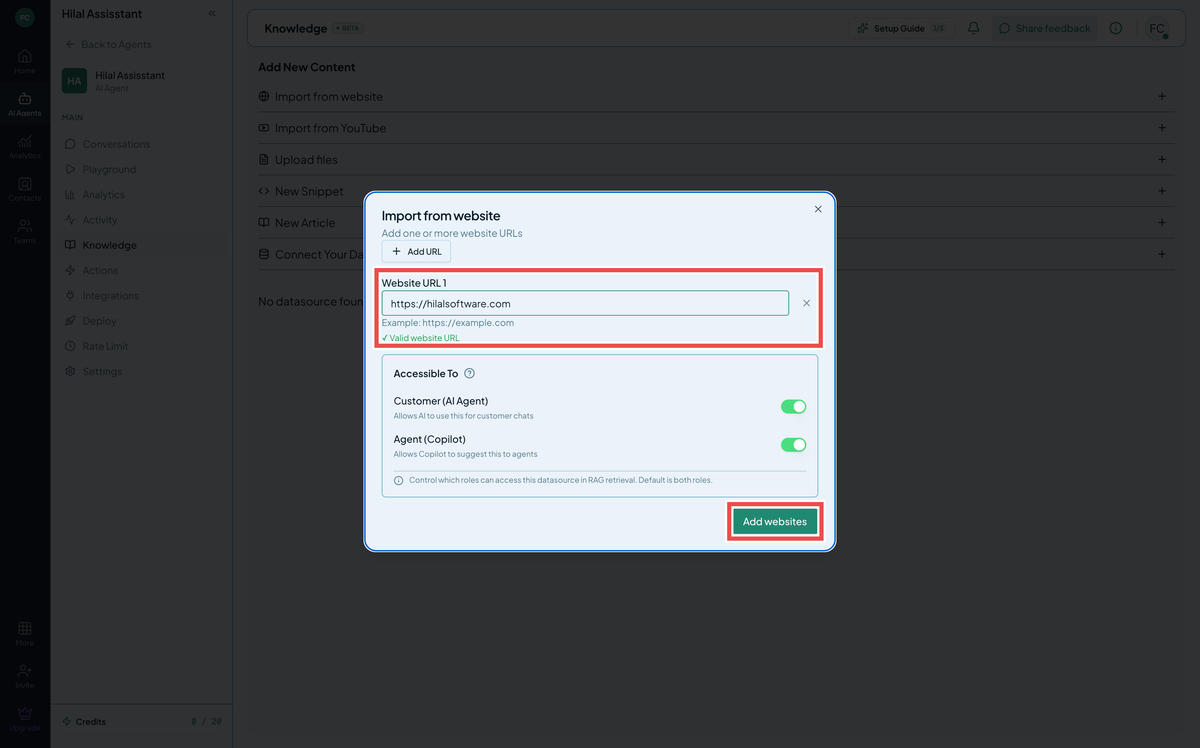 Screenshot: The source-type picker on the “Add Website knowledge source” modal.
Hilal Chatbot starts crawling immediately. You’ll see a row appear with status crawling, then training, then completed. A small site (≤ 50 pages) finishes in a minute or two; large sites take longer.
Step 3b: Upload a document
- Pick Document.
- Drag a file into the dropzone, or click to browse. PDF, DOCX, TXT, DOC, XLS, XLSX, PPT, PPTX, CSV, MD and HTML are supported.
- Click Upload.
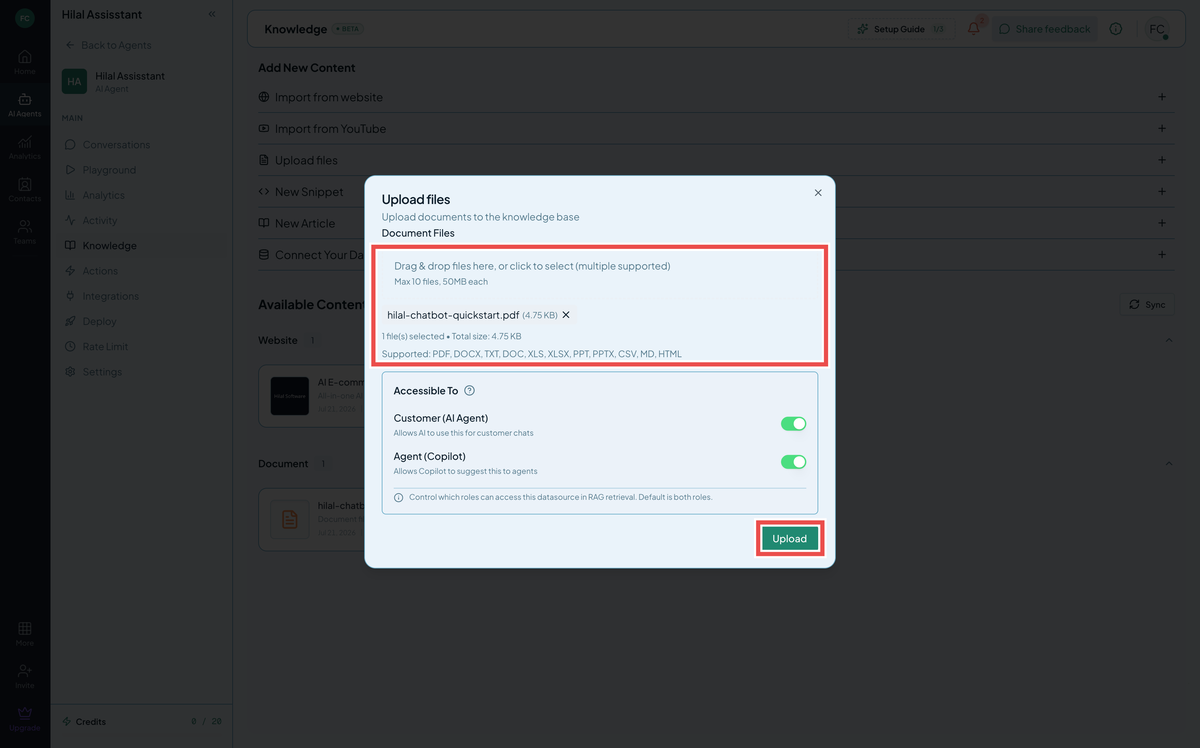 Screenshot: The source-type picker on the “Add Document Knowledge source” modal.
The file uploads, the backend extracts text, and training kicks off. Status flows from processing to completed.
Tip: Your file must contain selectable text. Scanned PDFs (image-only) won’t extract — run them through OCR first.
Step 4: Wait for training
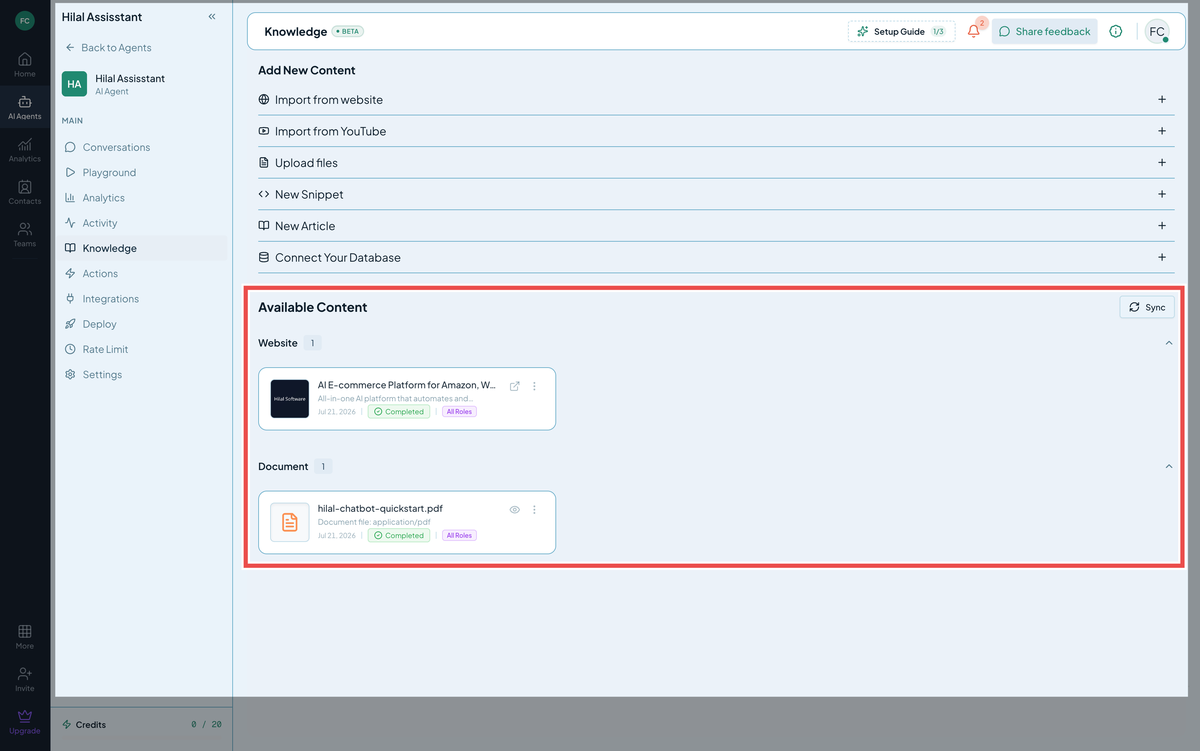 Screenshot: The Knowledge base after knowledge sources trained
Status pills tell you what’s happening:
| Status | Meaning |
|---|---|
pending | Queued, waiting for a training slot. |
crawling / processing | Pulling content from the source. |
training | Building the embeddings index. |
completed | Ready to answer questions. |
failed | Something went wrong. Hover for the error. |
The list polls automatically — you don’t need to refresh.
Step 5: Sanity-check the source
Once status is completed, click the source row to see what was extracted. For a website, you’ll see the list of indexed URLs. For a document, you’ll see a snippet of extracted text.
If the extraction looks wrong (e.g., a website crawler hit a paywall and got nothing useful), delete the source and try again with a different URL or a manual snippet.
Troubleshooting
- Crawl returned 0 pages. The site likely blocks automated crawlers via
robots.txtor returns 403 to non-browser clients. Try a public sub-section, an exported sitemap, or use Document sources instead. - “Quota exceeded” on upload. Your plan caps total knowledge size. See Quotas & training status for what counts and how to expand.
- Training stuck at
pendingfor over an hour. Refresh; if still stuck, contact support.