Create your first chatbot
A chatbot (also called an agent in some screens) is a single AI assistant with its own knowledge, behavior, and integrations. You can have many in one organization. This guide creates the first one — either through the guided onboarding wizard or manually.
In this guide:
- Create a chatbot through the onboarding wizard
- Create a chatbot manually instead
- Tour the chatbot detail tabs
- Pick what to do next
Prerequisites
- You’re signed in to Hilal Chatbot.
- You belong to at least one organization (see Your organization).
- You have Create permission on chatbots — Owners and Admins do by default.
Create a chatbot with the onboarding wizard
The onboarding wizard is the fastest way to create a chatbot. It walks you through five steps — Website, Plan, Knowledge, Customize, and Complete — and creates a fully configured chatbot at the end.
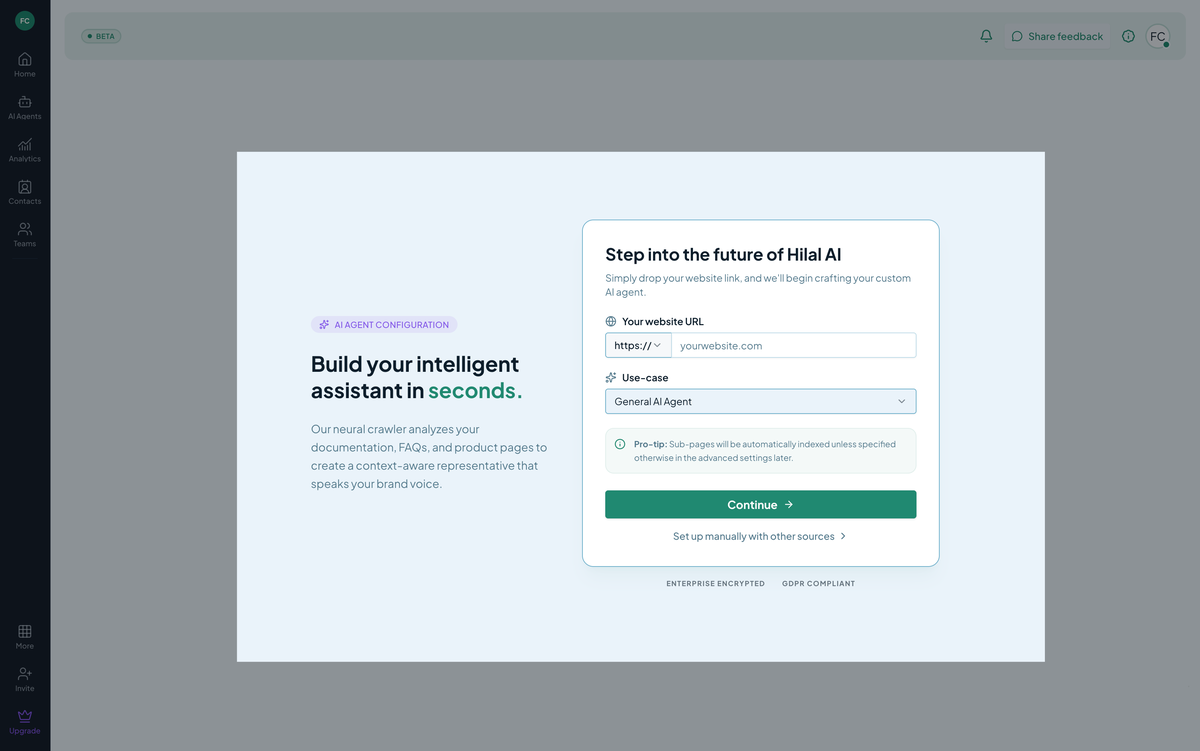 Screenshot: The onboarding wizard’s form
Step 1: Website & use case
Enter your website URL and select a use case from the dropdown (General AI Agent, Customer Support, Sales Assistant, or Knowledge Base Bot). The system uses your website to suggest knowledge sources later in the wizard, and uses the use case to seed sensible default instructions.
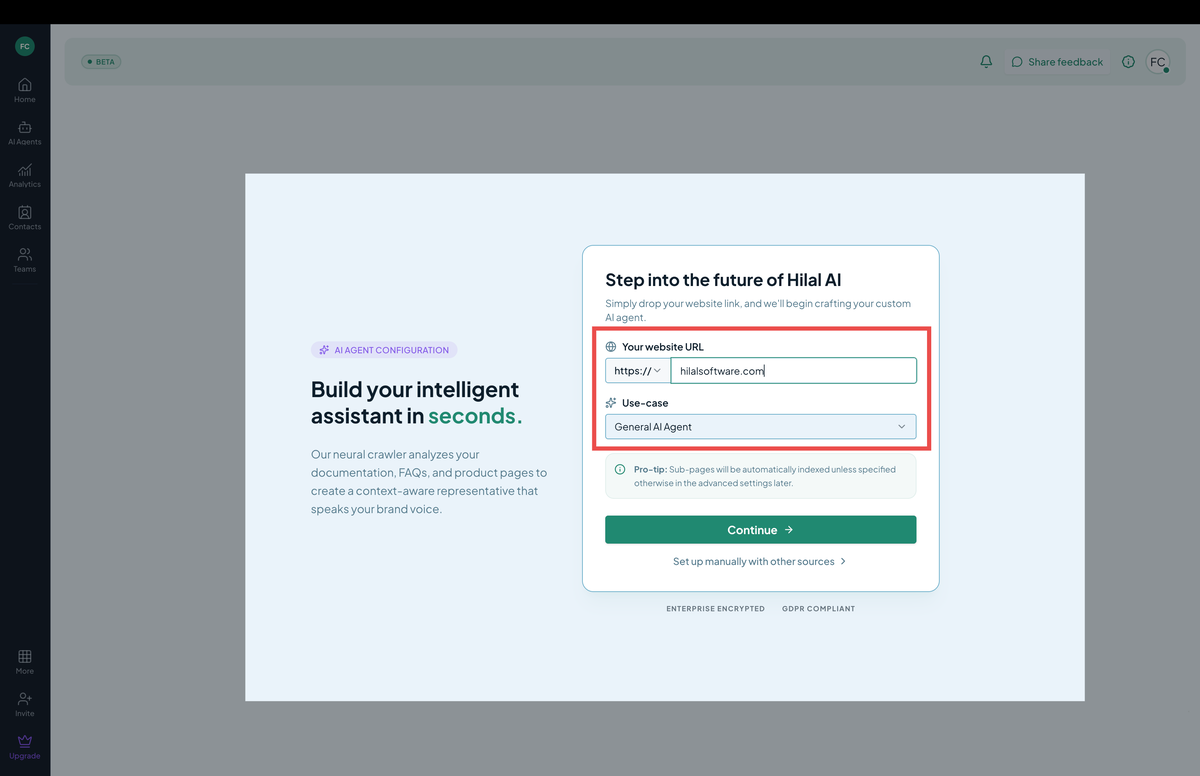 Screenshot: The onboarding wizard’s website and use case step.
Click Continue to proceed.
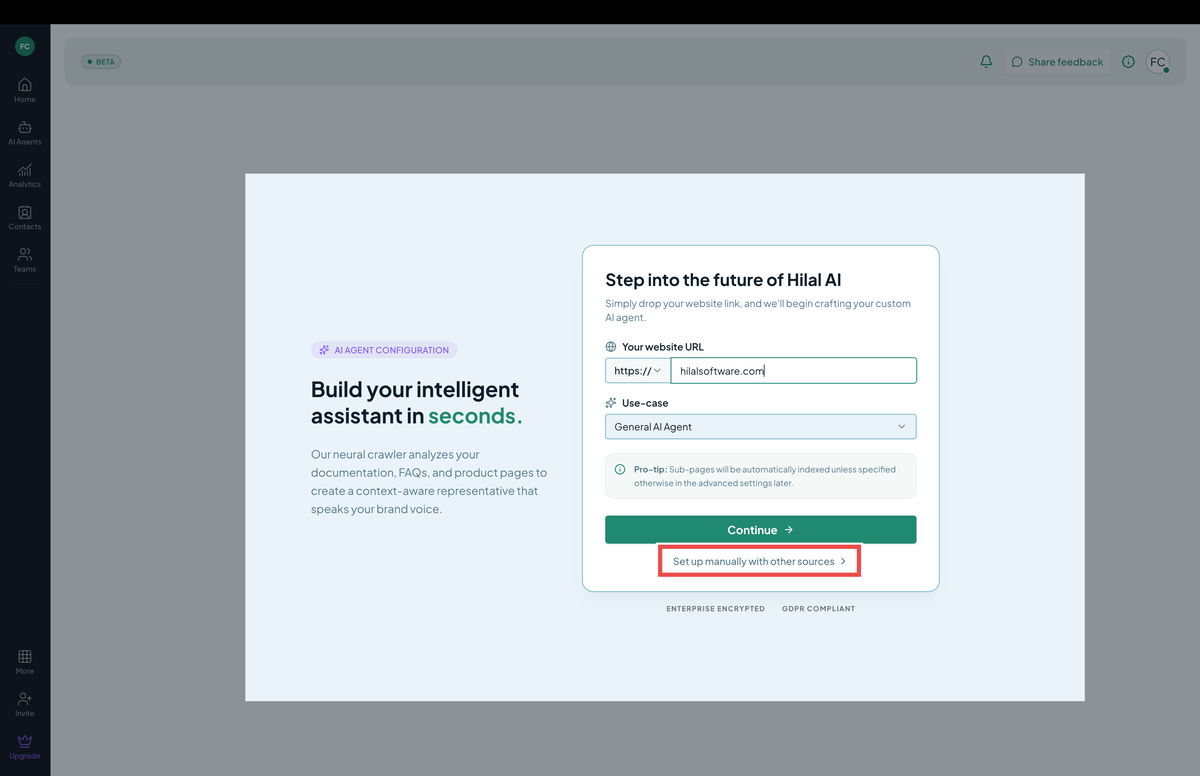
If you’d rather skip the wizard, click Set up manually with other sources to go to the manual creation flow instead below.
Step 2: Plan
Select a plan — Professional, Business, or Enterprise. Clicking Upgrade takes you to Stripe checkout to complete payment, after which the wizard continues.
If you’d rather choose a plan later, click Skip — continue with current plan at the bottom of the page to proceed without upgrading.
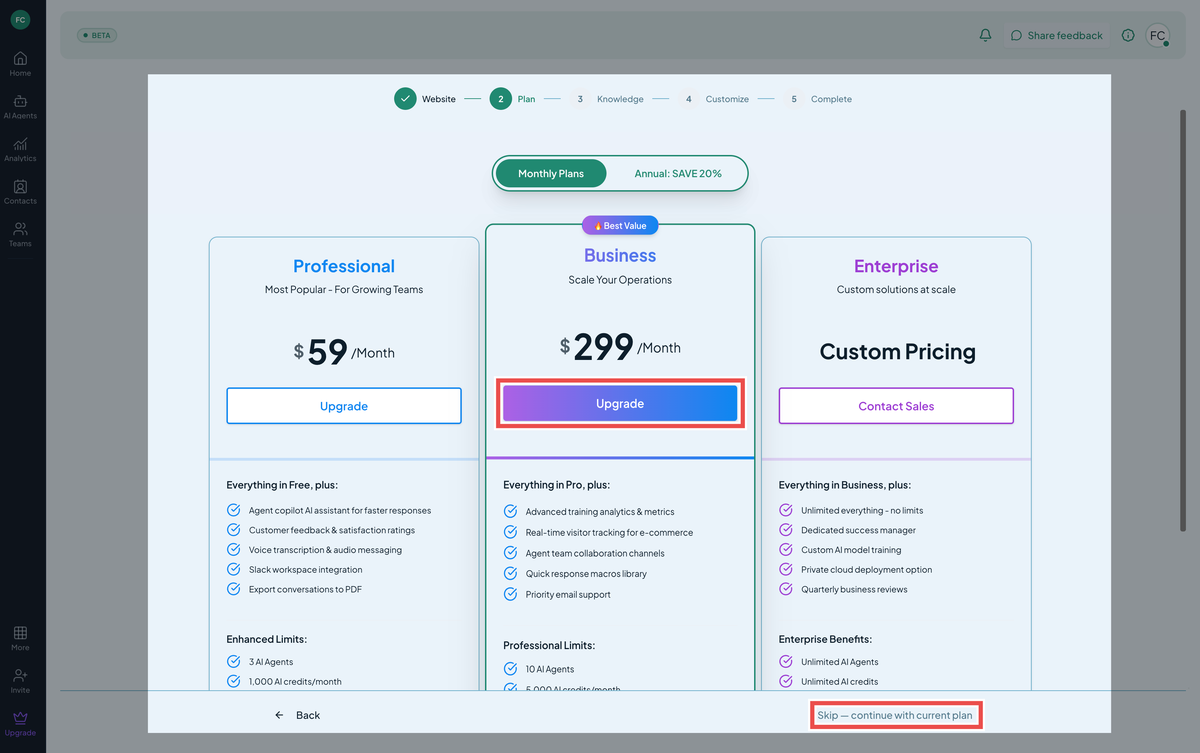 Screenshot: The onboarding wizard’s plan selection step.
Step 3: Knowledge
Add content to train your chatbot on. If you entered a website URL in Step 1, the wizard shows Suggested pages from your site — select the pages you want crawled. You can also add other source types (website, YouTube, file upload, snippet, or article) directly from this step.
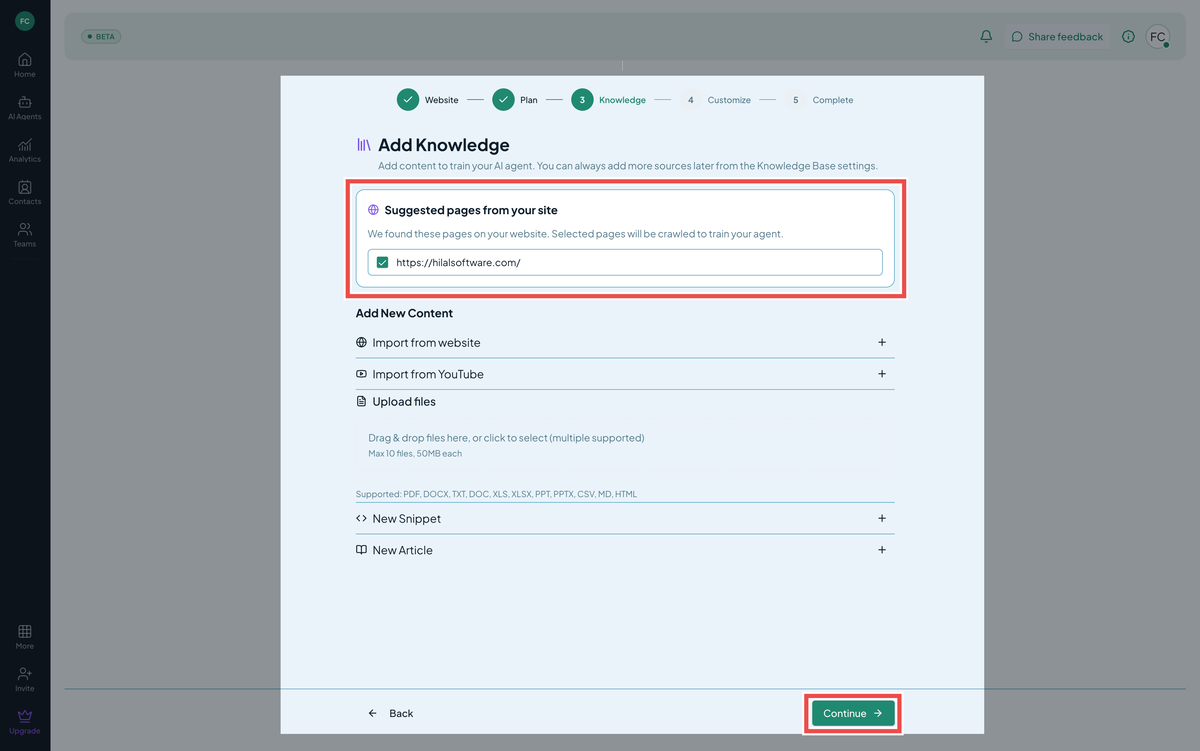 Screenshot: The onboarding wizard’s add knowledge step.
For details on each source type, see Add your first knowledge source or the full Knowledge base reference. You can always add more sources later from the chatbot’s Knowledge base tab.
Click Continue to proceed.
Step 4: Customize
Give your chatbot a name, look, and personality. A live preview of the chat widget updates as you make changes.
- Agent Name — shown to your users in the chat widget.
- Description — a short summary shown on the agent card. Up to 500 characters.
- Profile Image — PNG, JPG, or WebP, up to 2MB.
- Theme Color — pick a preset or enter a custom hex value.
- Dark Mode — enable a dark theme for the chat widget.
- AI Model — the model that powers responses (for example, Claude Haiku 4.5). You can change this later.
- Instruction Preset — General AI Agent, Customer Support, Sales Assistant, Knowledge Base Bot, or Custom Instructions. Selecting a preset fills the Instructions field below with a starting point you can edit.
- Instructions — the system prompt that guides tone and behavior. Up to 10,000 characters.
For more detail on any of these fields, see Chatbot settings.
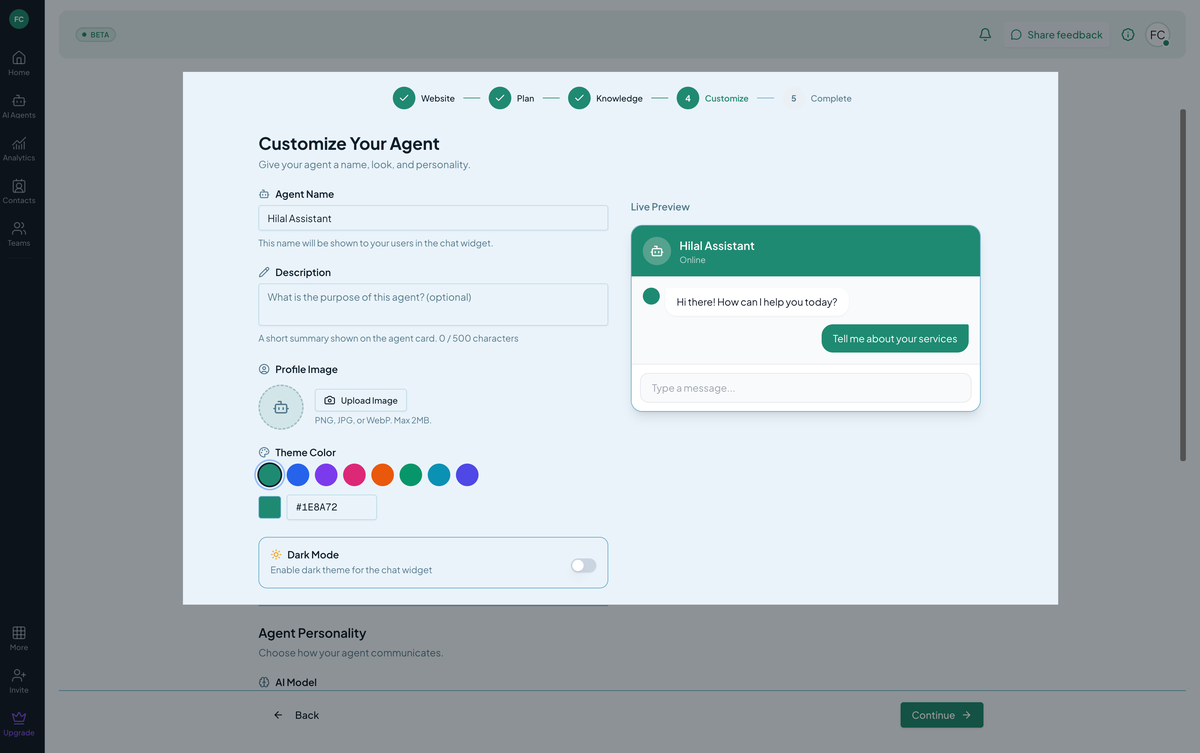
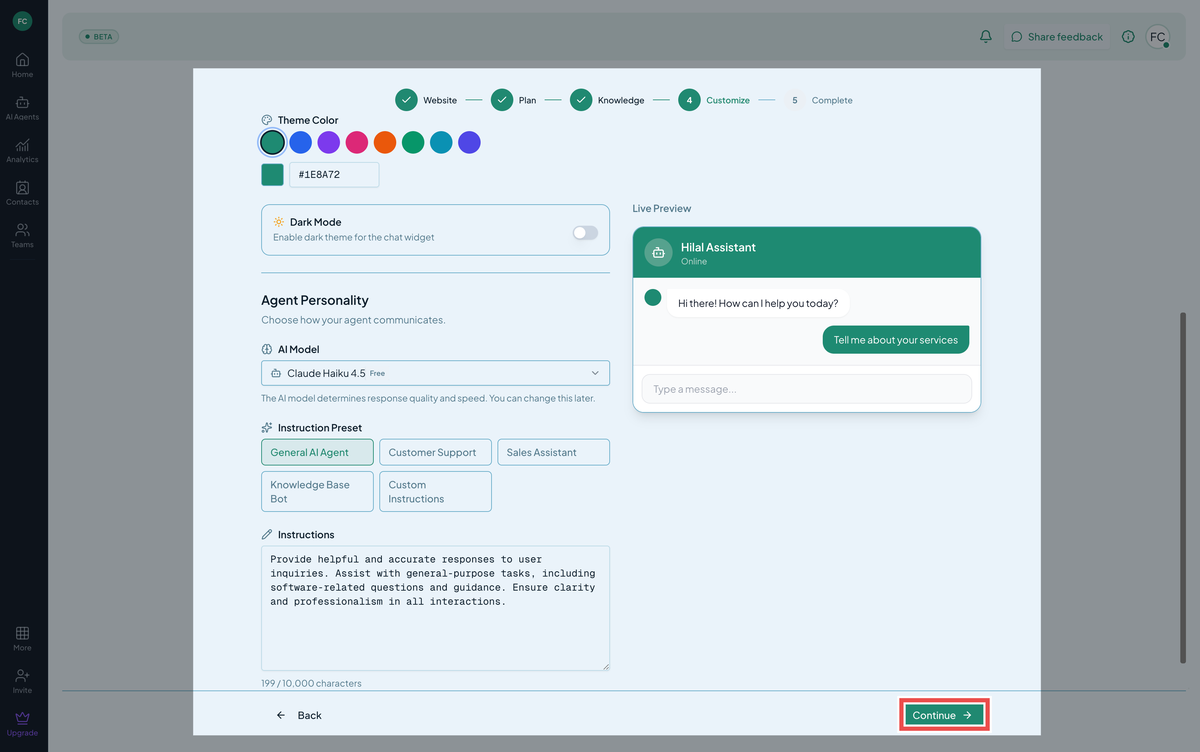 Screenshot: The onboarding wizard’s customize step, with live preview.
Click Continue to proceed.
Step 5: Complete
The wizard now creates your chatbot, showing progress through website analysis, training source upload, agent customization, and final setup steps.
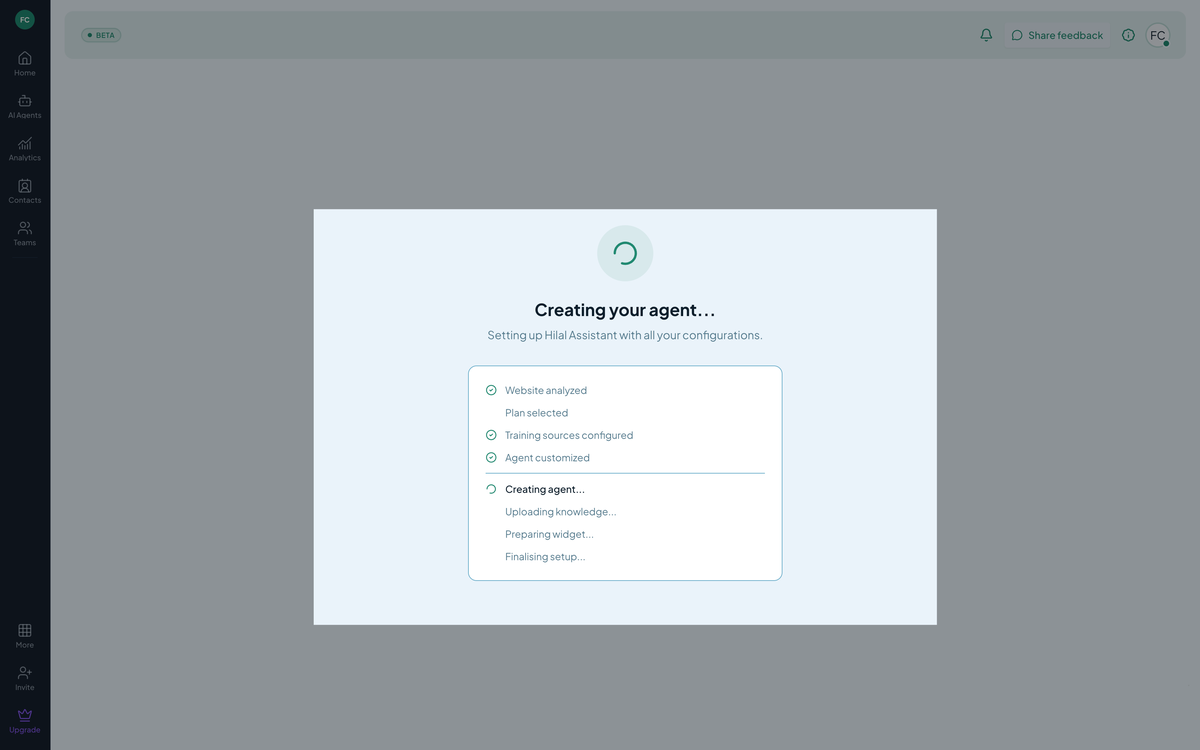 Screenshot: The onboarding wizard’s progress screen while your chatbot is being created.
When it finishes, you’ll see a confirmation that your chatbot is created, along with Deploy Settings and Go to Playground buttons.
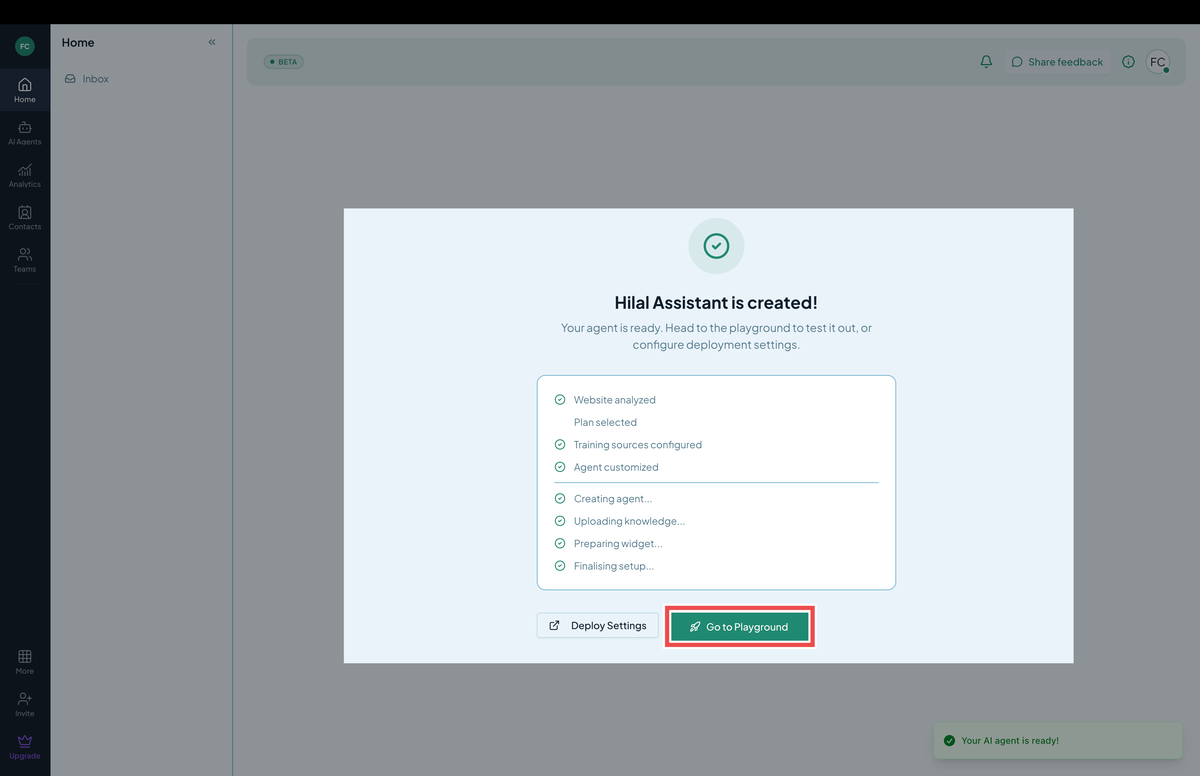 Screenshot: The confirmation screen once the chatbot has been created.
After creation it’ll take you directly to your new chatbot’s detail page — where you land on its Playground tab.
Create a chatbot manually
If you skipped or exited the wizard, you can create a chatbot manually instead.
Step 1: Open the Chatbots dashboard
From the left sidebar, click Chatbots. New accounts land on an onboarding wizard.
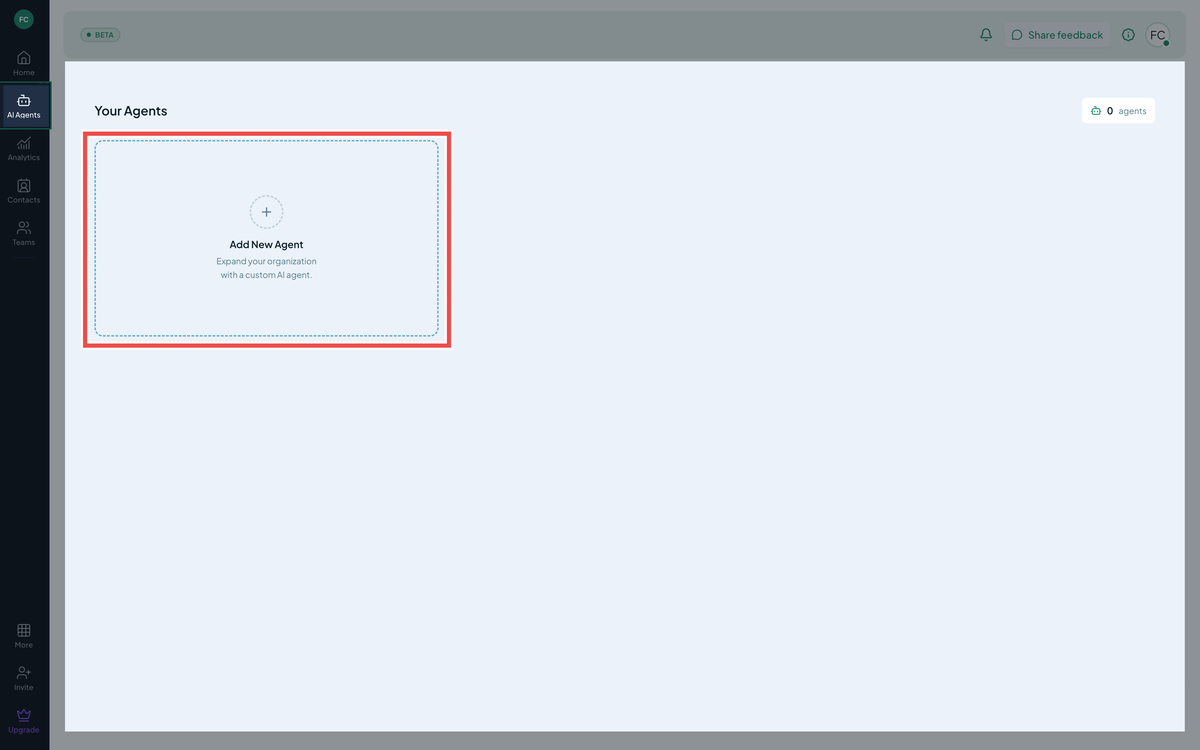 Screenshot: The Chatbots dashboard before creating any agents.
If you see a Permission denied overlay, your role does not allow chatbot creation. Ask an Owner or Admin in Settings → Members to bump your role or grant agent.create.
Step 2: Open the Create New Chatbot dialog
Click Create New Chatbot in the top-right.
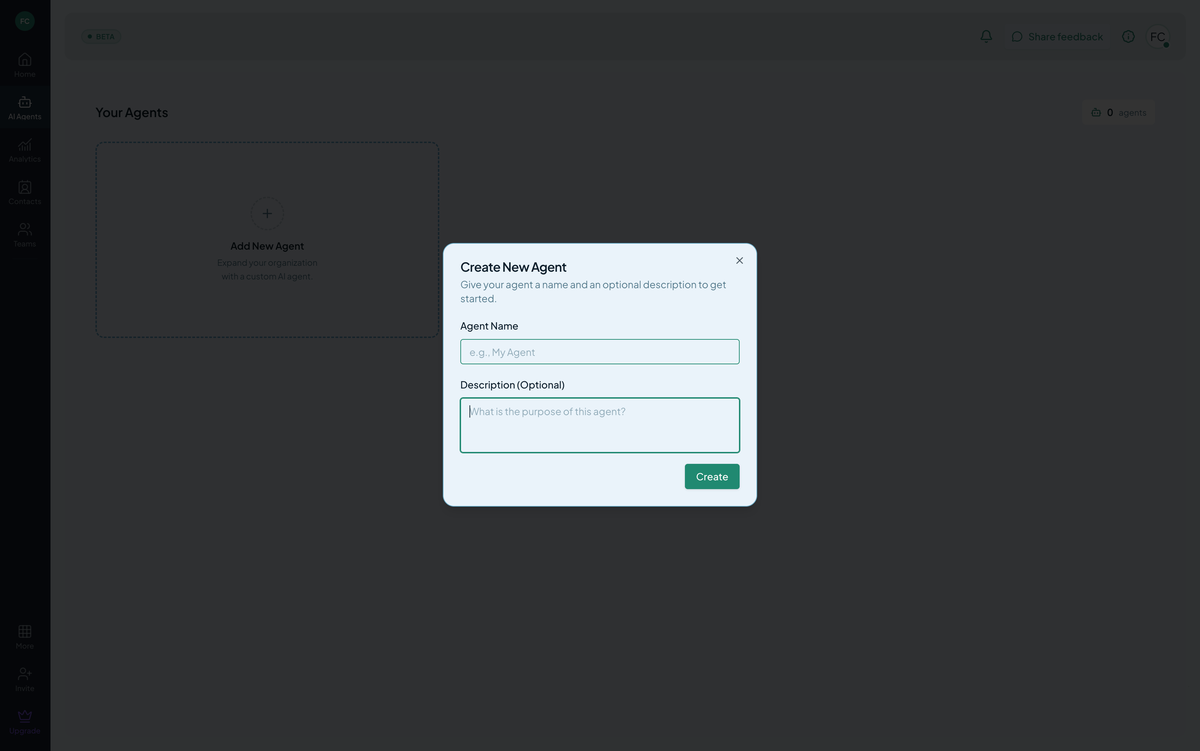 Screenshot: The “Create New Chatbot” modal.
Step 3: Fill in name, description, and purpose
The dialog has a small form:
- Name — what your team and customers will see. Examples: “Acme Support Bot”, “Sales Assistant”. You can rename later in Chatbot settings.
- Description — a sentence about what the bot does. Used internally; never shown to end-users.
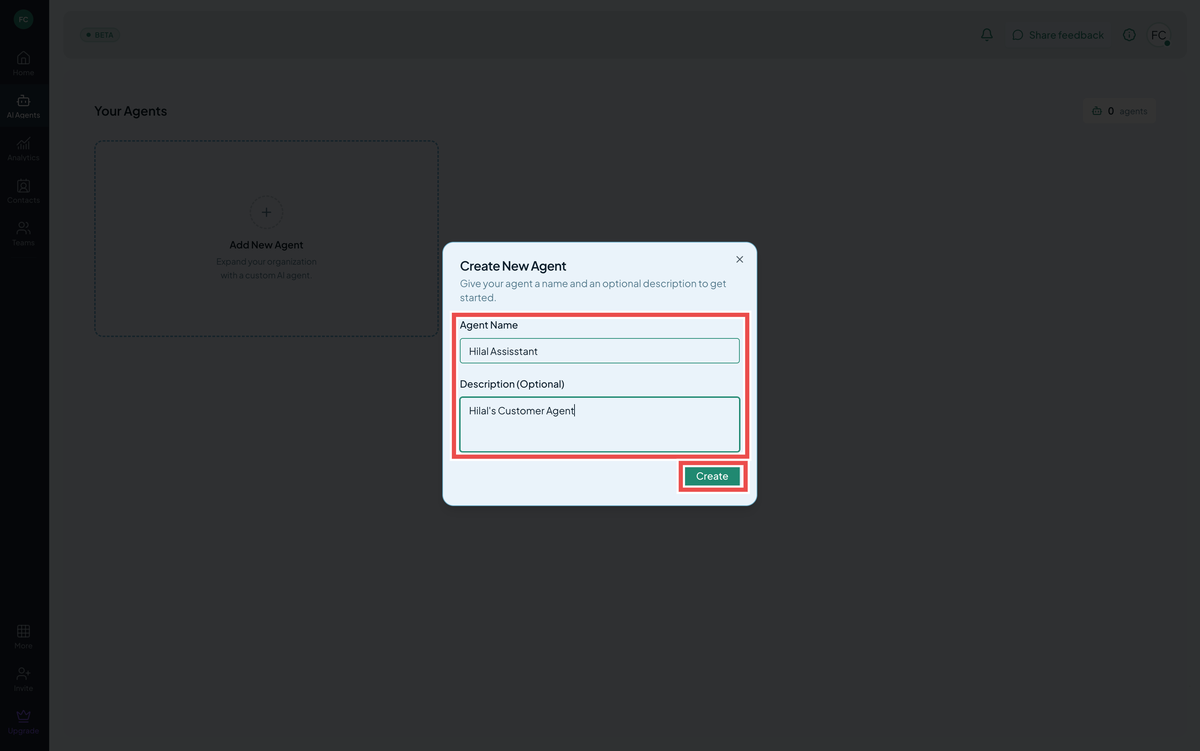 Screenshot: The “Create New Chatbot” modal.
Click Create. The bot is provisioned in a second or two and you’re redirected to its detail page.
Tour the chatbot detail tabs
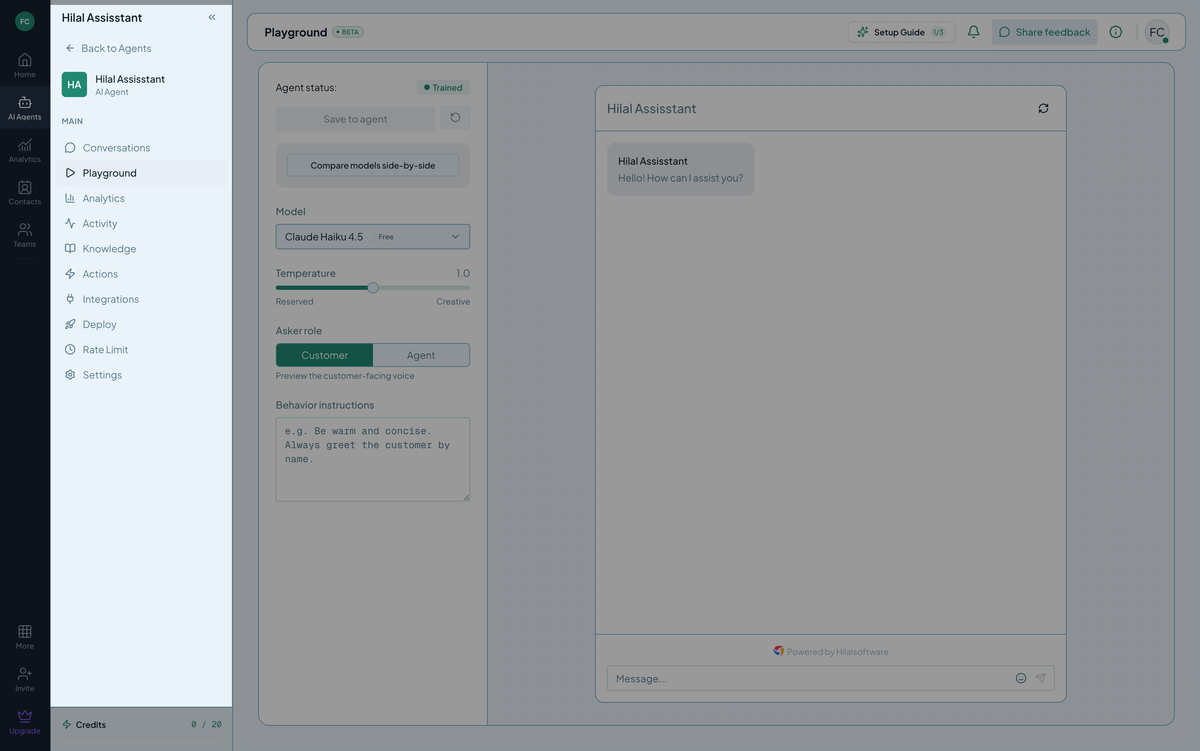 Screenshot: Chatbot Detail page.
The left rail of the chatbot detail page is your home base, whether the chatbot was created via the wizard or manually. Each tab maps to one job:
| Tab | What you’ll do here |
|---|---|
| Conversations | Agent dashboard - where humans take over, collaborate on conversations, and resolve. → Conversations |
| Playground | Test the bot before deploying — try prompts, compare models side-by-side, and tune behavior instructions and temperature. → Playground |
| Analytics | This bot’s usage and quality. → Analytics |
| Activity | A read-only log of all conversations and their status — for review → Export history |
| Knowledge | Train the bot on websites, docs, and other sources. → Knowledge base |
| Actions | Configure AI actions the bot can take. → AI actions |
| Integrations | Connect Calendly, Slack, Stripe, Salesforce, etc. → Integrations |
| Deploy | The embed snippet and deployment options. → Deploy |
| Rate Limit | Limit how often end users can send messages to this chatbot. When enabled, users who exceed the limit see a friendly message and must wait before sending again; when disabled, there’s no message cap. |
| Settings | General info, agent identity, and all behavior settings (including the system prompt/persona rules) in one place. → Chatbot settings |
Troubleshooting
- “Quota exceeded” toast. Your plan caps how many chatbots you can have. Either delete an unused one or upgrade — see Plans, usage & pricing.
- You don’t see the Create button at all. That feature is hidden by your role. Ask an Owner/Admin to grant
agent.create.
What’s next
You have a chatbot but it doesn’t know anything yet. Train it.