Members & invitations
The Members page is where you onboard new teammates and manage their access.
In this guide:
- Open Members
- Invite a teammate
- Resend or revoke an invite
- Change a member’s role
- Remove a member
Step 1: Open Members
Settings → Members. You see two tables:
- Active members — currently part of the organization.
- Pending invitations — invited but haven’t accepted yet.
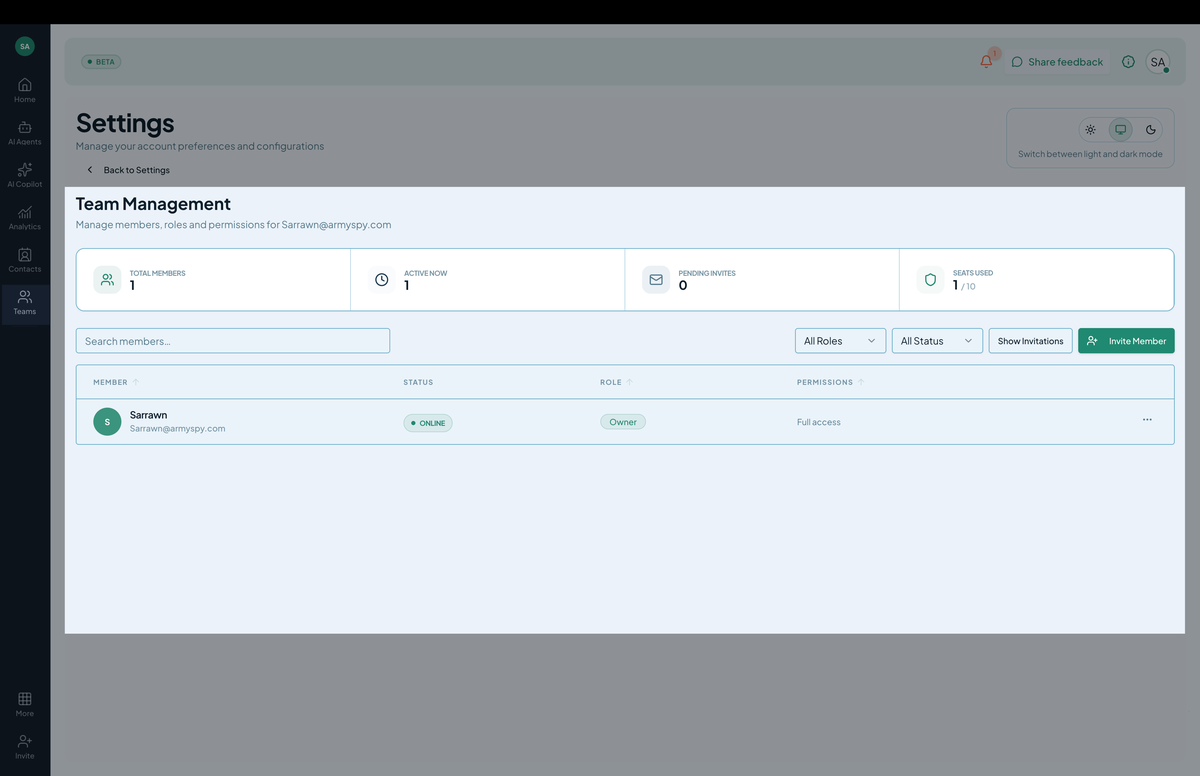 Screenshot: The Members table with role and last-active columns.
Step 2: Invite a teammate
Click Invite member. Fill in:
- Email — the address to send the invite to.
- Role — Owner / Admin / Member. (See Roles & permissions for what each can do.)
- Per-chatbot permissions (optional) — restrict the invitee to specific chatbots before they even arrive. Useful for clients in agency setups.
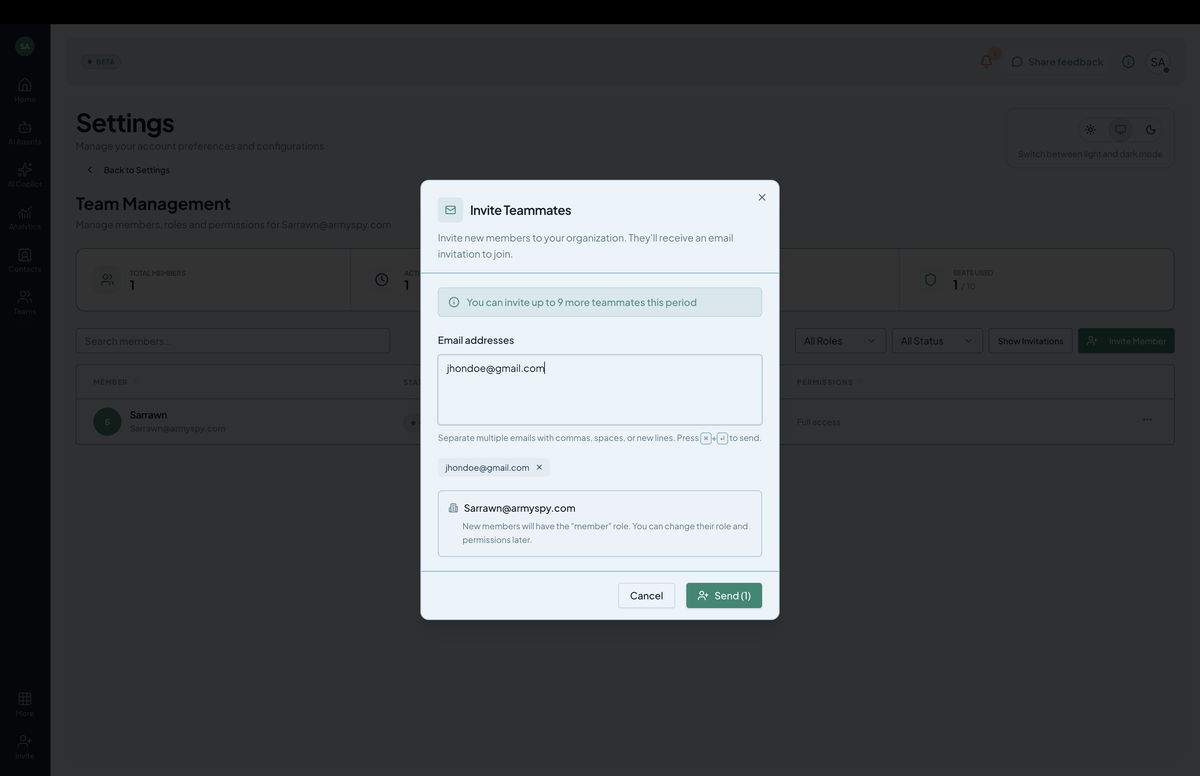 Screenshot: The invite-member modal with email, role, and per-chatbot scoping.
Click Send. The invitee receives an email with a sign-up / sign-in link.
Step 3: Manage pending invitations
Pending invitations table:
- Resend — re-send the invite email.
- Revoke — cancel the invitation. The link in the previously sent email becomes invalid.
Invitations expire after 7 days; revoked or expired invitations need a fresh invite.
Step 4: Change a member’s role
In the Active members table, click a member’s role pill → pick a different role. Changes apply immediately. Members are notified by email if their role changes.
Step 5: Remove a member
Click the trash icon on a member’s row. Confirm. The member loses access immediately:
- Their assigned conversations are unassigned and return to the queue.
- Per-chatbot permissions are revoked.
- Audit-log entries about their actions remain.
You can re-invite them later if needed.
Member-level vs. chatbot-level permissions
Two layers stack:
- Org role — the broad permission set (Owner / Admin / Member).
- Per-chatbot permissions — narrow access on specific bots.
For details, see Roles & permissions.
SSO and SCIM
For organizations on Enterprise plans:
- SSO: SAML or OIDC for sign-in.
- SCIM: provision and de-provision members automatically from your IdP (Okta, Azure AD, Google Workspace).
Configure in Settings → SSO / SCIM. With SCIM, the invite flow is handled by your IdP — adds and removes happen automatically when you make changes there.
Permissions
members.read— see the list.members.invite— invite new members.members.update— change roles.members.remove— remove members.
By default, Owners and Admins have all of these.