Custom
Overview
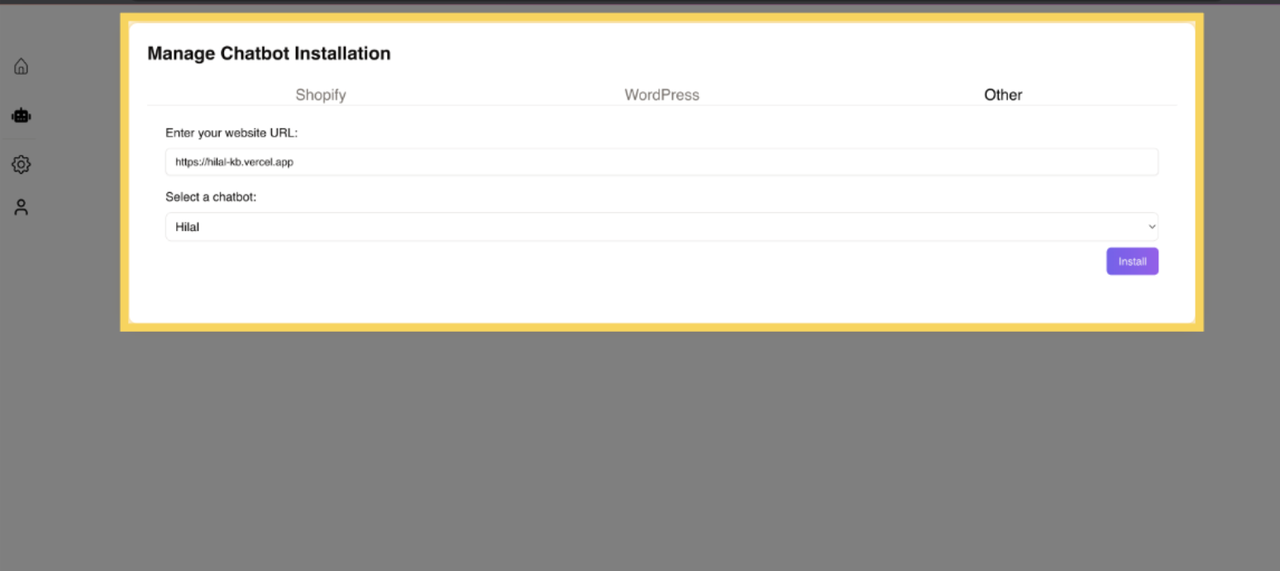
In the installation menu, you will see different platform options:
Shopify
WordPress
Other Websites
If you are installing on Shopify or WordPress, you can either:
Use the dedicated Shopify/WordPress installation method.
OR use the Other installation method (recommended for flexibility).
Click on “Other” if you are installing the chatbot on a custom website.
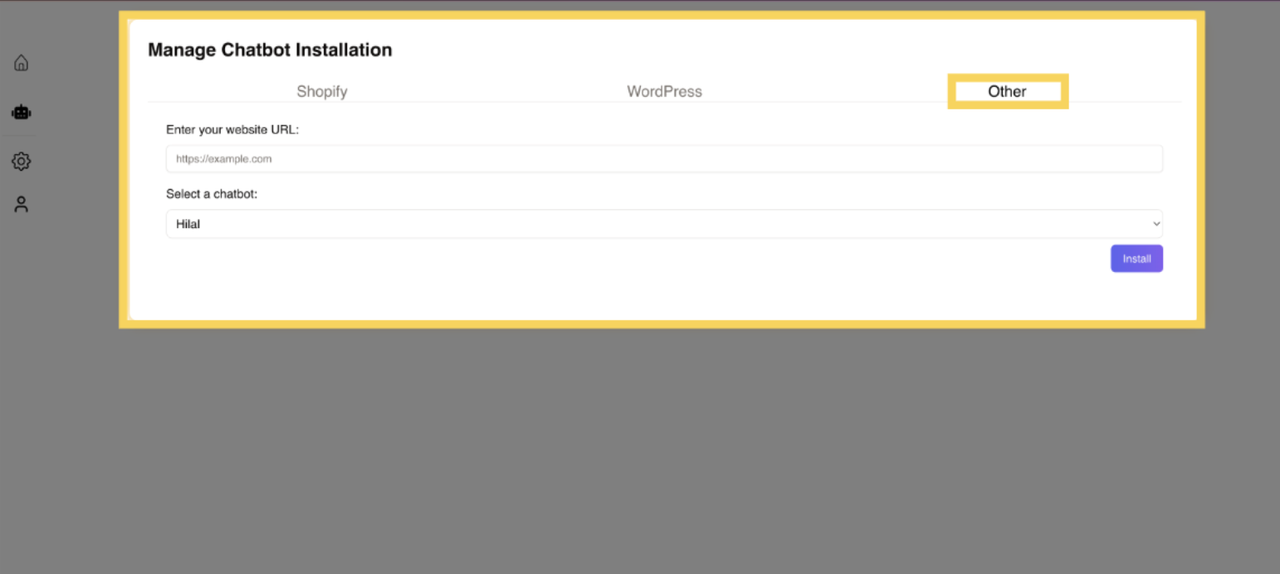
Enter Your Website URL
In the provided field, enter the URL of your website where you want to install the chatbot.
For Shopify: Enter your Shopify store’s URL.
For WordPress: Enter your WordPress website’s URL.
For other websites: Enter the domain of your custom website.
After entering the URL, proceed to the next step.
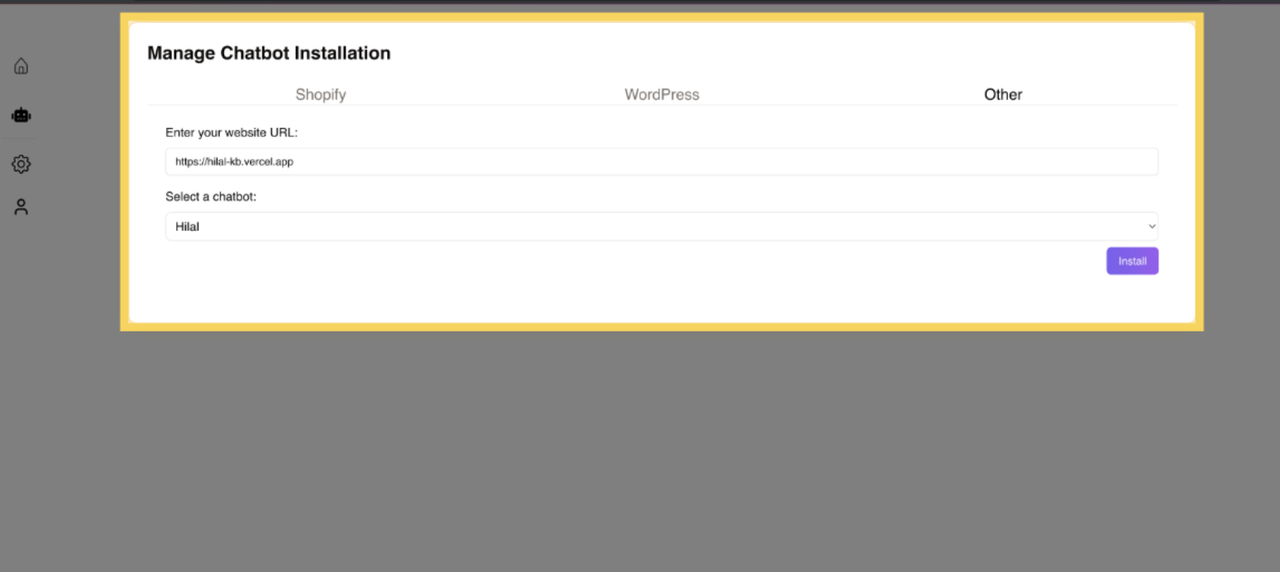
Selecting the Chatbot Type
Choose the type of chatbot you want to install from the available options.
Select a chatbot that best suits your business needs (e.g., support chatbot, sales chatbot, or custom AI assistant).
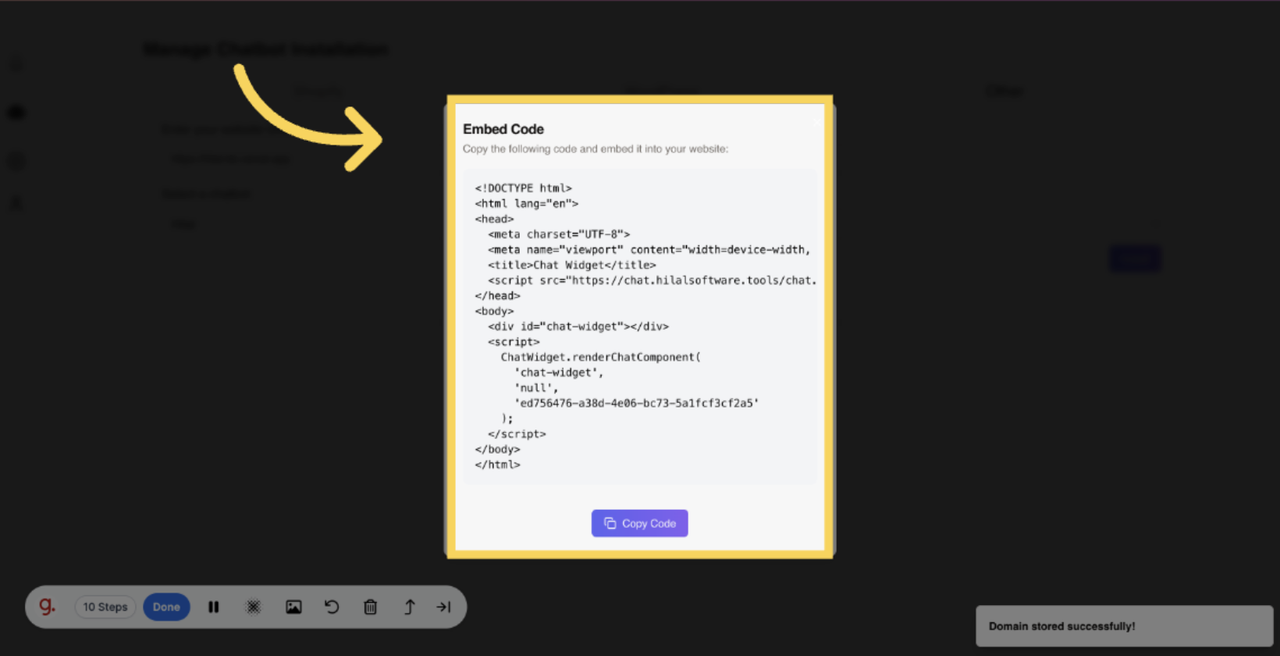
Installing the Chatbot
Click the Install button to generate the installation code snippet.
A code snippet will be provided that needs to be embedded into your website.
Embedding the Code into Your Website
A unique embed code will be provided for your website and copy the code snippet for integration.
Open your website’s source code or CMS editor.
Paste the copied chatbot code snippet into the
<head>or<body>section of your website’s HTML file.Save and publish the changes to your website.
Verifying the Installation
Refresh your website and navigate to the chatbot section.
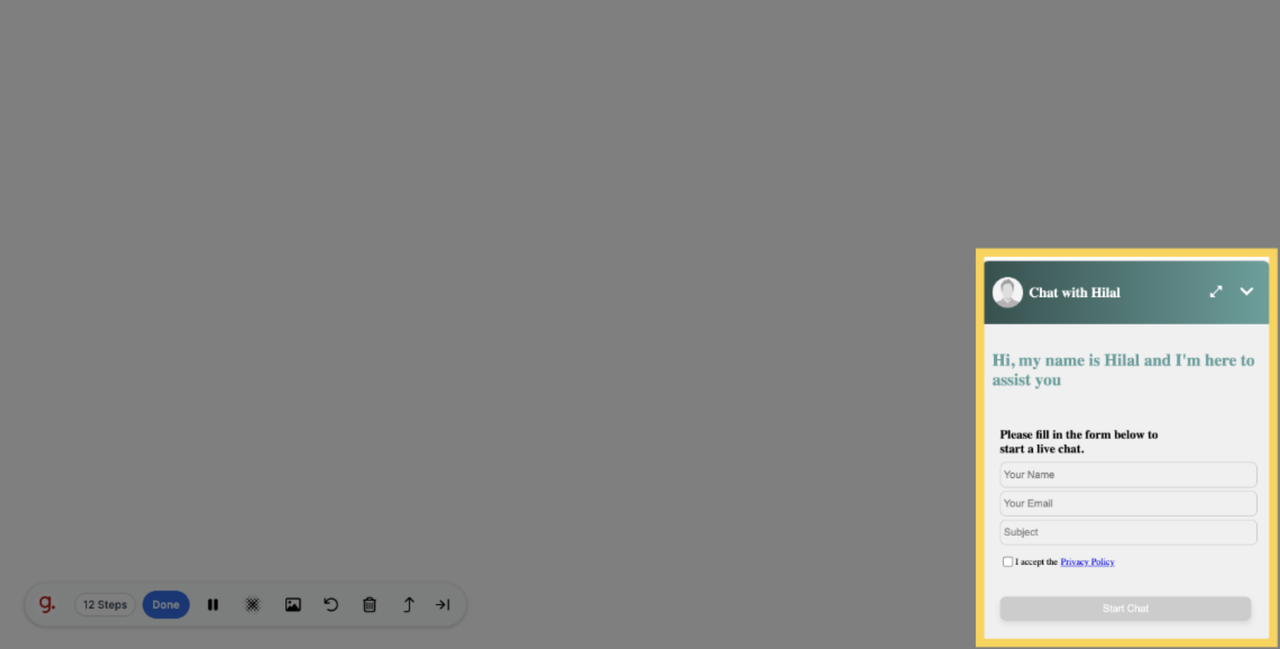
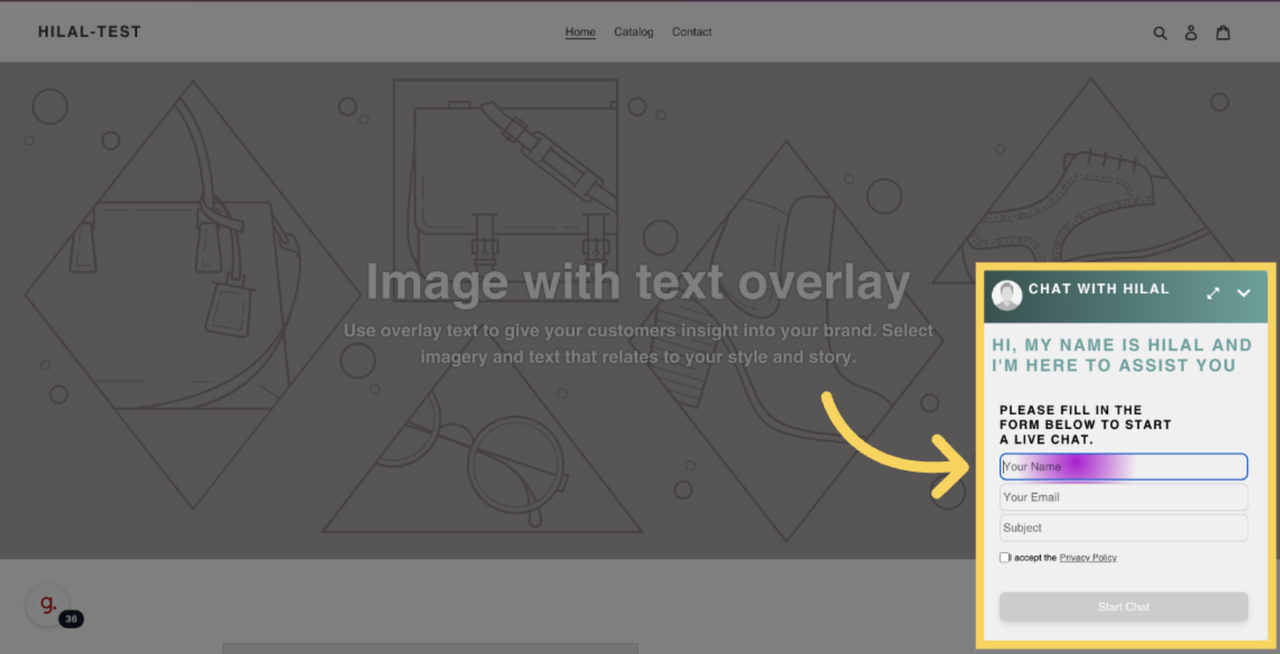
Ensure that the chatbot is visible and functioning correctly.
Test the chatbot by initiating a conversation to verify its response.