WordPress
Once the chatbot is created and customized, the next step is to install it on your website. Depending on your platform, you can choose either Shopify or WordPress or Custom for the integration.
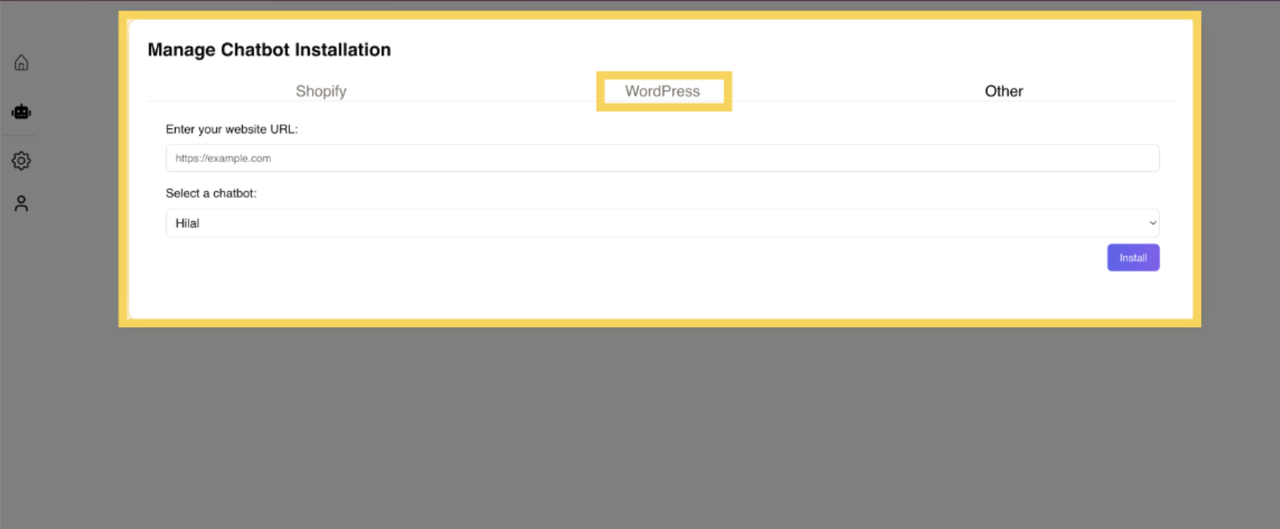
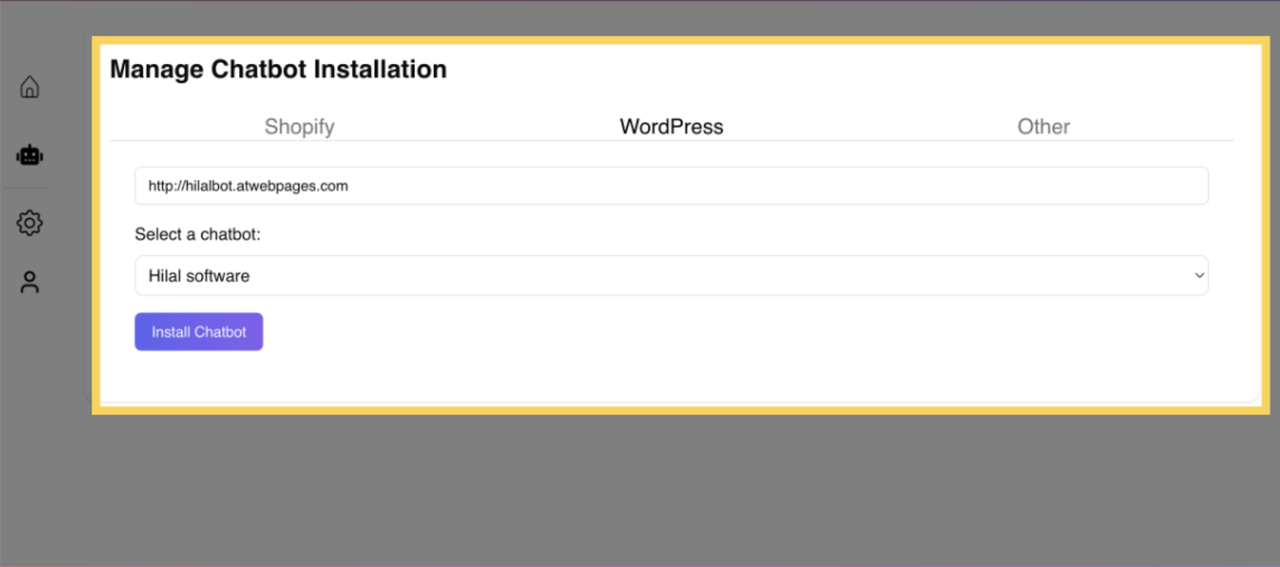
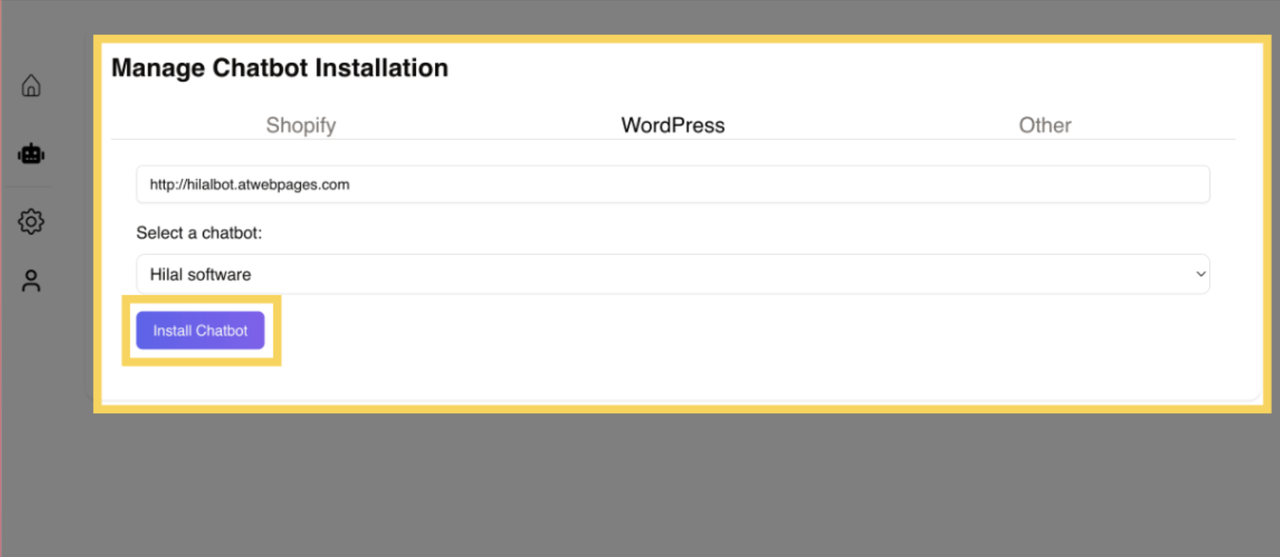
After finalizing your chatbot setup, you will be redirected to a page that manages the installation process for WordPress. This page allows you to configure and deploy the chatbot to your website.
Store Domain
On the installation page, you’ll be prompted to enter your Shopify store domain. This is the URL of your store where the chatbot will be integrated.
After entering the domain, click Connect. This will initiate the connection between your chatbot and the Wordpress store.
Add Plugin
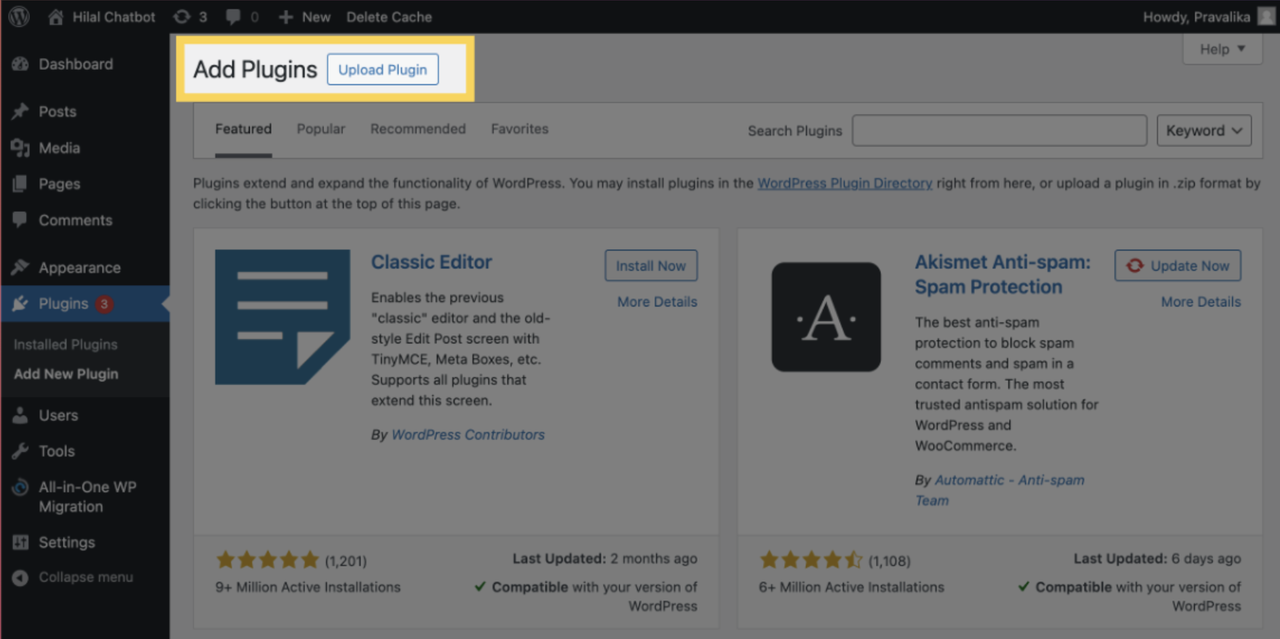
- Open your WordPress website dashboard and click on the Add New Plugin to upload the Hilal Chatbot plugin.
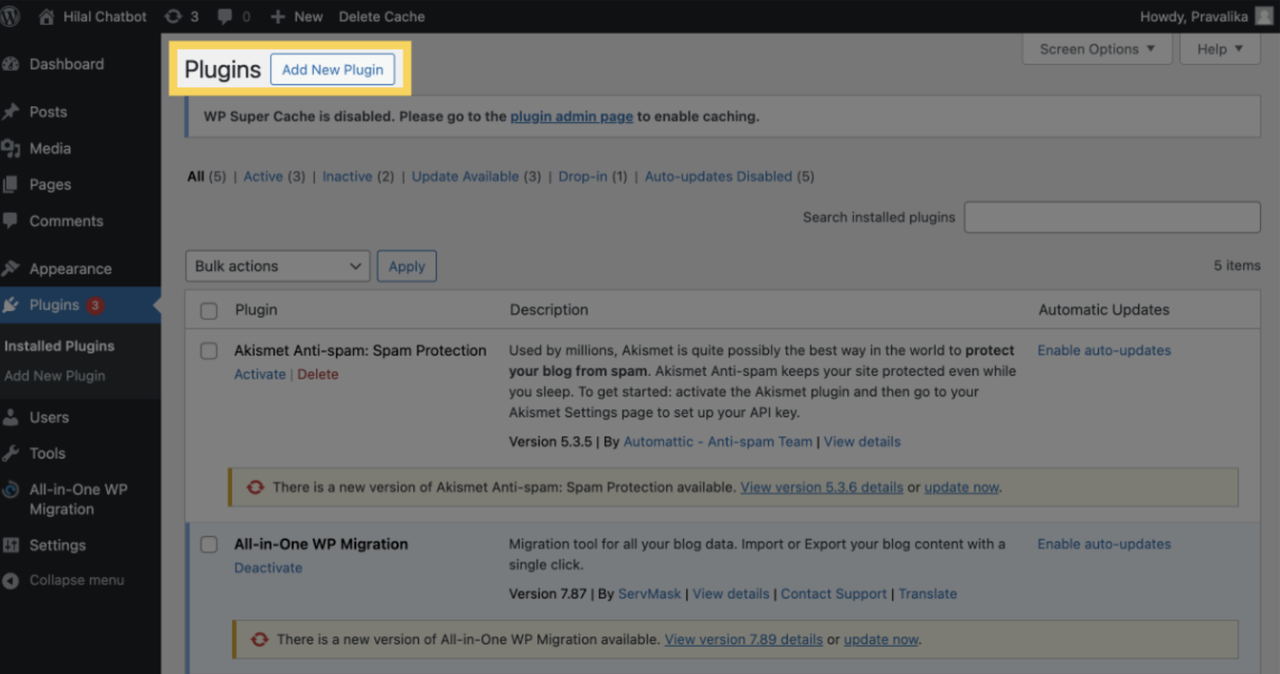
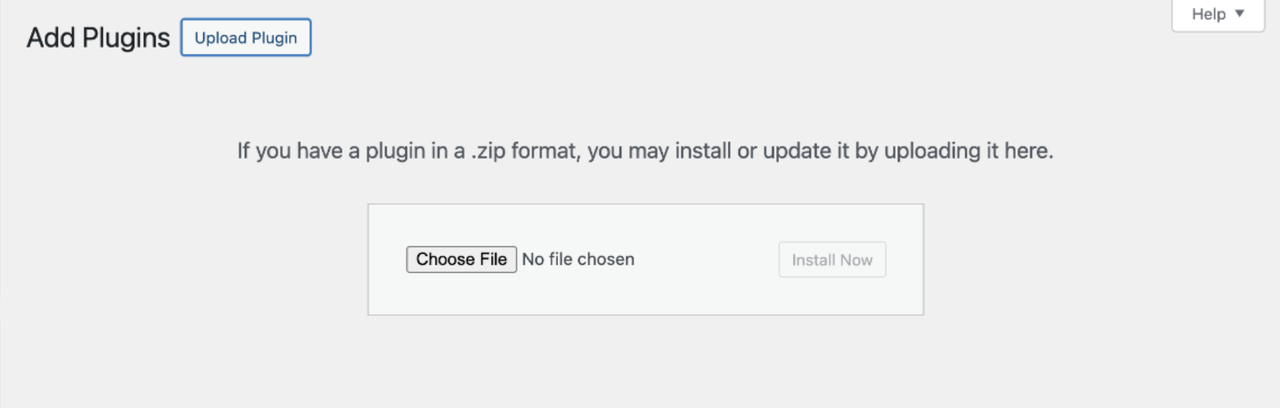
- Now Click on the Upload Plugin to upload a .zip file of the Hilal Chatbot plugin to install.
Activate the Plugin
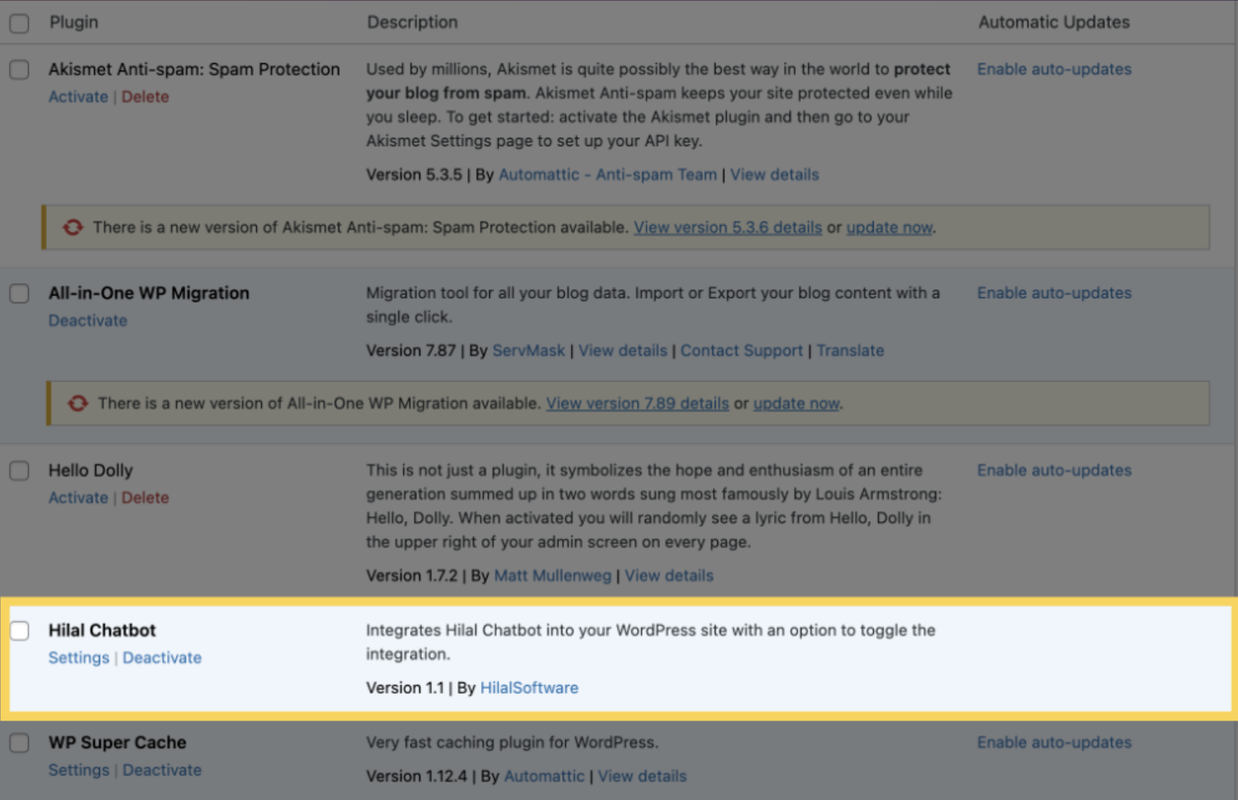
Once the plugin is added to the website. Navigate to the WordPress Plugin section, locate the Hilal Chatbot plugin in the list of installed plugins.
Click on Settings beneath the Hilal Chatbot plugin name to access its configuration panel.
Enable the chatbot and click on the connect, which allows you to link the plugin to your chatbot service.

Installation of Chatbot
Navigate back to the manage chatbot installation page and click install chatbot to final connection process. If the integration is successful, a confirmation message stating Installation Successful will appear at the bottom of the page. The chatbot will now be live and visible on your WordPress store.
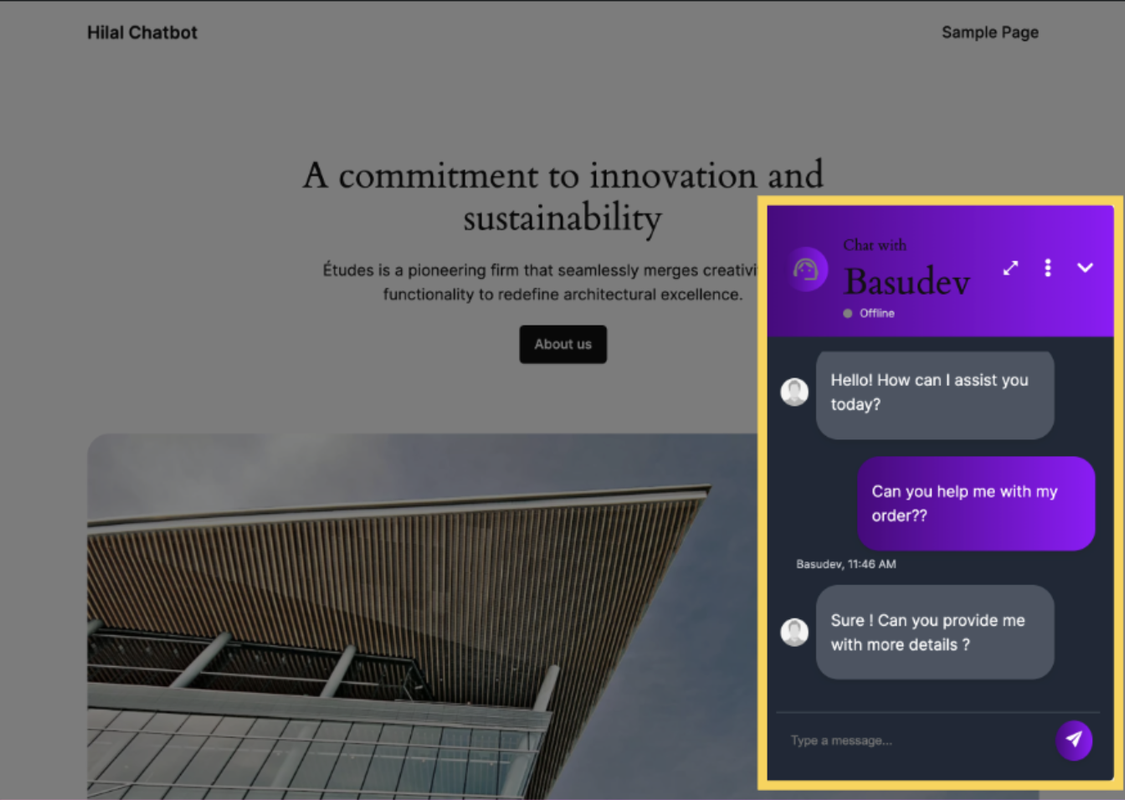
Viewing Chatbot on Store
Once installed, you can visit your store’s front end to verify that the chatbot is functioning as expected. The chatbot will be visible to customers, ready to assist with queries, product recommendations, and more.