Email Inbox Setup
The Email Inbox integration allows you to manage customer emails directly inside the Hilal platform. It brings all email conversations between customers and agents into a single inbox, making it easier to respond, track, and manage support communication without switching tools. This guide walks you through:
- Creating an Email Inbox
- Configuring email forwarding
- Getting your inbox ready for usage
Overview
Once an Email Inbox is set up:
- Customers can send emails to your support address
- Agents can reply directly from the Hilal Inbox
- All conversations are visible in one place
- Replies automatically reach customers via email
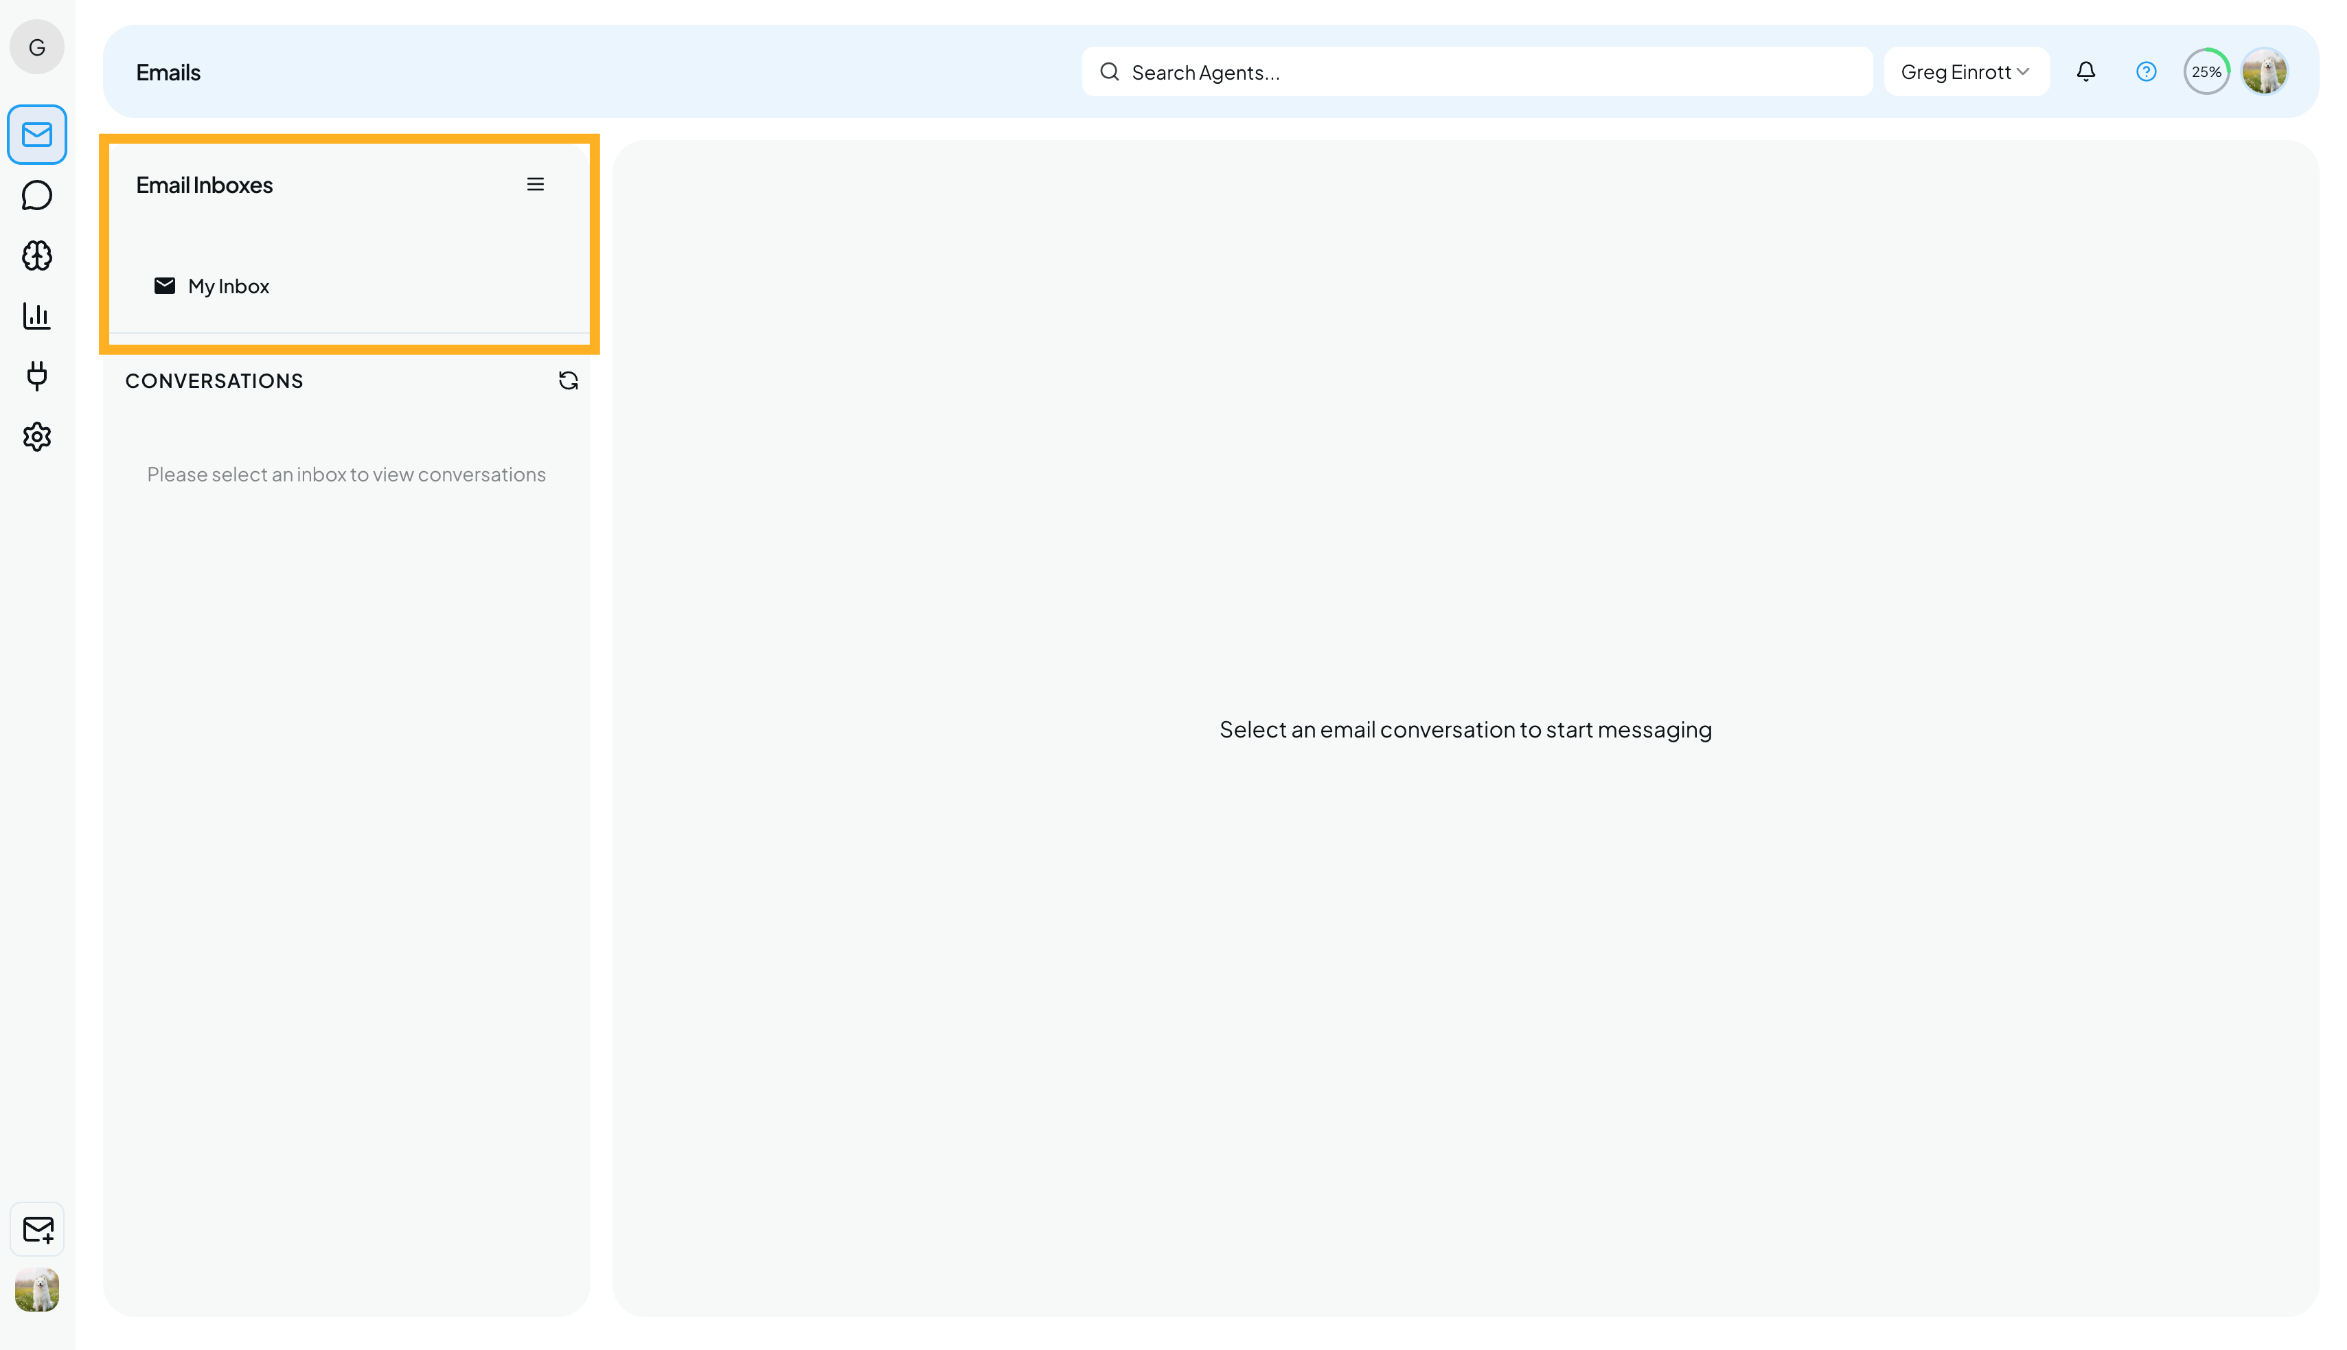
Accessing the Email Inbox
- Navigate to the Inbox section from the main dashboard
- Select Email Inbox
Here, you’ll see all existing email conversations between customers and agents.
If you haven’t created an inbox yet, you’ll be prompted to create one.
Creating an Email Inbox
To create a new inbox:
- Click Create Inbox

- You’ll be redirected to the Create Email Inbox page
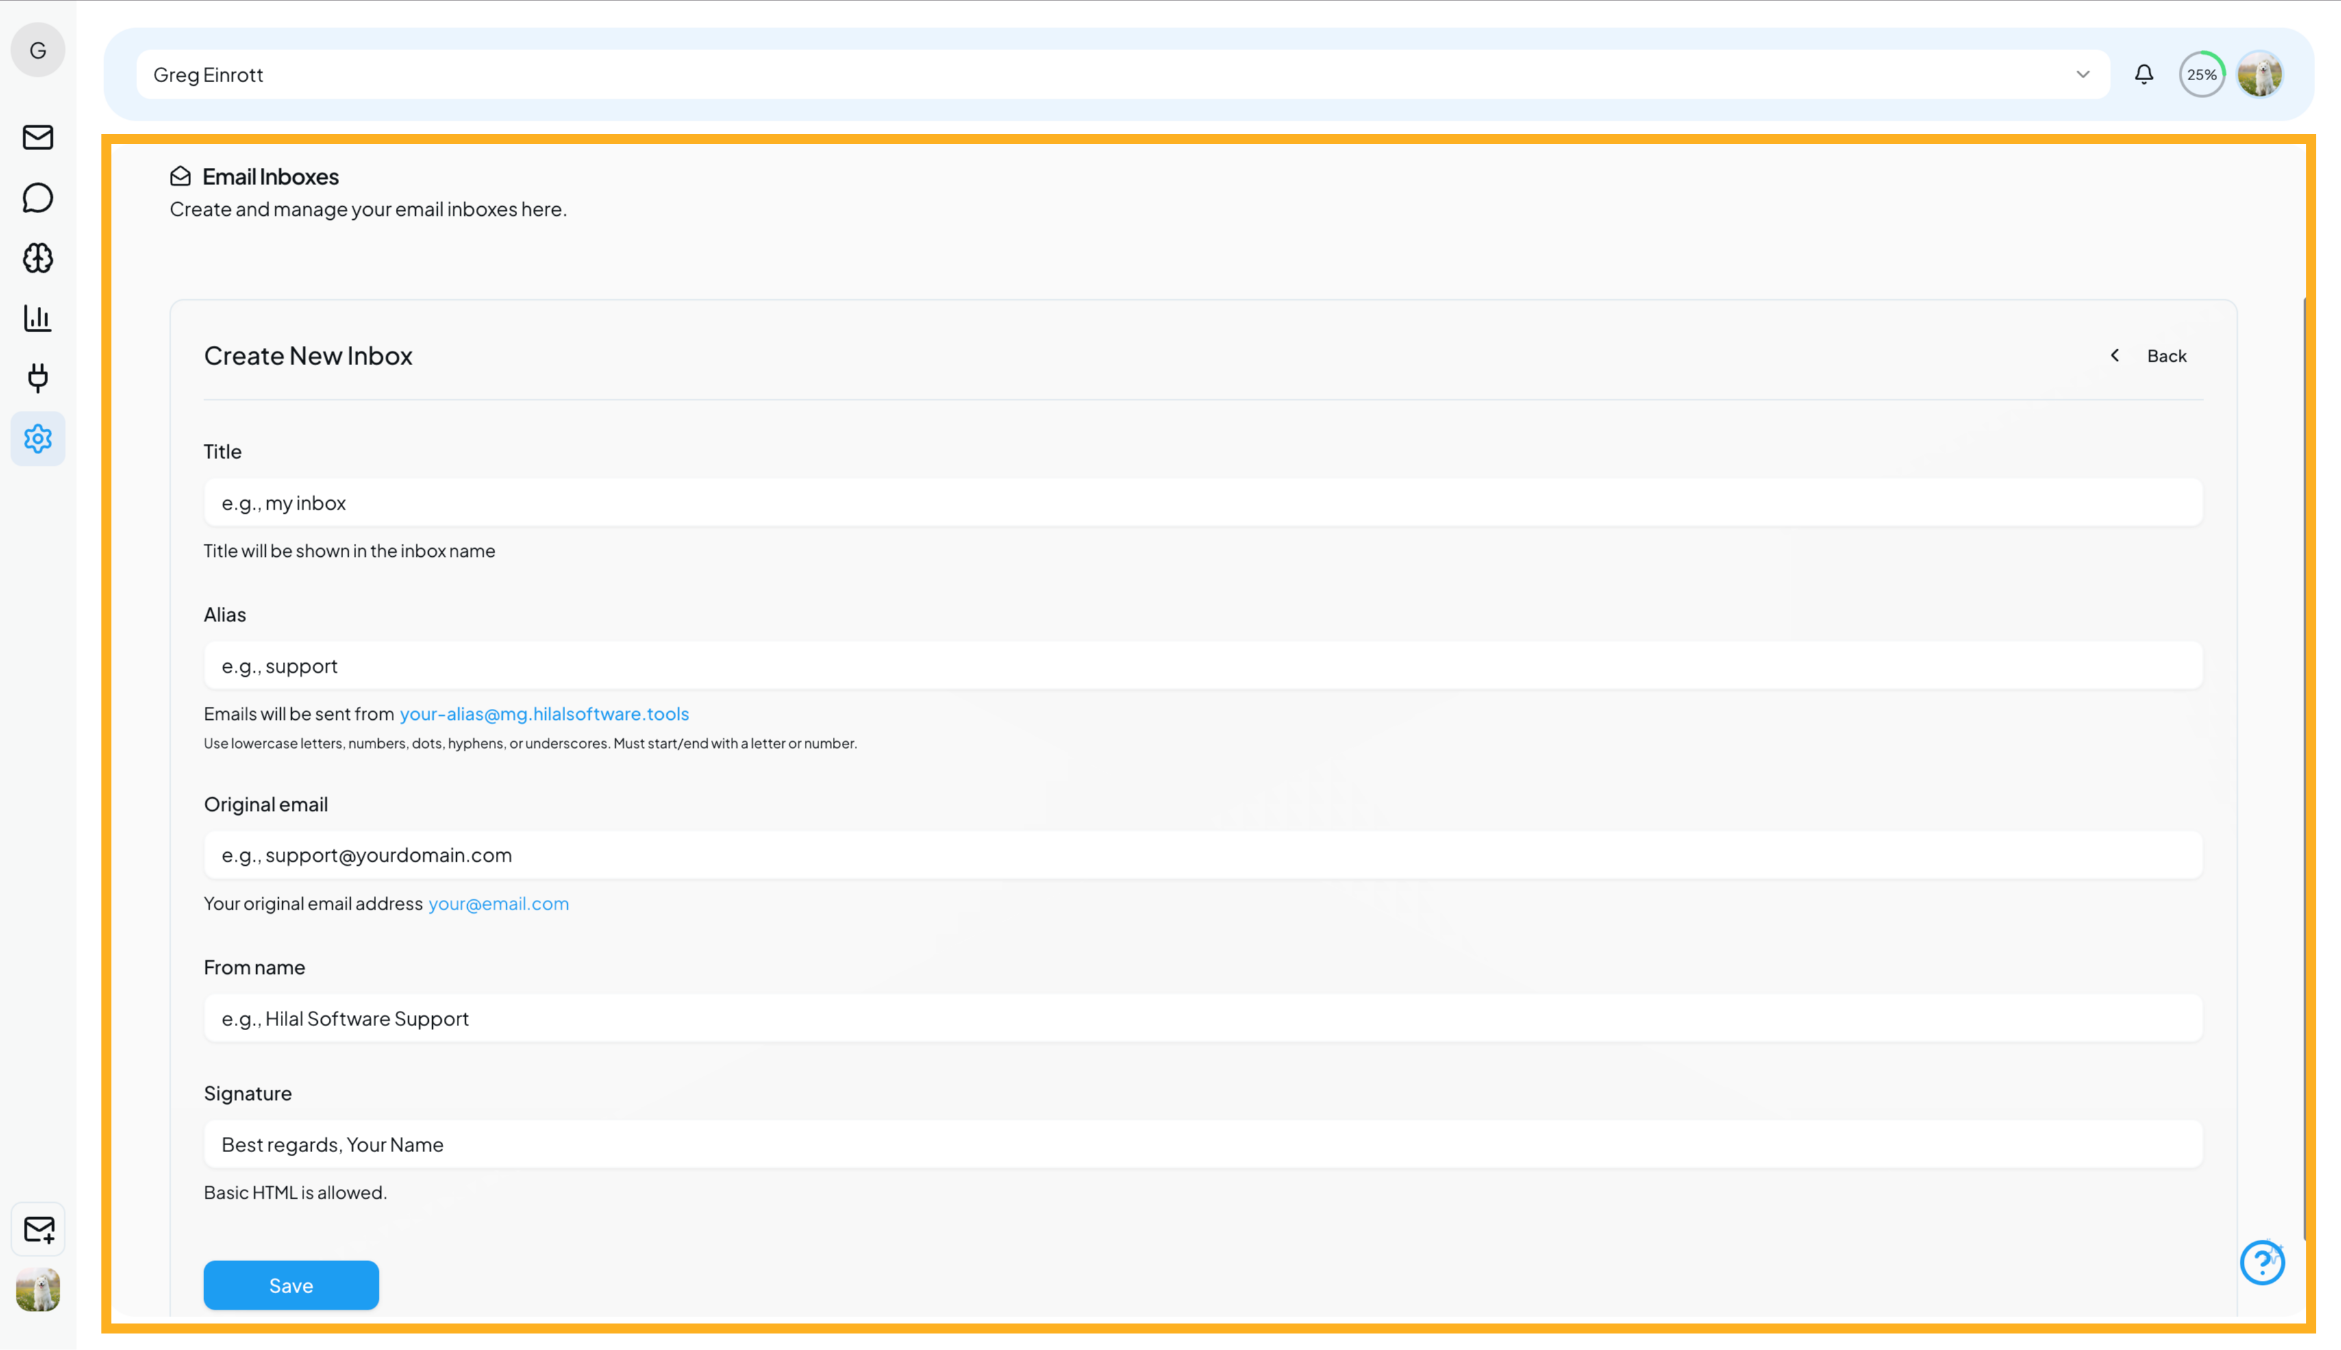
- Fill in the required details

Inbox Details Explained
Inbox Title
A name to identify your inbox internally (e.g., Support Inbox)Alias Email
The company email address used to send emails to customers
(Example: your-alias@mg.hilalsoftware.tools)Original Email Address
Your existing email address (e.g., Gmail) where customer emails are currently receivedSender Name
The name displayed to customers in outgoing emailsSignature
A default email signature (e.g., Best regards, Support Team)
This is automatically appended to every outgoing email, don’t need to type it each time.
- Click Save
Your Email Inbox is now created and visible in the Email Inbox list.
- Configure the Inbox
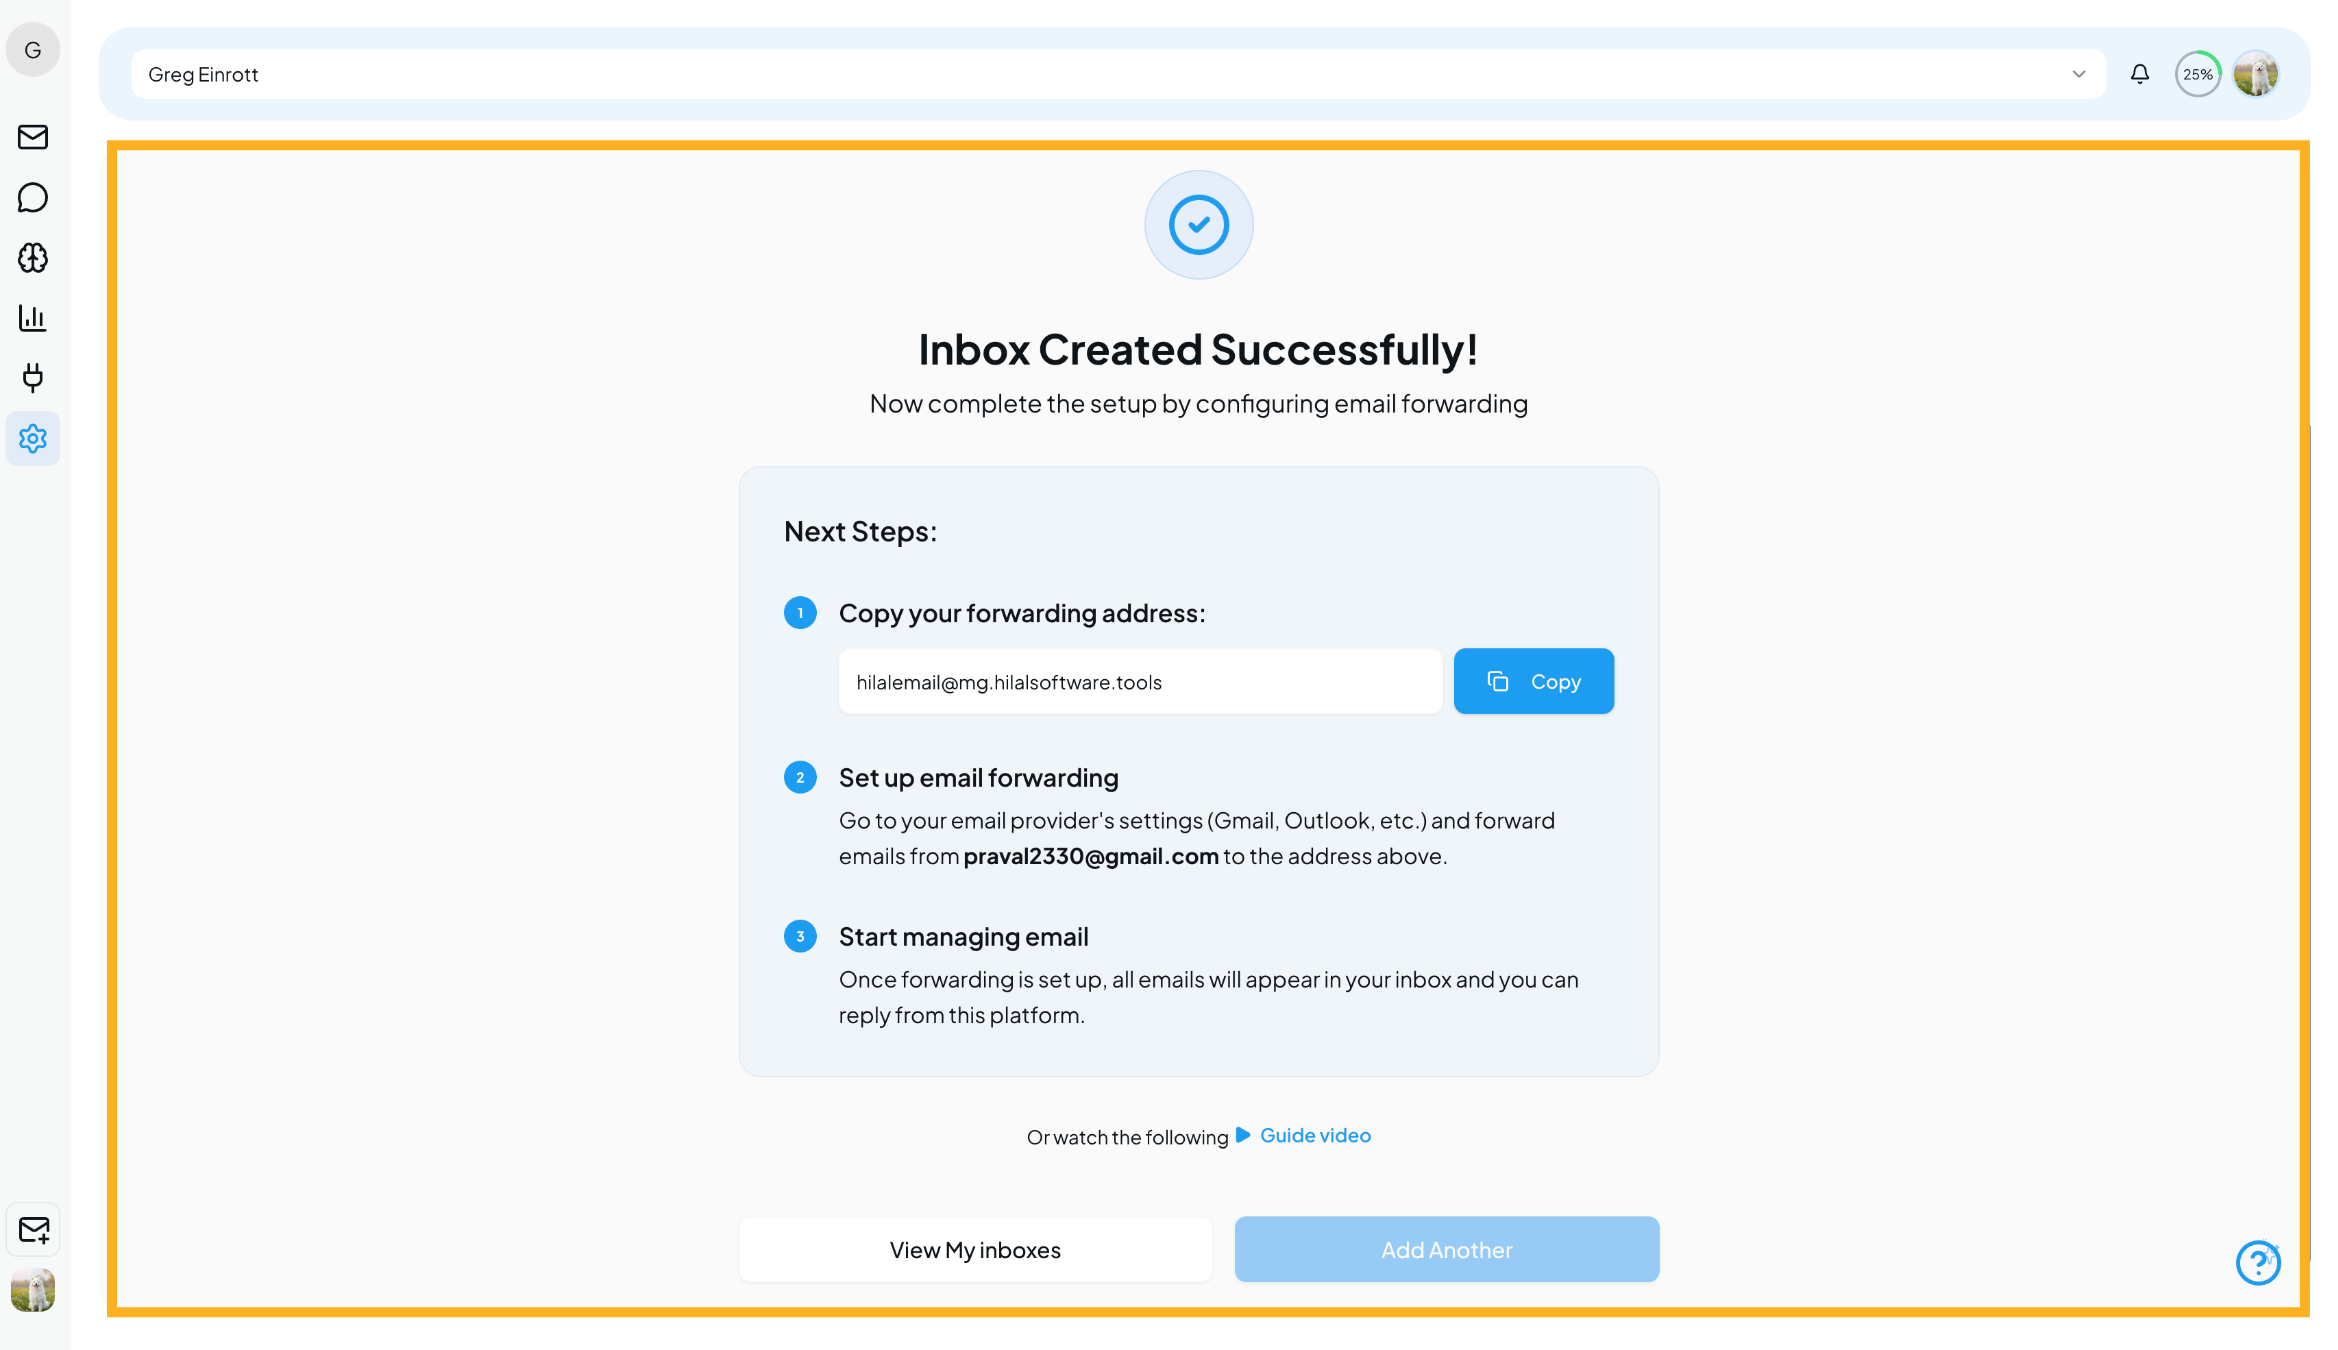
After creating the inbox, you’ll see a confirmation screen indicating that your inbox has been created successfully.
Click on the View My Inboxes to see the Email Inbox list.
This screen also provides step-by-step instructions to configure email forwarding, which is required to start receiving emails in Hilal.
Configuring the Inbox for Usage
Configuring the inbox is a mandatory step to ensure that incoming customer emails are properly forwarded to the Hilal platform. This setup connects your existing email provider with Hilal, enabling seamless email ingestion, conversation tracking, and agent replies directly from the platform.
Below is a demonstration video on how to create an email inbox and configure email forwarding end to end.
This configuration ensures all incoming emails appear as conversations in the Hilal Inbox.
Step 1: Add a Forwarding Address
- Open Gmail
- Click ⚙ Settings → See all settings
- Go to the Forwarding and POP/IMAP tab
- Click Add a forwarding address
- Paste the Alias Email generated in the Hilal application
- Click Next
Gmail will send a confirmation email to the alias email address.
Step 2: Verify the Forwarding Address
- Open the Hilal application
- Navigate to the Email Inbox
- Open the incoming confirmation email from Gmail
- Click the confirmation link inside the email
Once confirmed, your Gmail account is authorized to forward emails to the Hilal Email Inbox.
After verification:
- All incoming emails to your Gmail address will appear as conversations in the Hilal Inbox
- Agents can reply directly from the platform
- Customers will receive responses via email seamlessly
Your email inbox is now fully configured and ready for use.
Using the Email Inbox
After setup and configuration:
- Customers can send emails to your support address
- Emails appear in the Hilal Email Inbox
- Agents can reply directly from the platform
- Replies are sent back to customers via email
- Signatures and sender details are automatically applied
All conversations remain organized and accessible inside the Inbox.
Best Practices
- Use a dedicated support email for better organization
- Set a clear sender name so customers recognize your brand
- Keep your signature concise and professional
- Regularly monitor the inbox to avoid delayed responses
You’re All Set
Your Email Inbox is now fully configured and ready to use.
You can start handling customer conversations directly from Hilal—without switching between email tools.
For advanced capabilities like automation, routing, and analytics, explore the other Inbox and Integration features in the platform.