Campaigns
Overview
The Campaigns allows users to manage and automate their marketing campaigns efficiently. It provides three main functionalities:
- Create Automation - Users can create a custom automation path from scratch.
- Review Automation - Users can review previously created campaigns.
- Search Bar - A search functionality at the top allows users to search campaigns by name.
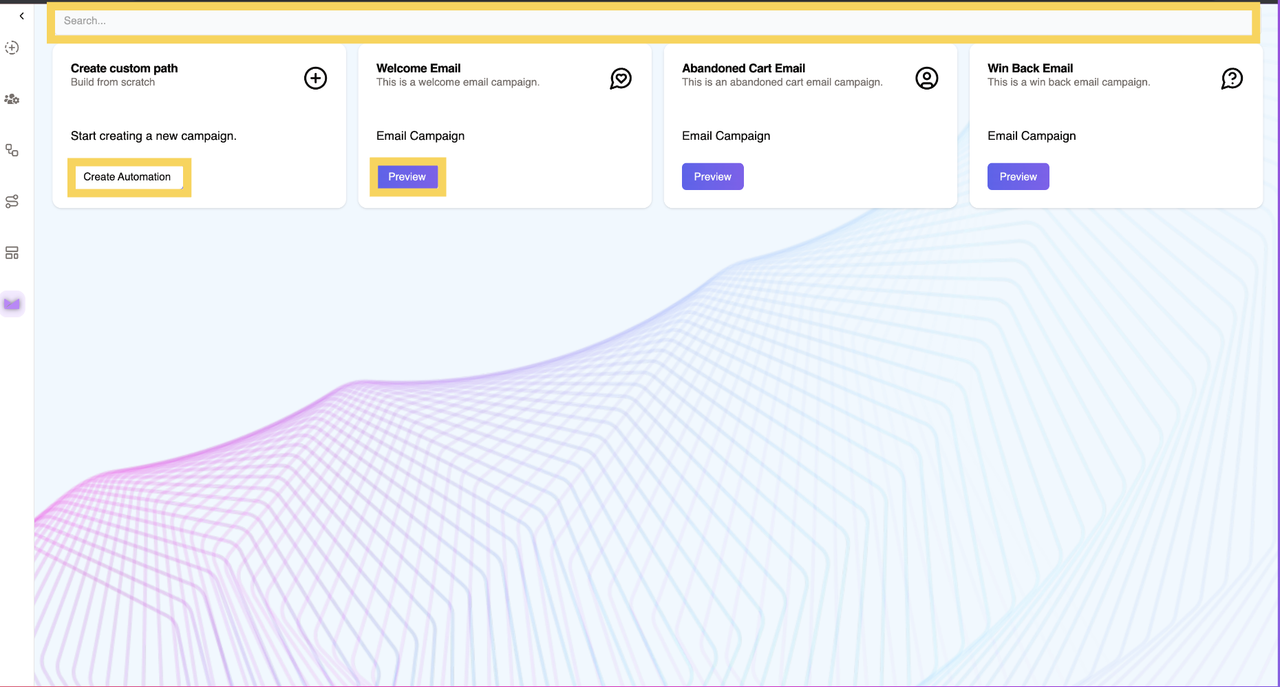
Create Automation
- Enables users to create a custom campaign path from scratch.
- Users can define the campaign’s audience, message, and review the details before sending.
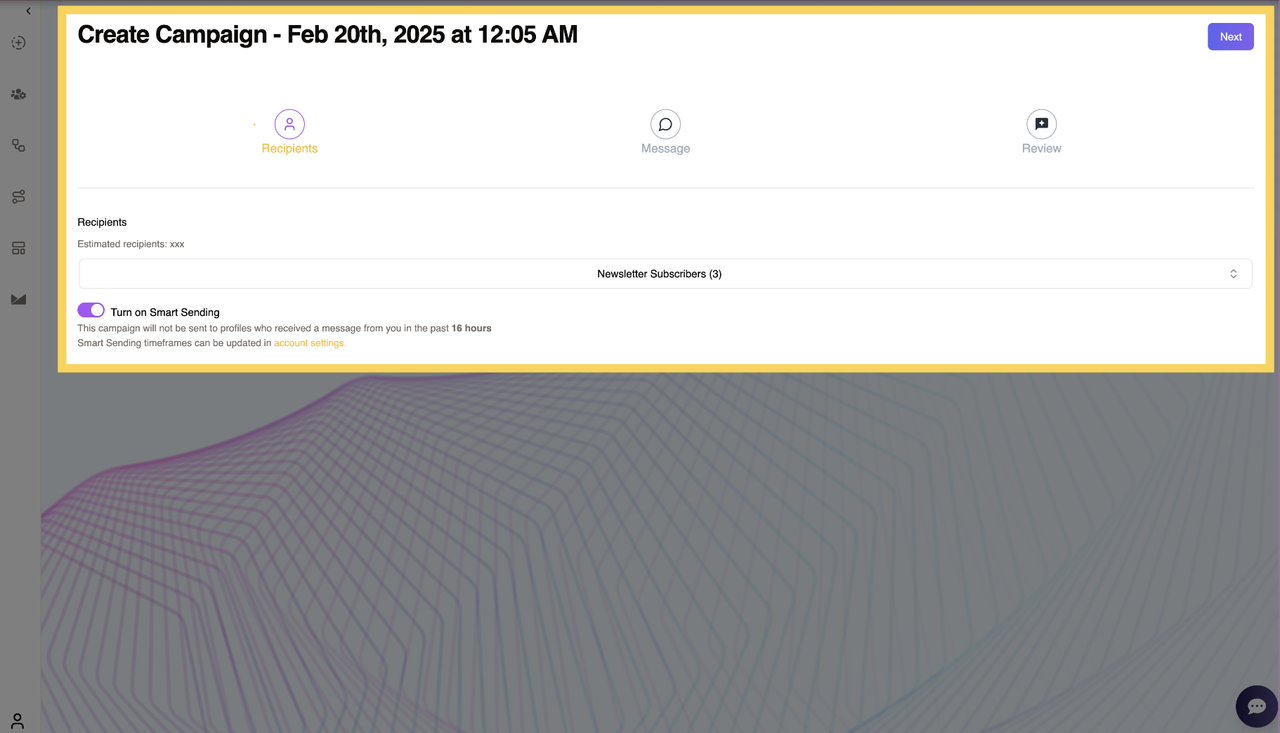
When users click “Create Automation”, they are directed to the Create Campaign Page, which consists of three sections:
1. Recipients
This section is used to define the target audience for the campaign.
Features in Recipients Section:
Select Audience Dropdown
- Allows users to choose the estimated number of recipients.
- Provides an estimate of the audience size based on the selected criteria.
Smart Sending Toggle
- When enabled, the system ensures that recipients who have received a message from the user in the past 16 hours will not receive another message.
- Note: The Smart Sending timeframes can be customized in Account Settings.
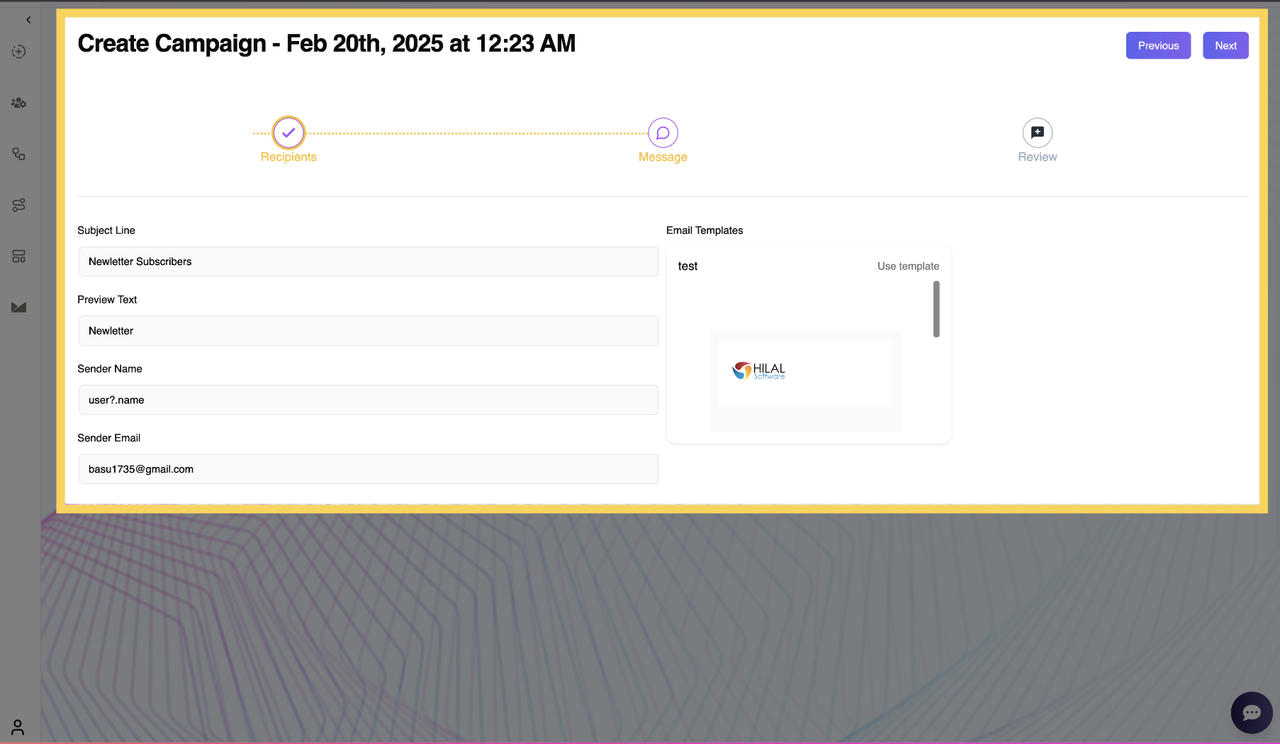
2. Message
This section allows users to define the content and appearance of their email campaign.
Features in Message Section:
Subject Line
- The primary subject of the email.
- This will be the first thing recipients see in their inbox.
Preview Text
- A short snippet of text that appears next to or below the subject line in most email clients.
- Provides additional context about the email’s content.
Sender Name
- The name that will appear as the sender of the email.
- Helps recipients recognize the sender and improve open rates.
Sender Email
- The email address from which the campaign will be sent.
- Ensures correct sender identity and compliance with email sending policies.
Email Templates
- If there are pre-existing email templates, they will be visible and selectable here.
- Users can choose a template instead of creating an email from scratch.
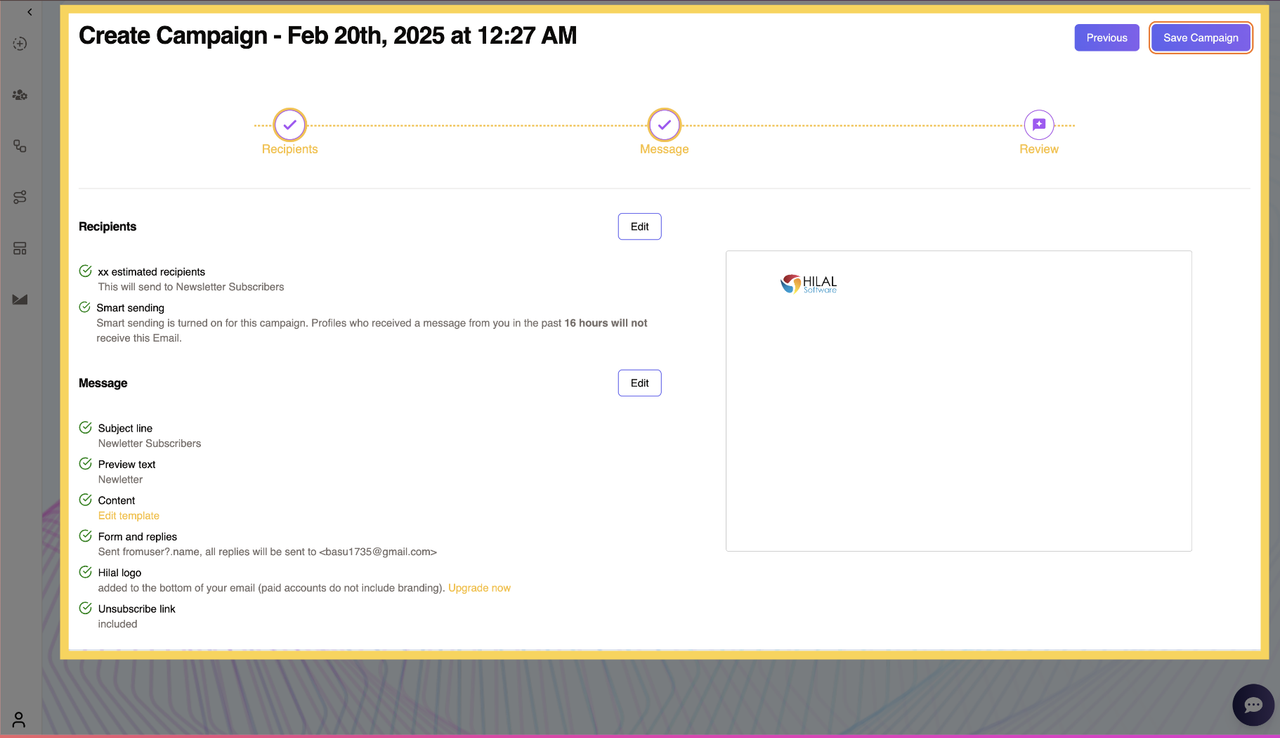
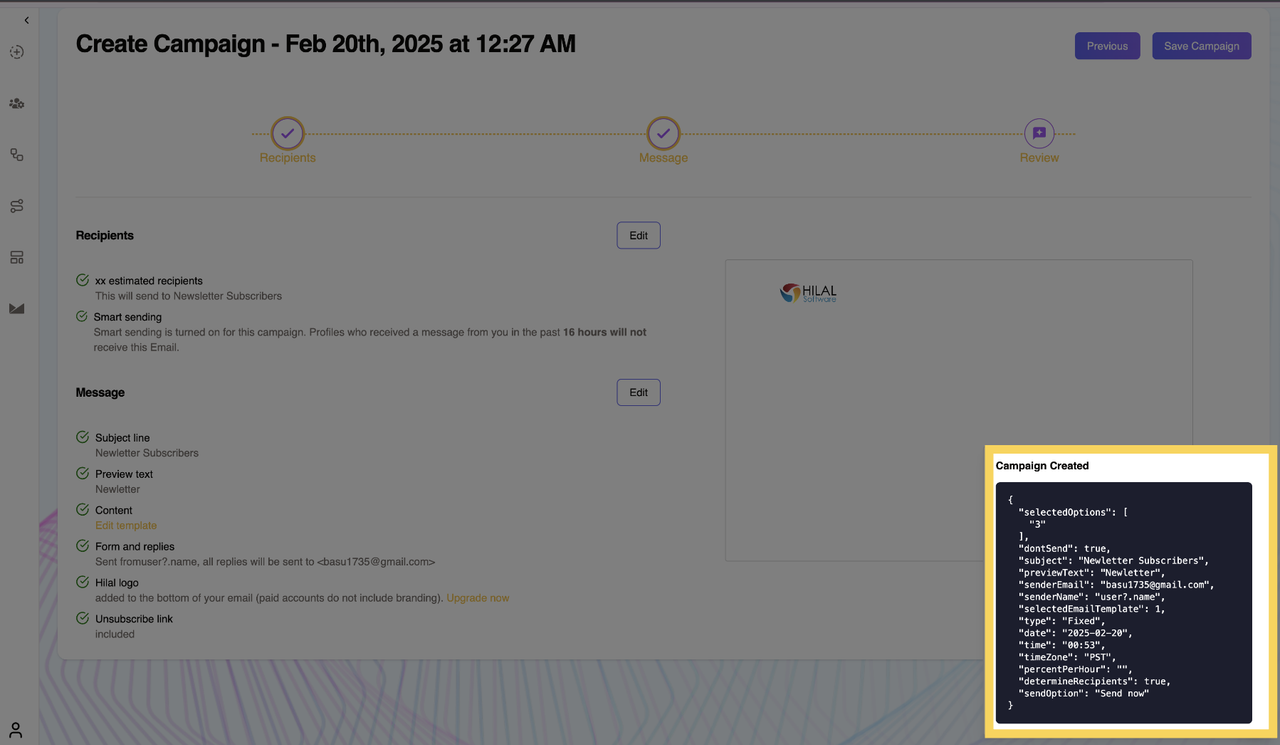
3. Review
This section allows users to review all campaign details before finalizing. After editing the required changes then Saves the campaign for scheduling or sending the campaign.
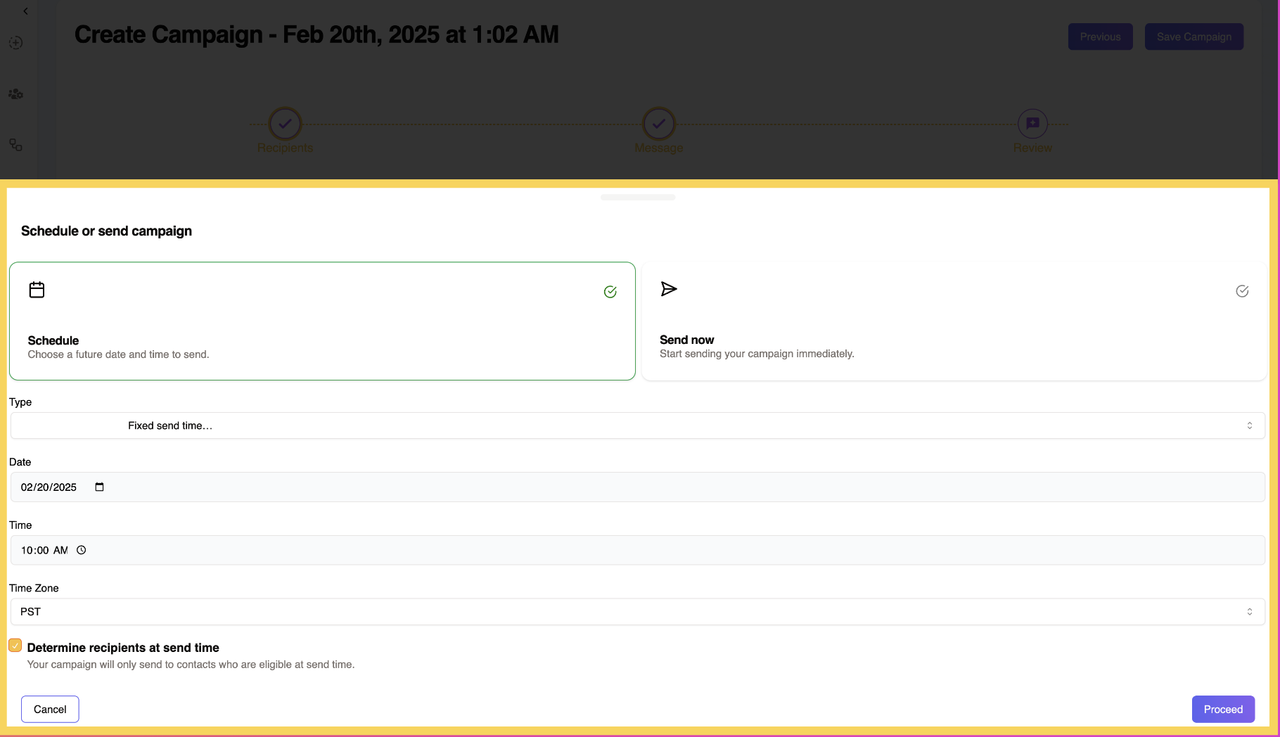
Schedule or Send Campaign
After clicking “Save Campaign”, users are directed to the “Schedule or Send Campaign” pop-up with two options:
Sending Options
- Schedule: Choose a future date and time to send the campaign.
- Send Now: Starts sending the campaign immediately.
Schedule Settings
Users must fill out the following details:
Type:
- (A) Fixed Send Time: Schedule the message for a specific date and time.
- (B) Gradual Send Over Several Hours: Sends the message gradually to a selected percentage of recipients per hour.
Date: Select the scheduled send date.
Time: Choose the exact time to send.
Time Zone: Select from the drop-down:
- PST
- CST
- MST
- EST
Percentage of Recipients Per Hour (Only available for Type B):
- Choose from the drop-down: 10%, 11%, 13%, 14%, 17%, 20%, 25%, 33%, 50%.
Determine Recipients at Send Time (Only available for Type A):
- A checkbox option that ensures the campaign is only sent to recipients who are eligible at the scheduled send time.
Campaign Confirmation
- After clicking “Proceed”, a confirmation pop-up appears:
- Message:
"Your campaign has been successfully created!" - Snippet of Code: Displays a code snippet related to the campaign for record-keeping.
- Message:
The Campaigns simplifies the process of creating, scheduling, and optimizing marketing campaigns while ensuring effective audience engagement. With features like Smart Sending, customizable scheduling options, and detailed review controls, users can efficiently manage their outreach without overwhelming recipients. By leveraging these tools, businesses can enhance engagement, improve deliverability, and maximize the impact of their campaigns.